

Table of contents
Kubernetes cluster
A Kubernetes cluster is a grouping of nodes that run containerized apps in an efficient, automated, distributed, and scalable manner. It allows engineers to orchestrate and monitor containers across multiple physical, virtual, and cloud servers. Kubernetes is a portable, extensible, open source platform for managing containerized workloads and services that facilitates both declarative configuration and automation. It has a large, rapidly growing ecosystem, and Kubernetes services, support, and tools are widely available.
Kubernetes cluster using Kubeadm
For this we need at least 2 instances with 2GiB or more memory and 2 vCPU or more each. Out of which one will be our Master node and the other one would be the worker node.
And we need to set up both the nodes as follows:
For both Master and worker nodes:
sudo su
apt update -y
apt install docker.io -y
systemctl start docker
systemctl enable docker
curl -fsSL "https://packages.cloud.google.com/apt/doc/apt-key.gpg" | sudo gpg --dearmor -o /etc/apt/trusted.gpg.d/kubernetes-archive-keyring.gpg
echo 'deb https://packages.cloud.google.com/apt kubernetes-xenial main' > /etc/apt/sources.list.d/kubernetes.list
apt update -y apt install kubeadm=1.20.0-00 kubectl=1.20.0-00 kubelet=1.20.0-00 -y
Master Node
sudo su kubeadm init
mkdir -p $HOME/.kube
sudo cp -i /etc/kubernetes/admin.conf $HOME/.kube/config
sudo chown $(id -u):$(id -g) $HOME/.kube/config
kubectl apply -f https://github.com/weaveworks/weave/releases/download/v2.8.1/weave-daemonset-k8s.yaml
kubeadm token create --print-join-command
Worker node
sudo su kubeadm reset pre-flight checks
-----> Paste the Join command on worker node and append --v=5 at end
Pod in kubeadm k8s cluster
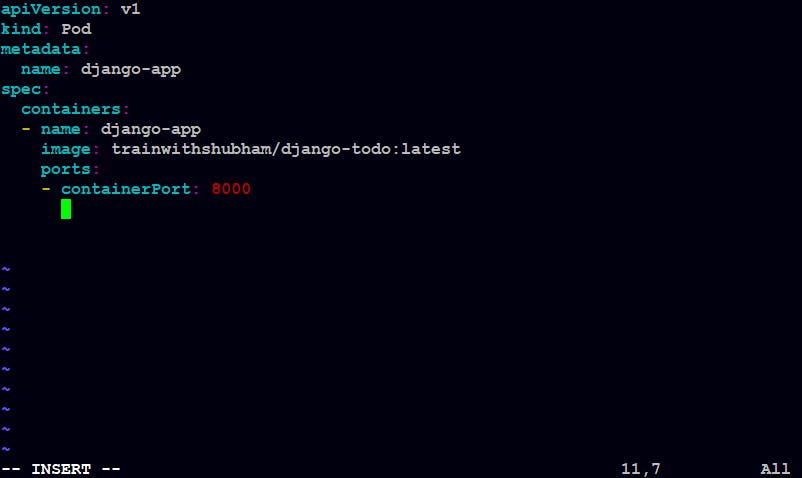
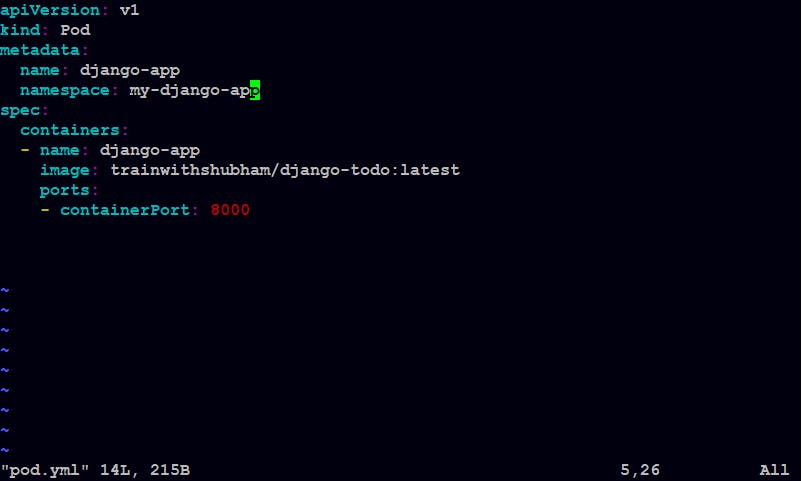
We make the pod.yml file in our master node.
Apply the pod.yml file kubectl apply -f pod.yml

Let's try accessing the pod.

Open 10250 port and try again

Great! we have entered our pod from Kubernetes Master node.
Now, Let's check our Worker node.
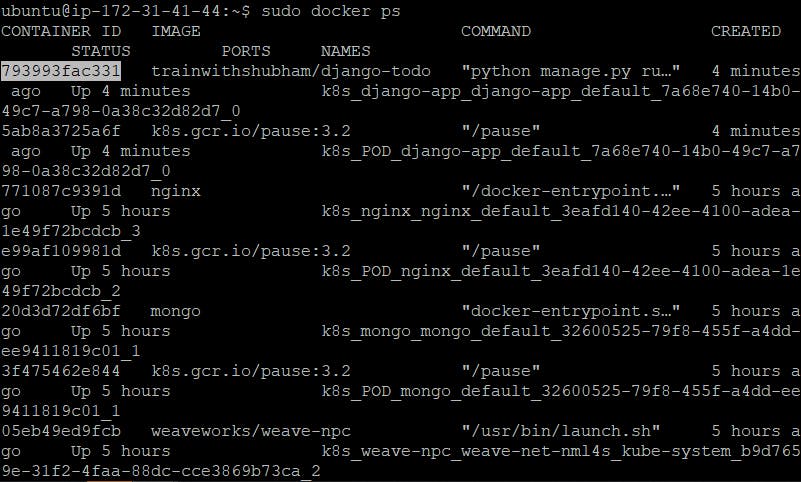
Open the docker container.

Great! we have entered our container from Kubernetes worker node
Now, Let's see if our application is working or not from here itself.
curl -L http://127.0.0.1:8000

We can see that our app is running.
Namespace
Kubernetes namespaces are a way to isolate, group, and organize resources within a Kubernetes cluster.
They provide scope for Kubernetes resource names and are useful when many users across multiple teams or projects use the same cluster and there’s a risk of name collisions. Namespaces help pod-to-pod communication using the same namespace and provide logical separation between the teams and their environments.
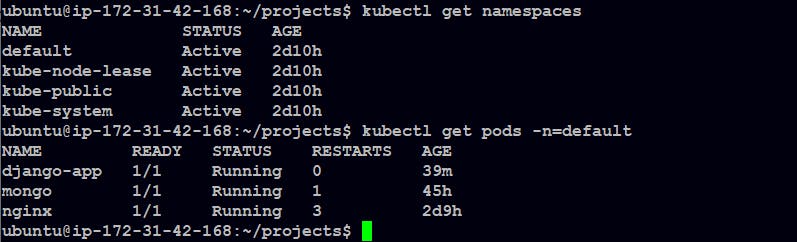
To check all of the existing namespaces: kubectl get namespaces
To check all the pods in a particular namespace: kubectl get pods -n="nameOfGroup"

Creating a namespace

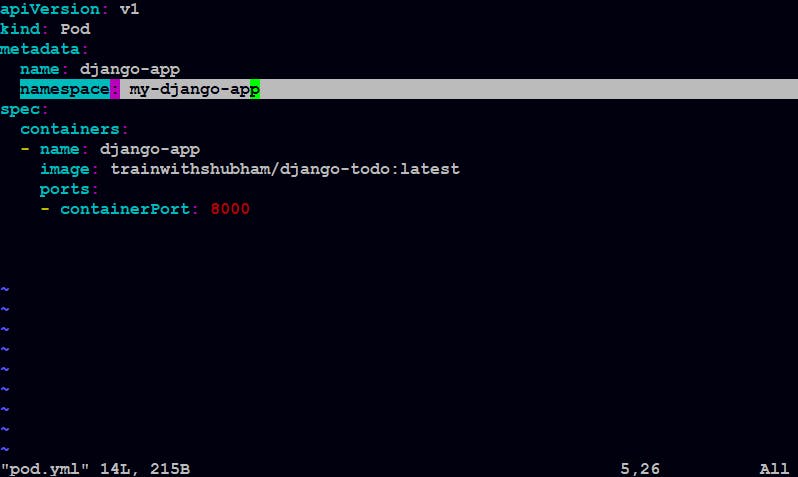
Add namespace to our pod.yml file
Let's apply the updated pod.yml file.
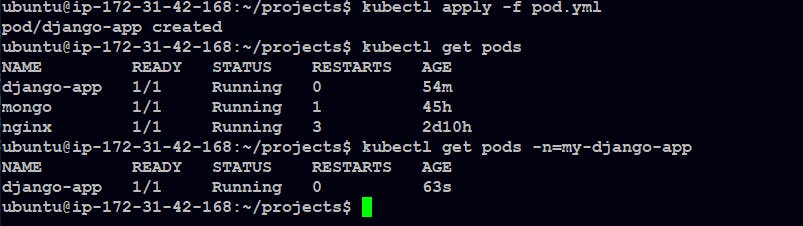
We can see that a new pod has been created by our updated pod.yml file in the new namespace "my-django-app".
Deleting a Pod

We have django-app pod running in 2 namespaces, "default" and "my-django-app" But the question is, where will the pod get deleted from?
It will be deleted from the namespace "my-django-app" as we wrote the command kubectl delete -f pod.yml and in our pod .yml there is a mention of namespace "my-django-app" in the "metadata".

Now, if we remove the namespace from the pod.yml file and try deleting the pod again.

Now, it got deleted from the "default" namespace.
What is Deployment in k8s
A Deployment provides a configuration for updates for Pods and ReplicaSets.
You describe a desired state in a Deployment, and the Deployment Controller changes the actual state to the desired state at a controlled rate. You can define Deployments to create new replicas for scaling, or to remove existing Deployments and adopt all their resources with new Deployments.
Let's write a "deployement.yml" file.
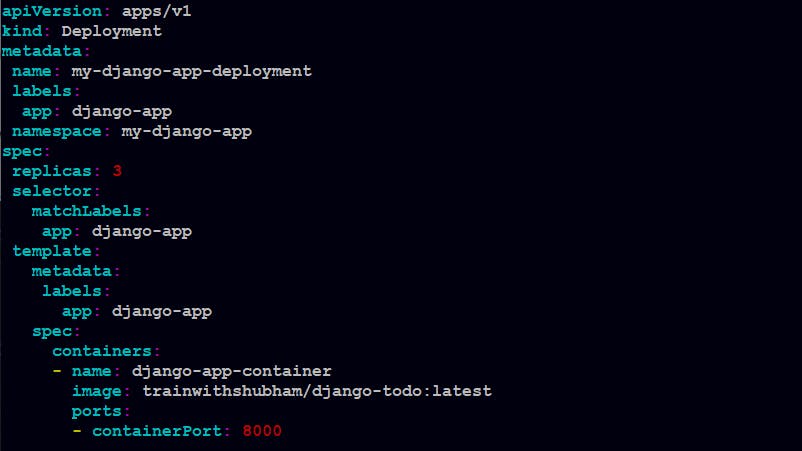
Let's apply the deployment.yml file: kubectl apply -f deployment.yml

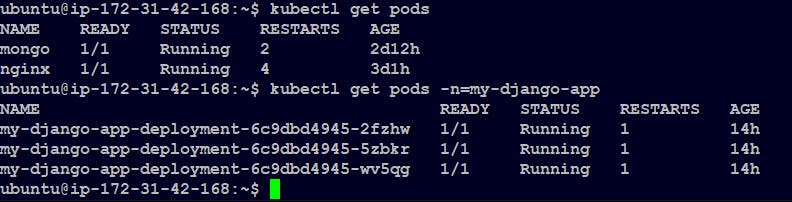
We can check the new pods: kubectl get pods -n=my-django-app
Scaling up and down
Scale up:
kubectl scale deployment my-django-app-deployment --replicas=10 -n=my-django-app


Scale down:
kubectl scale deployment my-django-app-deployment --replicas=5 -n=my-django-app

Service
A service can be defined as a logical set of pods. It can be defined as an abstraction on the top of the pod which provides a single IP address and DNS name by which pods can be accessed. With Service, it is very easy to manage load balancing configuration. It helps pods to scale very easily.
A service is a REST object in Kubernetes whose definition can be posted to Kubernetes apiServer on the Kubernetes master to create a new instance.
Types of Service
ClusterIP
In Kubernetes, the ClusterIP service is indeed the standard form of service. It provides a service within the Kubernetes cluster that other Kubernetes apps can manage without providing access from the outside. It is an IP address that the Kubernetes cluster and all of its Services can use internally. UNLIKE THE POD IP ADDRESS, the IP address utilized in the ClusterIP is not reachable beyond the cluster.
NodePort
Each node in your cluster has an open port called a NodePort. Even if your app runs on a different node, Kubernetes straightforwardly routes traffic from the NodePort to the service. Every Kubernetes cluster accepts NodePort, but you have to modify your firewalls if you’re using a cloud service provider like Google Cloud.
LoadBalancer
A LoadBalancer is a popular way to introduce a Kubernetes service to the outside world through the internet. LoadBalancer can be used in a similar way to ClusterIP and NodePort.The cluster will approach the cloud provider and build a load balancer if you select LoadBalancer as the service category. Traffic will be redirected to the backend pods when it arrives at this load balancer. The particulars of this method are determined by how each load balancing supplier implements its technology.
ExternalName
Since ExternalName services don’t have any selectors or fixed ports or endpoints, they can redirect traffic to an outsides service. This form associates the service with the external name field’s elements. It completes this by returning the record value of a CNAME
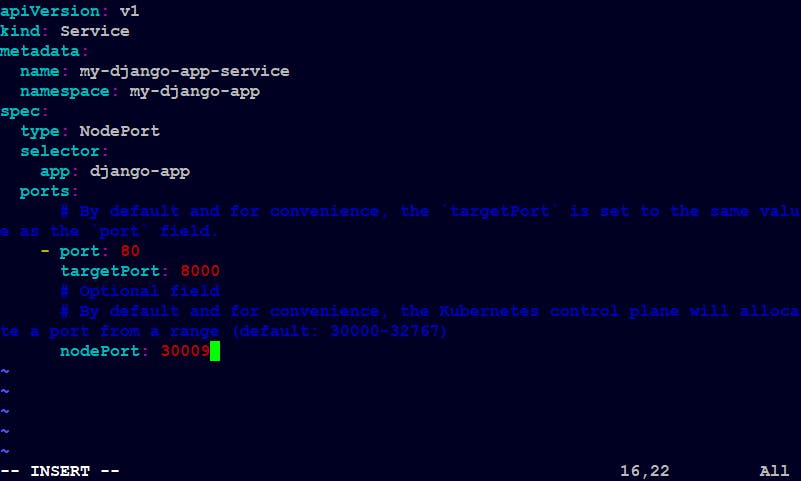
Let's make a service using NodePort
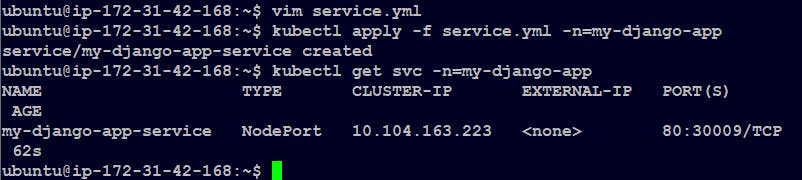
Apply the service.yml file: kubectl apply -f service.yml -n=my-django-app
Now edit inbound rules of your worker node and add port 30009 and save.

Copy the Public IP of your worker node and open it in a new tab with port 30009
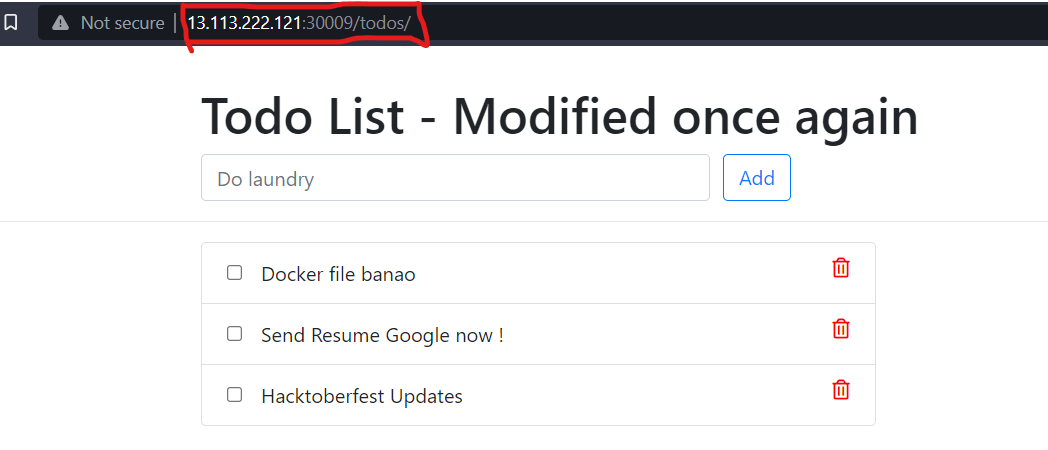
Great Job! Our Application is up and running.
Thank you for reading!
Happy Learning!