

What is a three-tier architecture?
A three-tier architecture is a software design pattern that divides an application into three distinct layers, each responsible for specific functionalities. Basically, it is a way of organising software applications into 3 distinct layers.
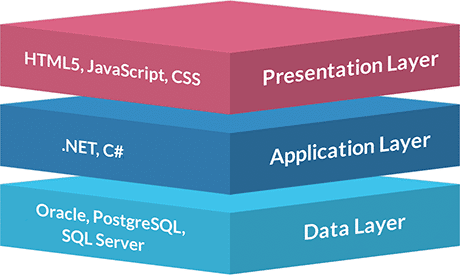
Presentation Tier [Frontend]:
The presentation layer is responsible for the user interface and handles user interactions. It includes components like web browsers, mobile apps, or desktop applications that users directly interact with.
Application Tier [Backend]:
The application layer contains the application's logic and processing. It handles requests from the presentation layer, performs business operations, and coordinates data access and manipulation.
Data Tier: [Database]:
The data layer is responsible for storing and retrieving data used by the application. It includes databases or other storage systems that securely store and manage data.
Architecture

Its specifications are as follows:
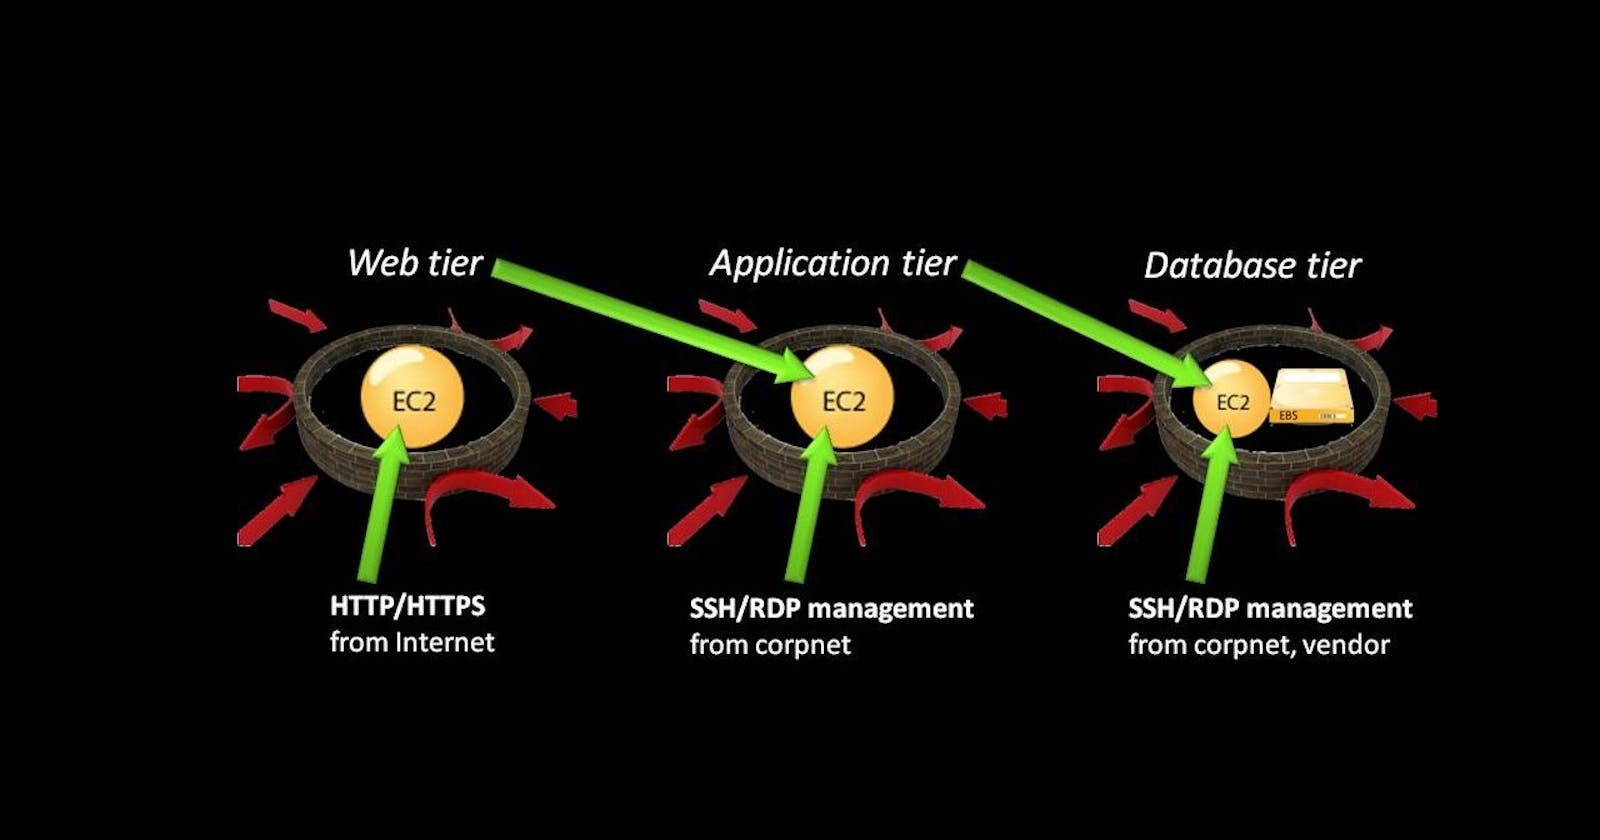
A Web Tier
1) A Public Route Table — associated with 2 Public Subnets
2) At least 2 EC2 instances with a boot-strapped Static Web Page — managed by an Auto Scaling Group
3) EC2 Web Server Security Group
An Application Tier
1) A Private Route Table — associated with 2 Private Subnets
2) At least 2 EC2 instances managed by an Auto Scaling Group
3) EC2 Application Server Security Group
A Database Tier
1) A Private Route Table — associated with 2 Private Subnets
2) A Database Security Group
3) A free Tier MySql RDS Database
Let's start with Creating our VPC
First off, enter the AWS Console & select a region, I'm selecting N. Virginia for my project. Then navigate to VPC, select “create VPC”, & name it as of your choice. I am naming mine, "3-tier-VPC”.
Next, enter your IPv4 CIDR block as manual input, and below that add “10.0.0.0/16” to the IPv4 CIDR. We will use varying CIDR notations for our subnets from this later on.
Leave the rest default, and select “create VPC”.

Now, we will create our subnets
Go to your Subnets page, and select “Create subnet”. In VPC ID, select the VPC that we created a while ago.

Likewise, We will create a total of 6 subnets.
Where The first two subnets are for my presentation tier, and I will name them “pub-subnet-1" and “pub-subnet-2”.
The next four subnets are for my application tier and my database tier. I will name them “pr-subnet-1”, “pr-subnet-2”, “db-subnet-1”, and “db-subnet-2”.

Assign the Public IP to the presentation subnets
Select a public subnet, and click on Actions, select Edit subnet settings from the dropdown.

Tick mark the check box against Enable auto-assign IPv4 address option and save it.

Now, Do the same with the other public subnet.
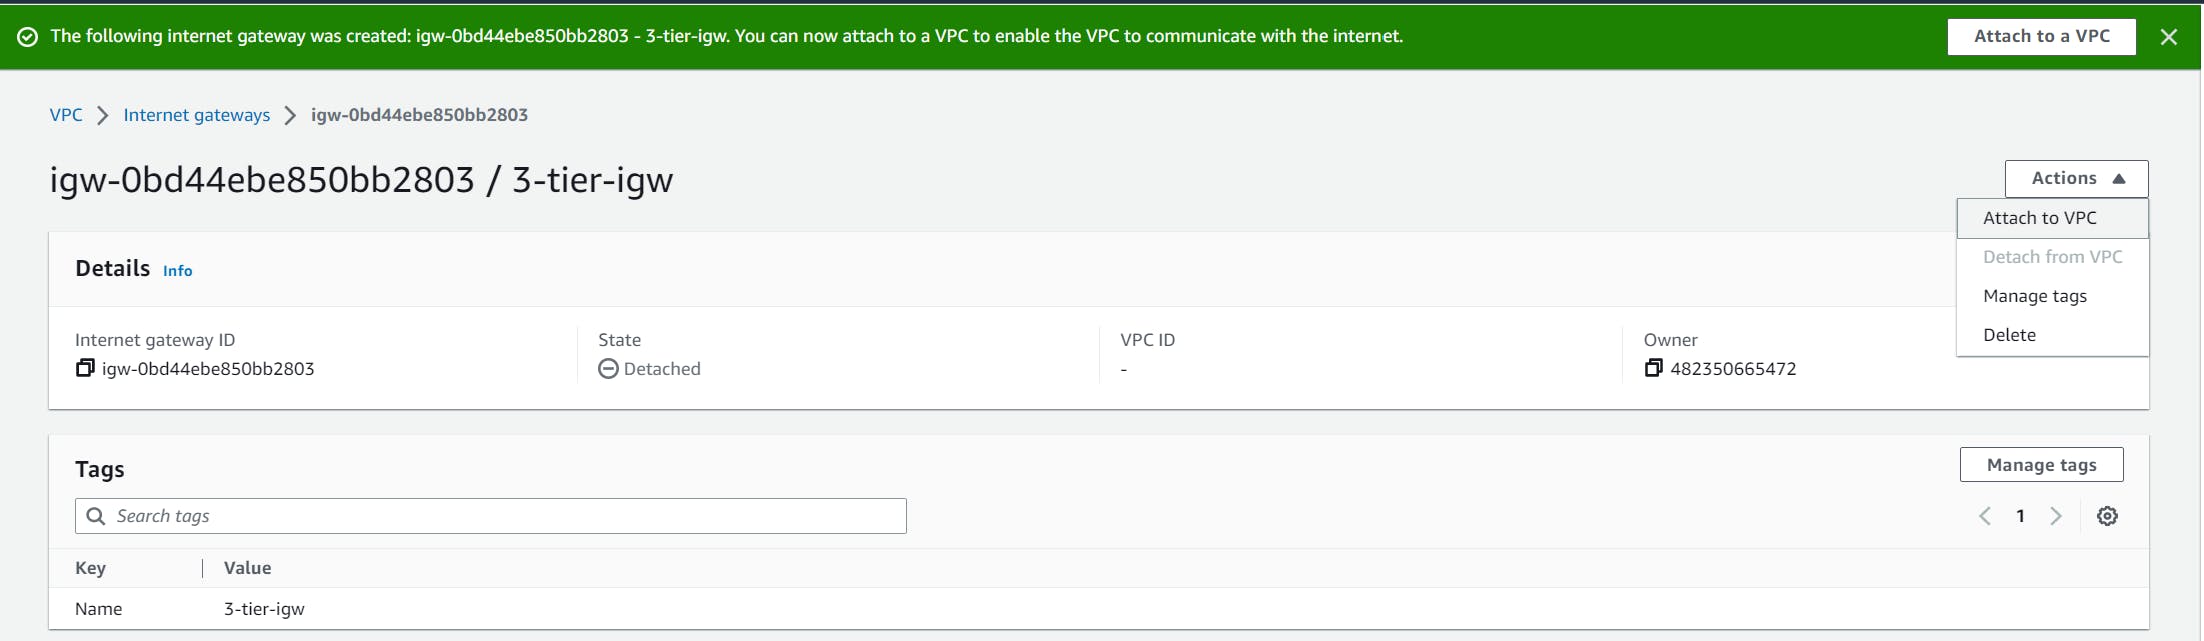
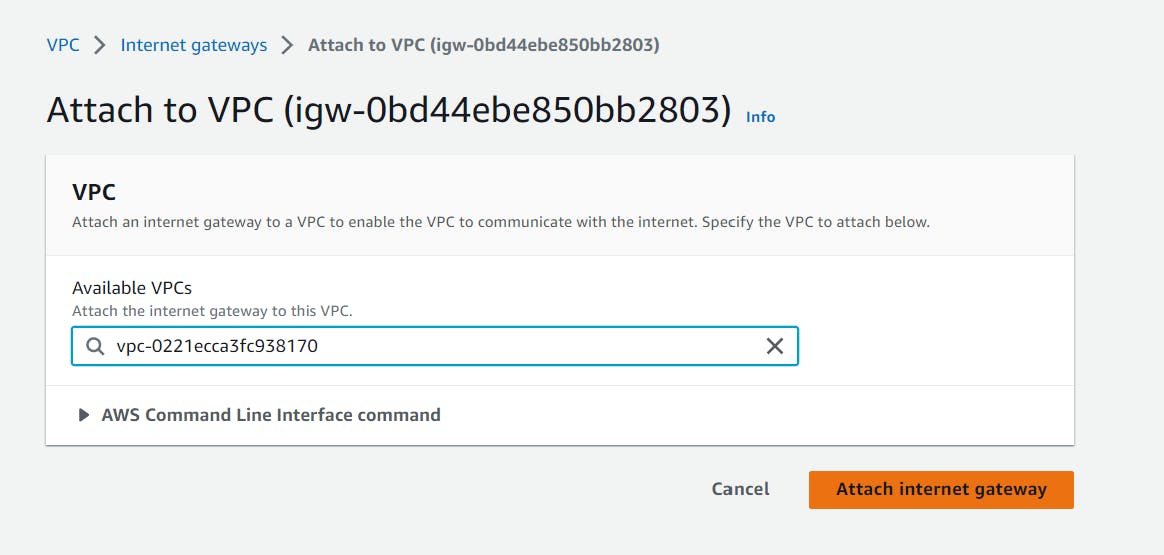
Create Internet Gateway(IGW)
An IGW enables communication between the VPC and the internet. Click on “Internet gateway”. Select “create internet gateway”, name it, I'm naming mine "3-tier-igw", and click on “Create Internet gateway”. After that go inside your internet gateway choose “Actions”, “attach to VPC”, then select your VPC, and then choose “Attach internet gateway”.
Create NAT Gateway
Choose “NAT Gateway” under VPC dropdown, and “Create NAT gateway”. Go ahead and name it, I'm naming it “3-tier-NAT”, choose a public subnet (pub-subnet-1), and make sure to select “Allocate Elastic IP”. Then, click “Create NAT gateway”. This will be used to connect our private subnets to the internet.
Note: Make sure to Release your Elastic IP after you're done with your project, as Elastic IP is chargeable.

Create Route Table
Next, we will navigate to the Route Tables page. Our subnets should be attached to our main route table by default, but we are going to make sure each tier has its own routing table. so, we will re-model the routing tables for each tier.
For the Application subnets and the Database subnets, we will create private routing tables. When it's done, we will create a public route table for our two Presentation (Web) subnets.
You can start this by selecting “Create route table”, name it, then find your VPC and choose “Create route table”. Inside your new route table, choose “Subnet associations”, and then “Edit Subnet associations”. For each table, you can associate the different subnets. At the end of each configuration, select “save”.
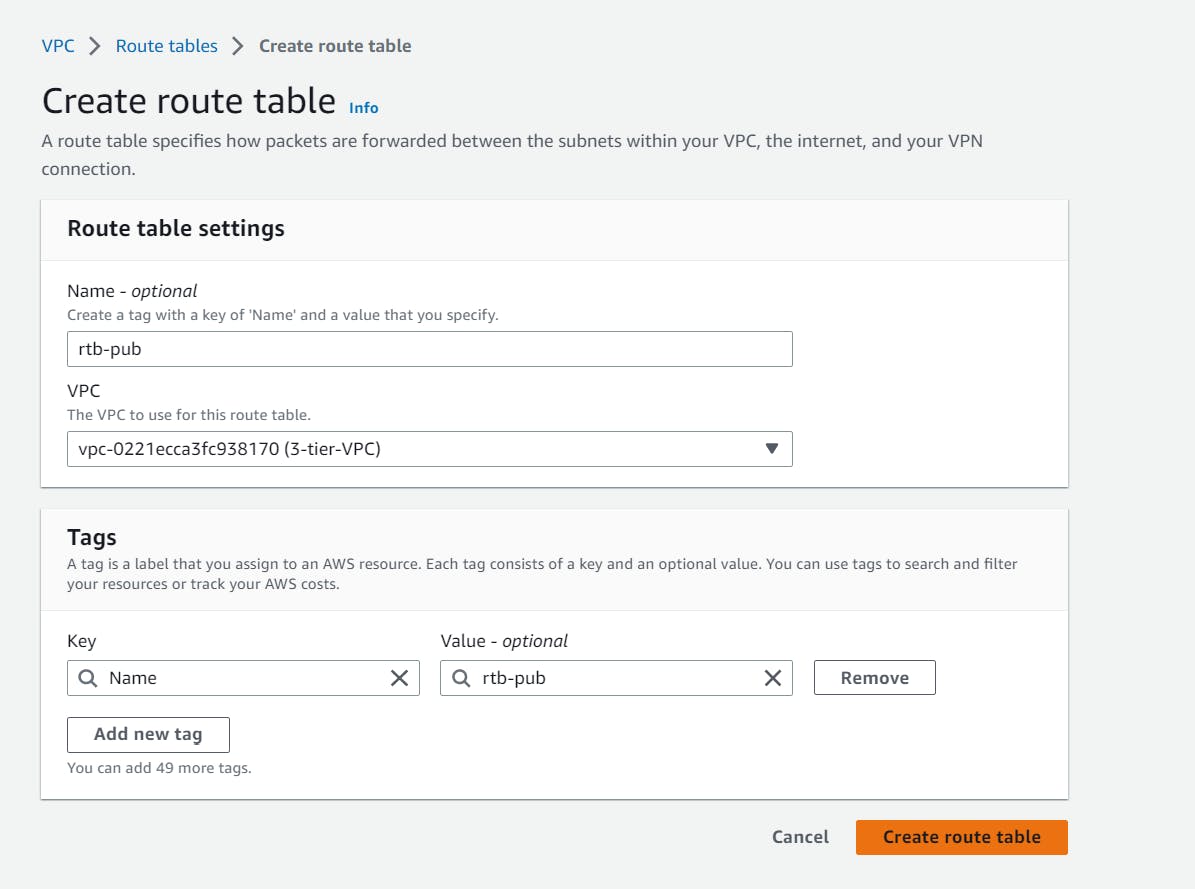

Now, select the route table associated with the web tier (public) and select Edit routes in the Routes section.

Select the IGW you created and click on save changes.

And, for our Application Tier, edit the route table (rtb-private) and select NAT gateway that you created and save the changes.


Let's create our Presentation tier
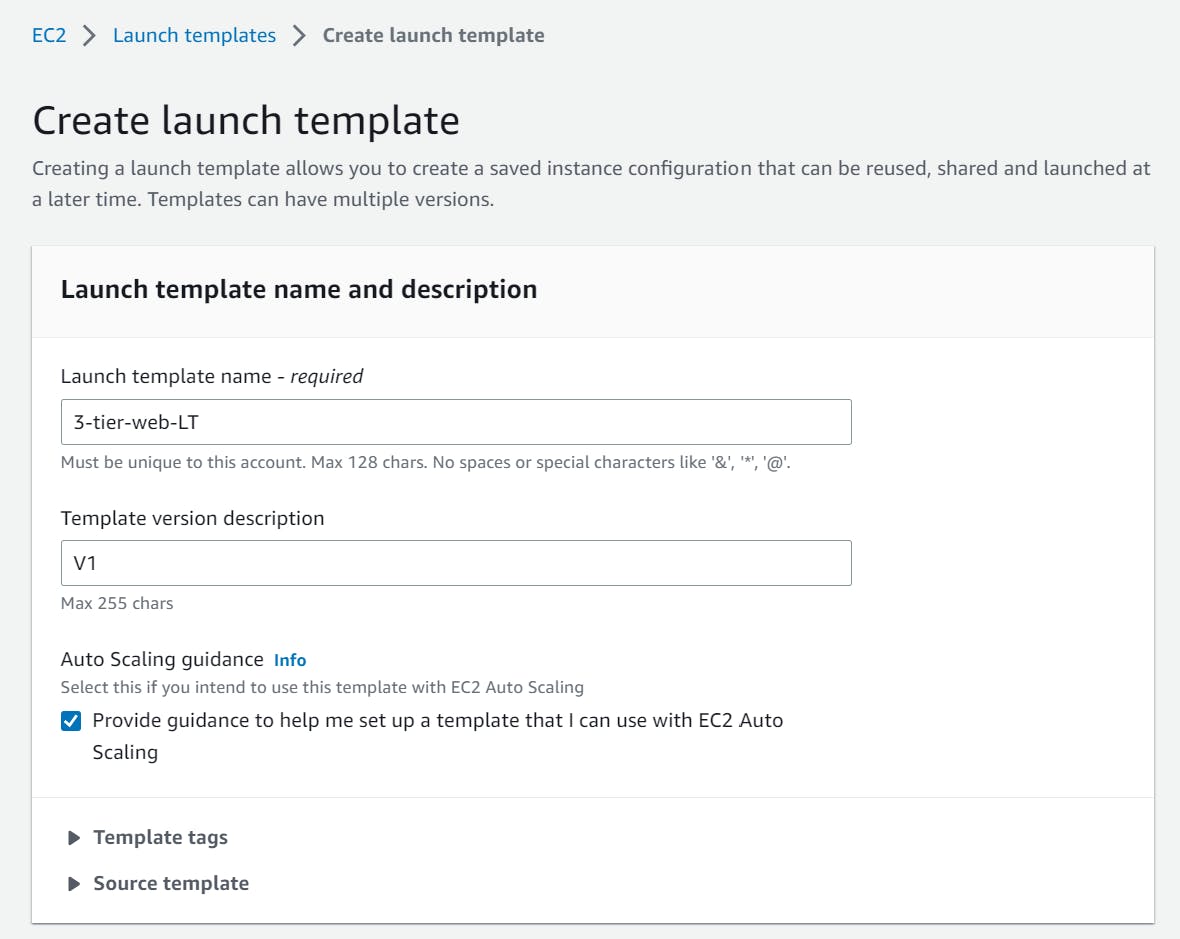
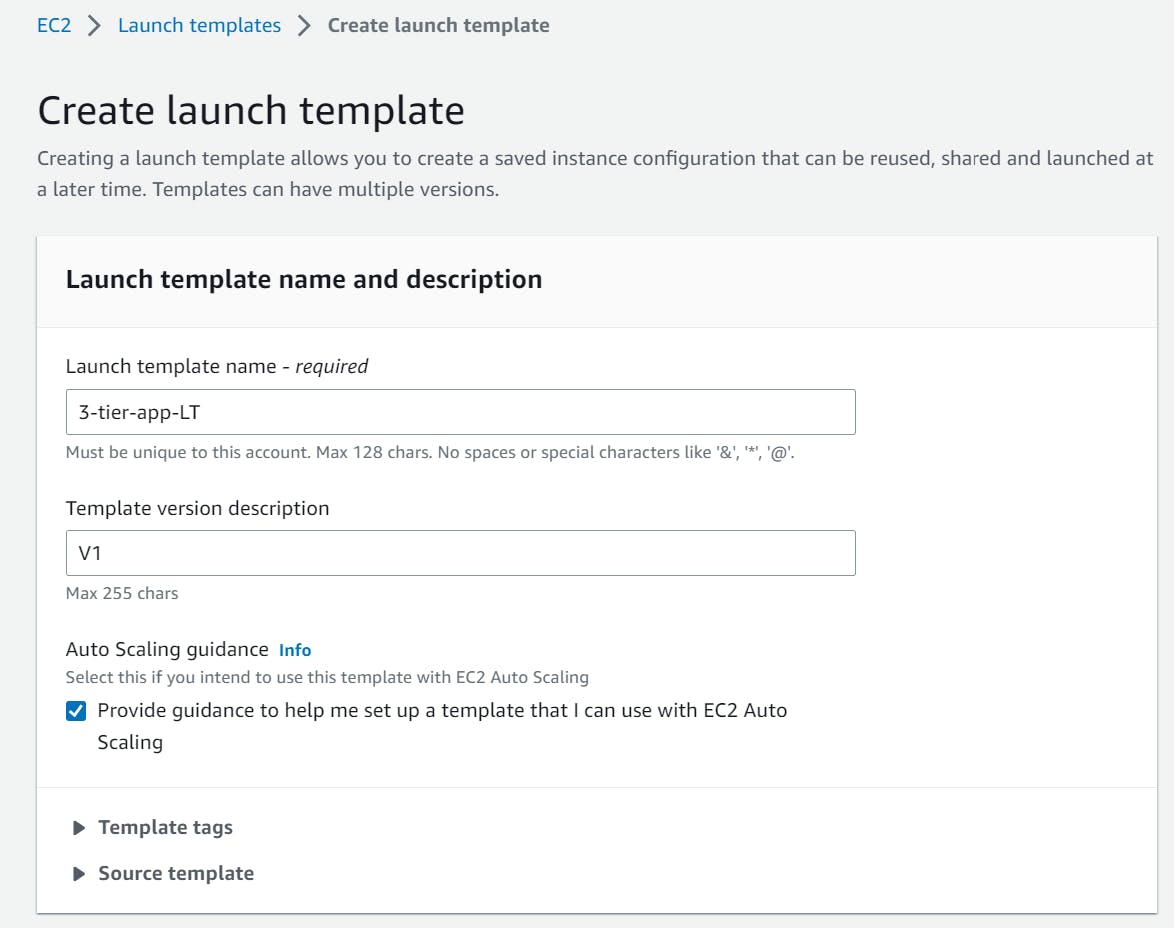
Create Launch Template
Go to the service “EC2” and select “Create launch template” by clicking on “Launch Templates” from the list of services provided on the left.
For the Launch Templet that I'm creating for our presentation tier, I'll choose the name "3-tier-web-LT" and will create a version V1.
Next, select your preferred AMI. I will use the Amazon Linux AMI with free tier eligibility. You can find this under, “Quick Start”.

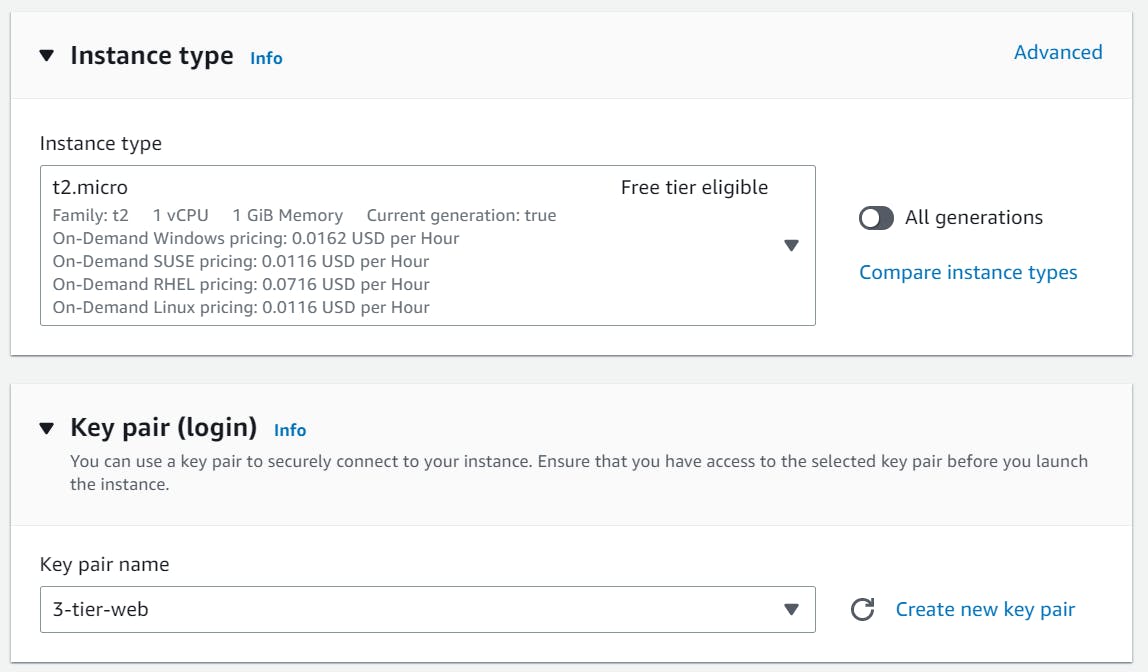
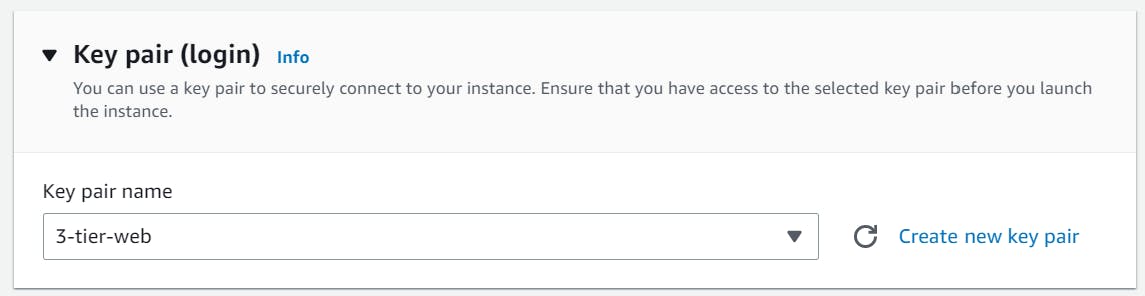
Choose instance type, I'm choosing t2.micro (Free tier eligible), and create a key pair that we'll need later to connect to our instance.
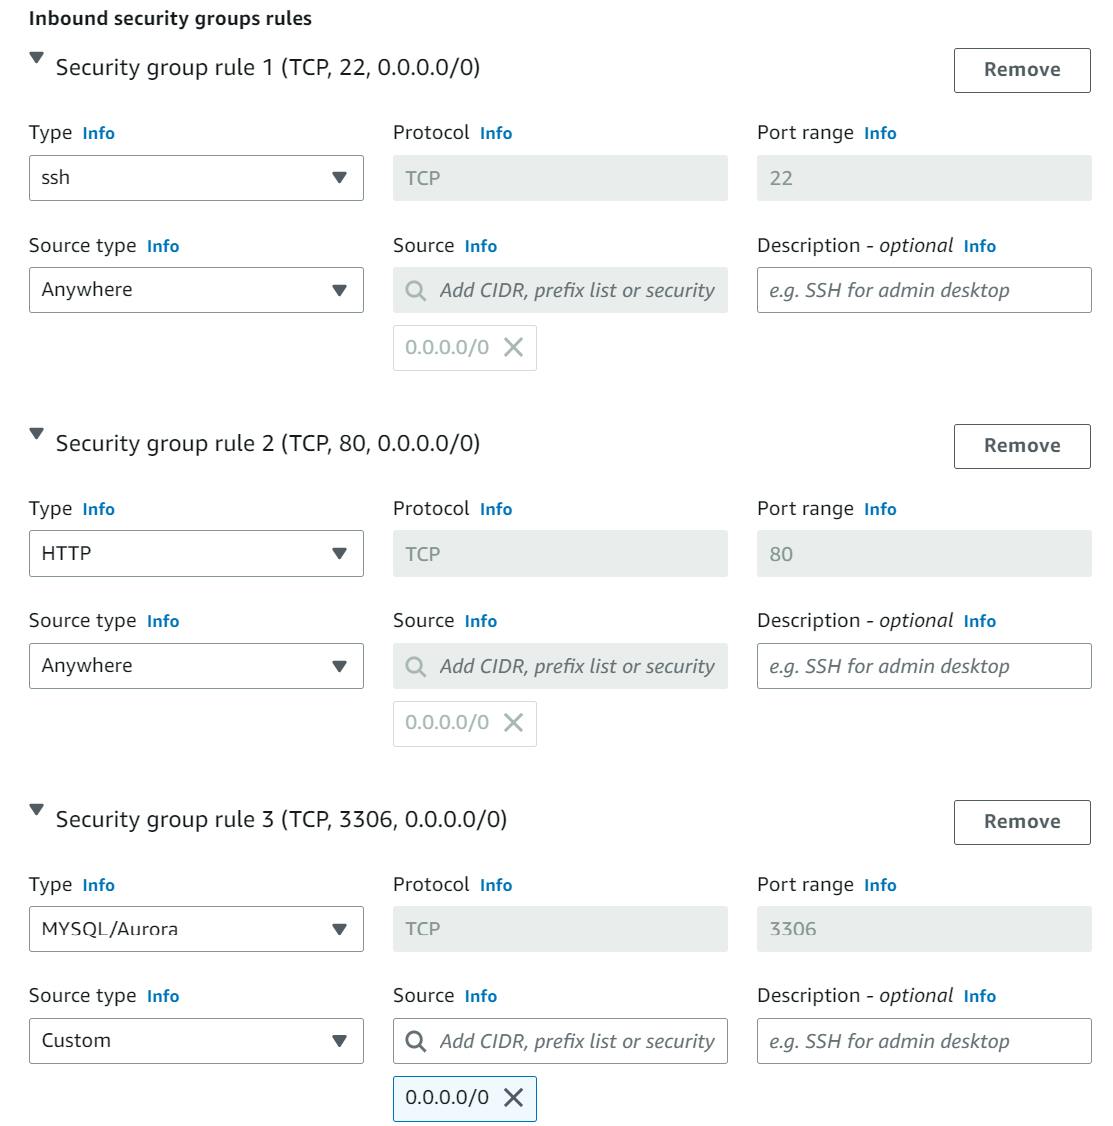
Under Network settings, Create a Security Group, and name it as per your choice, I'm naming it "3-tier-web-SG". You can write a small description and then select the VPC that we created. After that add security group rules for ssh and HTTP

By default, it will show 8GB under EBS Volumes but Free tier supports a volume upto 30 GB, So, I've taken a volume of 20 GB. You can keep it as 8GB as well.

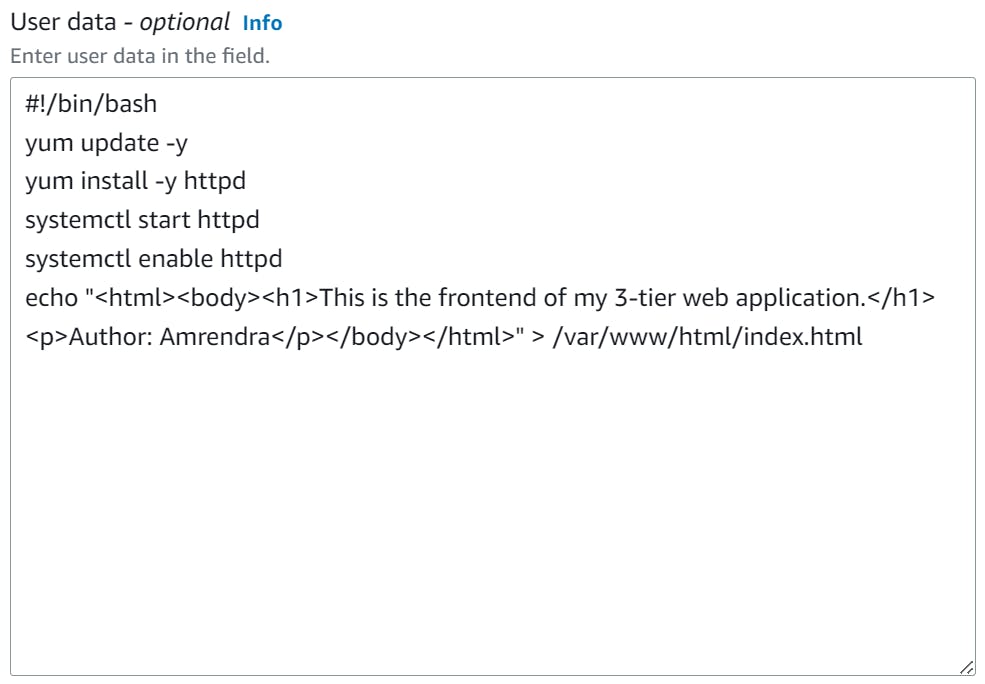
Now, scroll down to Advanced details and write a bash script in the User Data box.
  #!/bin/bash
  yum update -y
  yum install -y httpd
  systemctl start httpd
  systemctl enable httpd
  echo "<html><body><h1>This is the frontend of my 3-tier web application.</h1><p>Author: Amrendra</p></body></html>" > /var/www/html/index.html
Finally, we can create this Launch template by clicking on the Create Launch Template option.

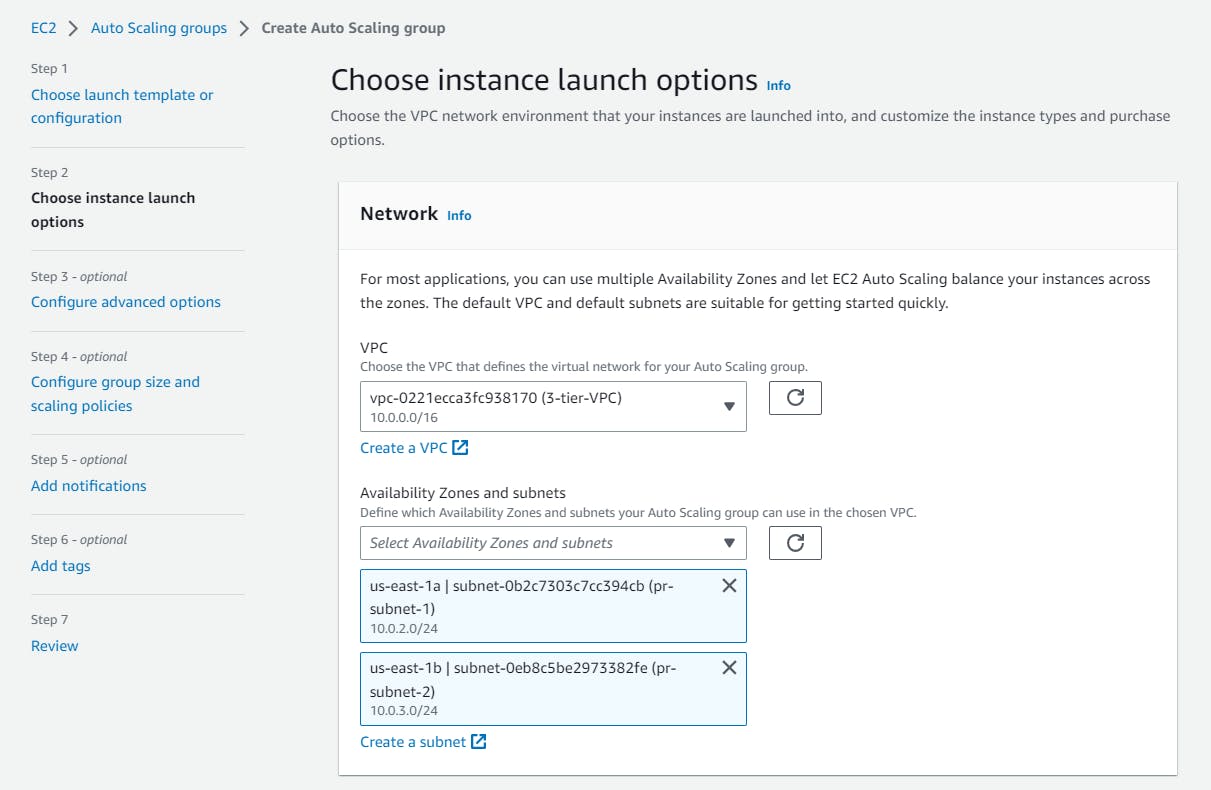
Create an Auto Scaling Group
We can create an Autoscaling Group by just selecting our Launch Template “3-tier-web-LT”, and under the “Actions” choose “Create Auto Scaling Groups”.
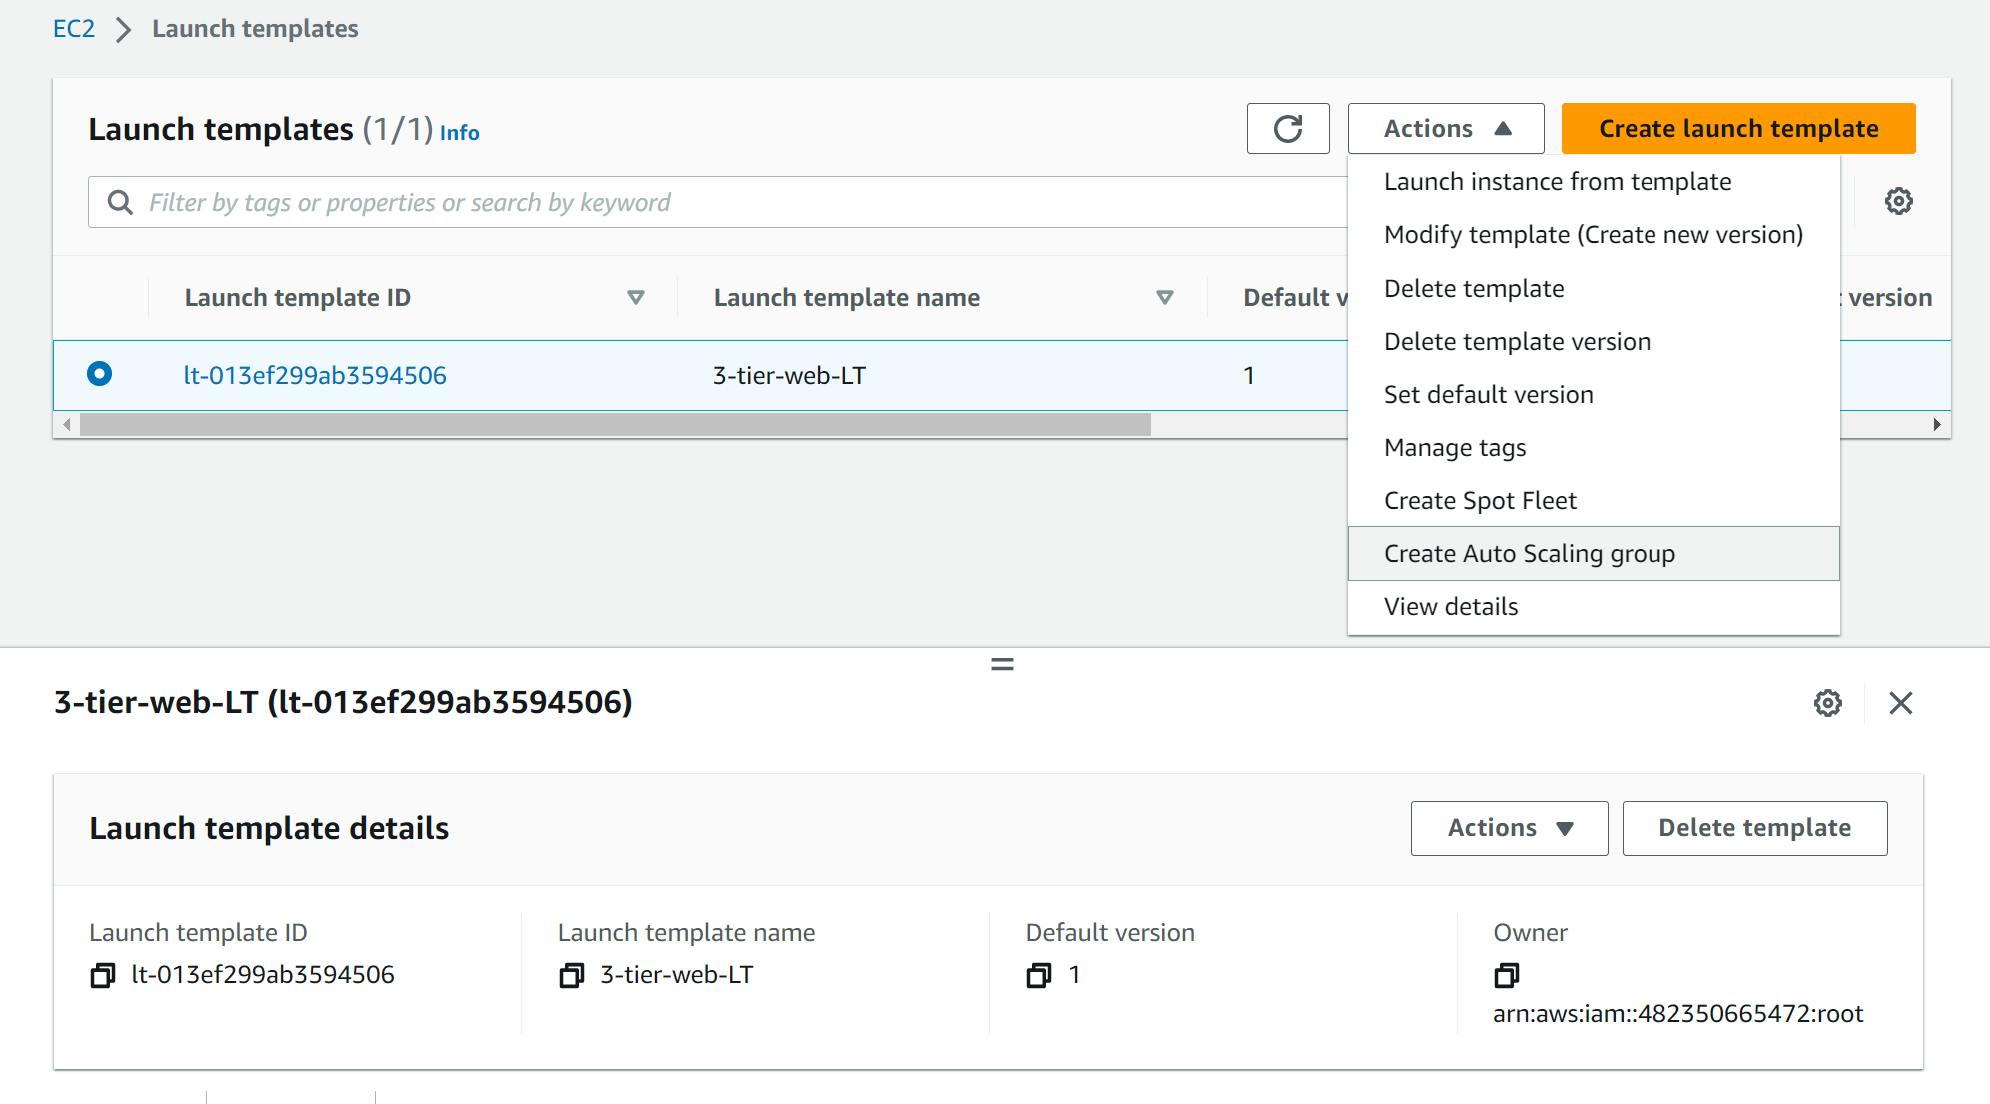
Name your group, I am naming mine "3-tier-web-ASG". Make sure that the correct Launch Template and Version are selected. Then click on Next.

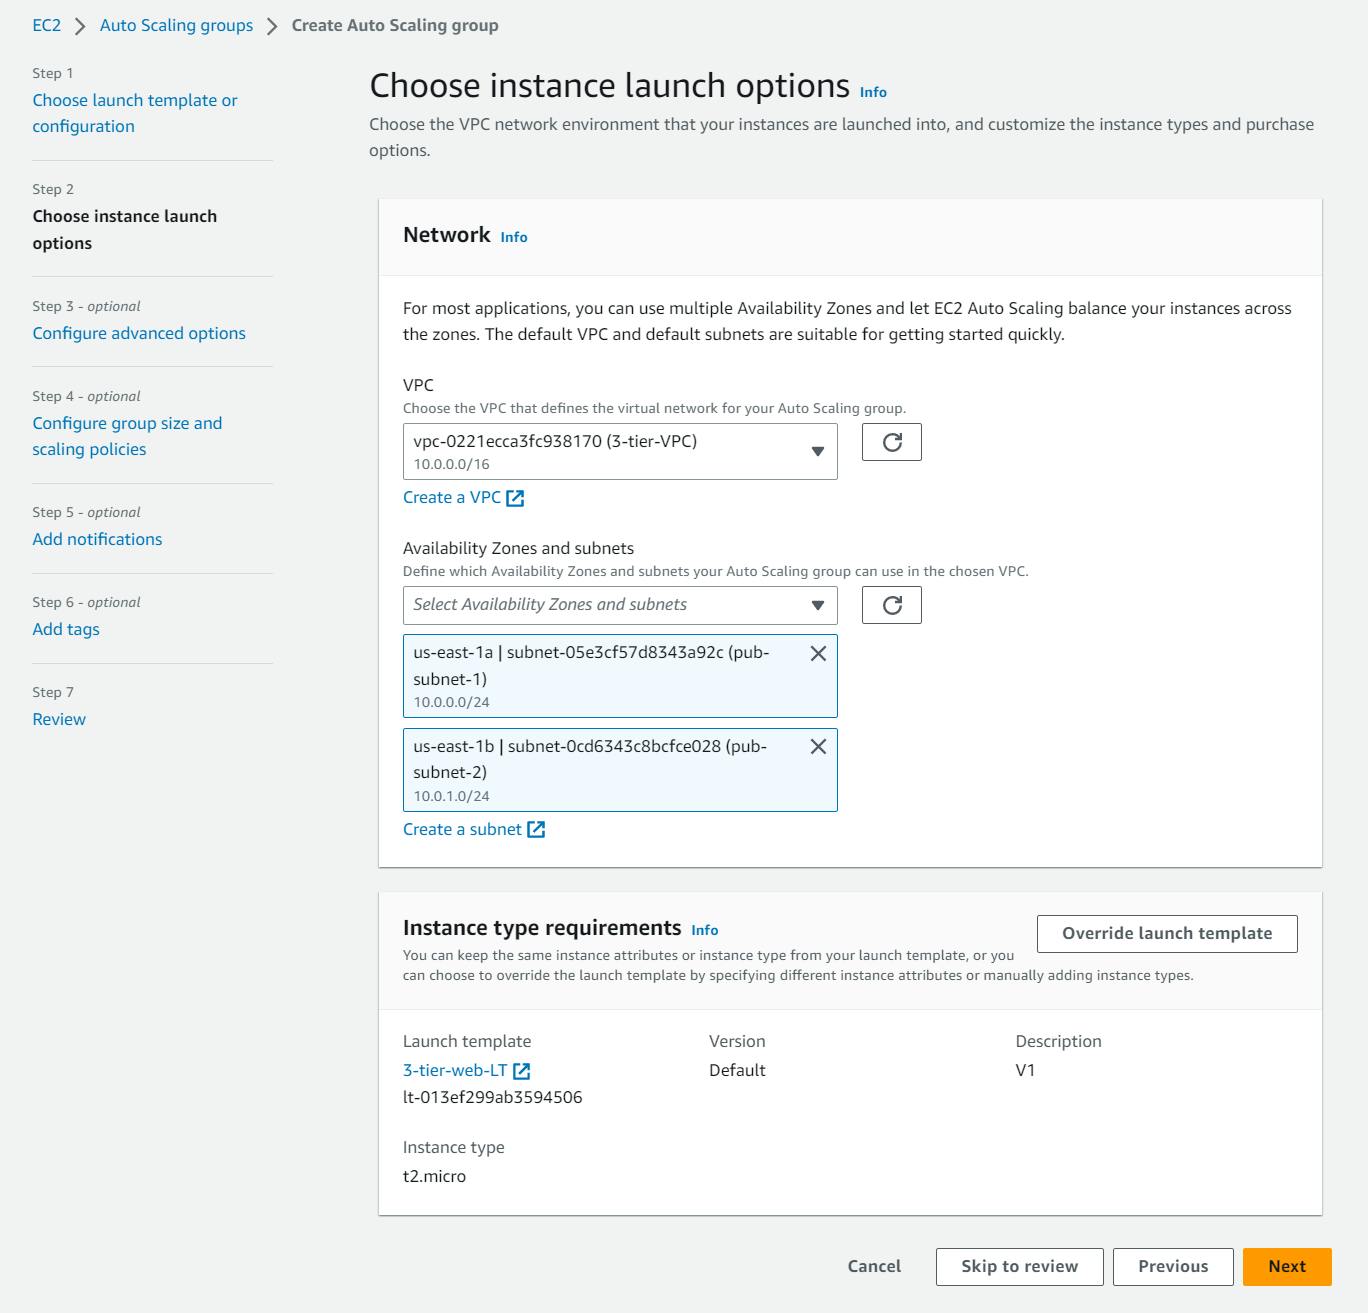
On this next page, make sure you have the correct VPC selected, then add both of your presentation tier subnets and select “Next”.
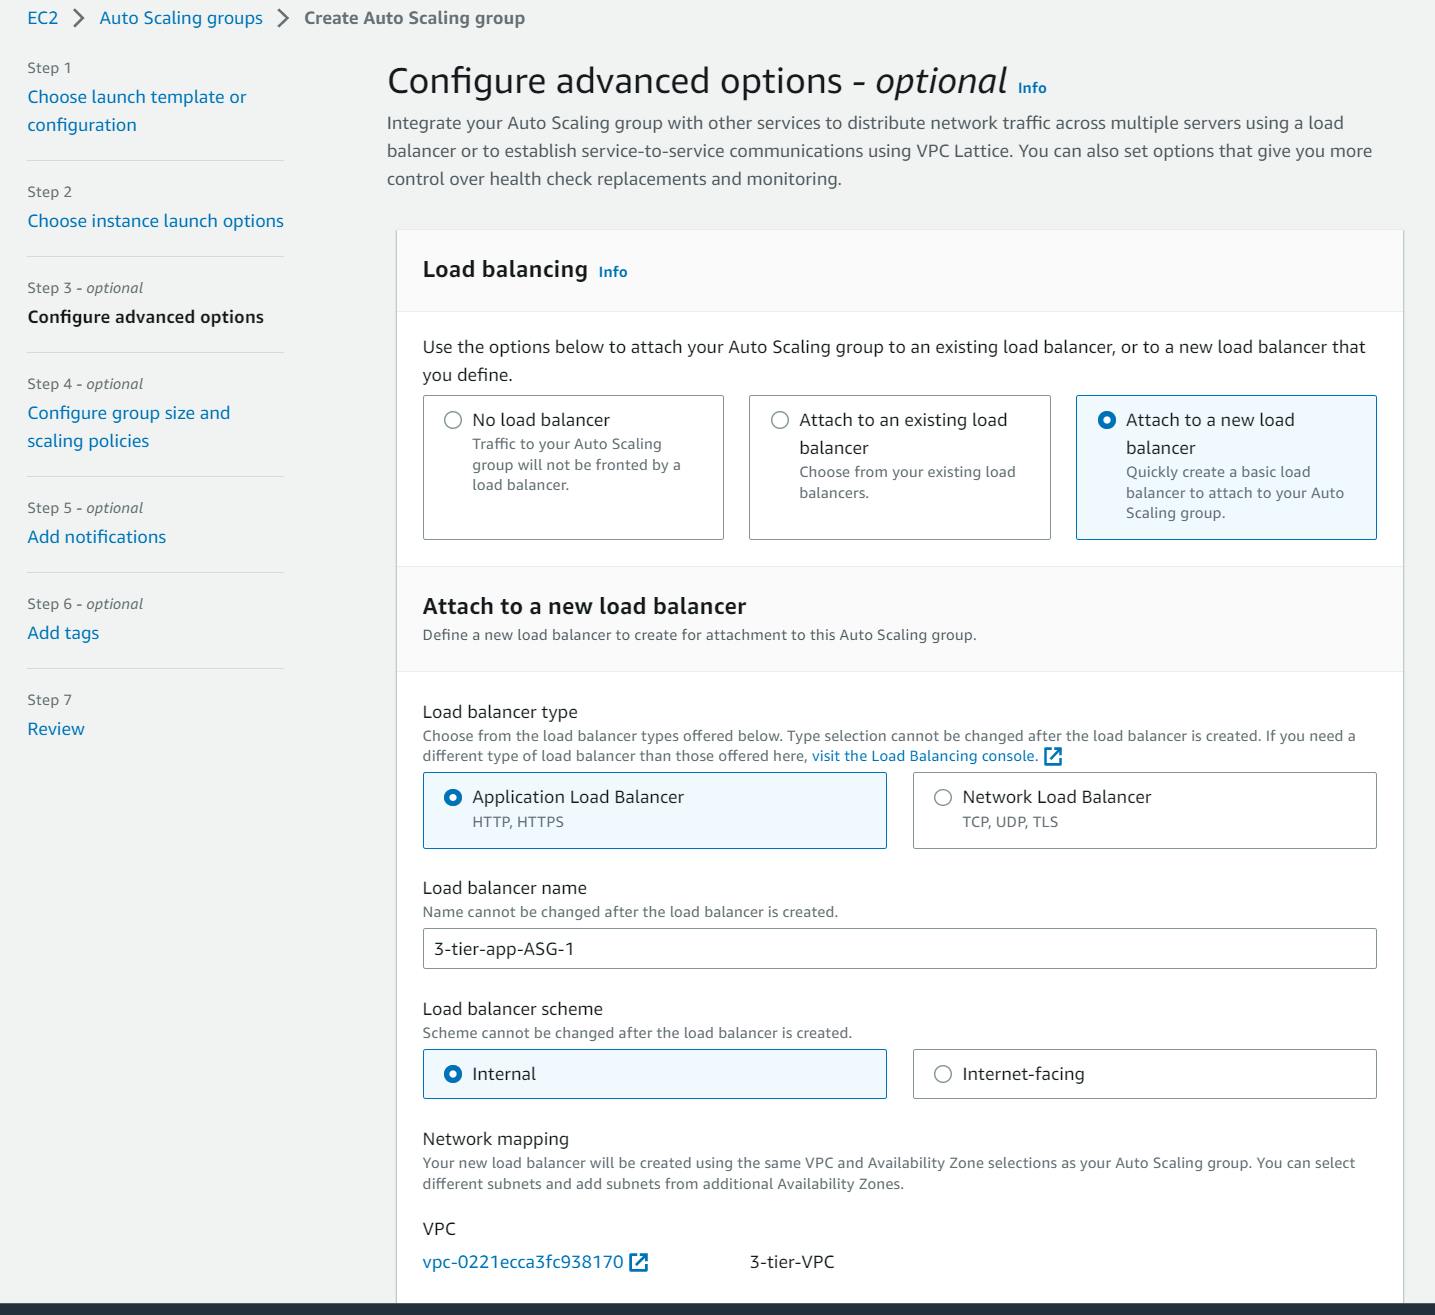
On this page, Select Attach to a new load balancer, under load balancer type select Application load balancer, and under Load balancer scheme select Internet-facing.

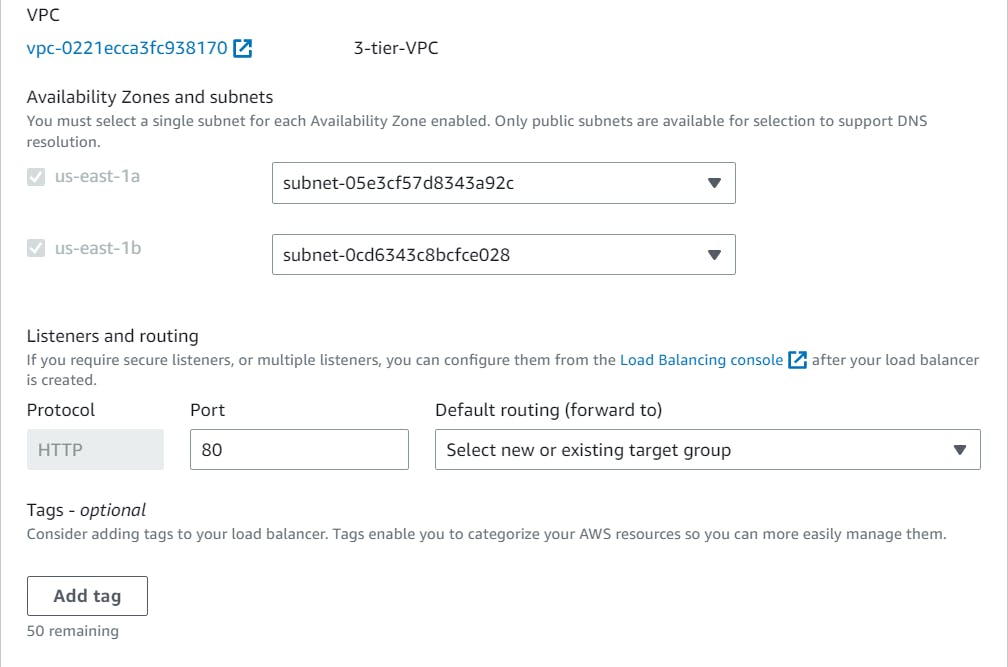
Under Listeners and routing, go to the Default routing (forward to) and create a New target group and click on Next at the bottom of the page.

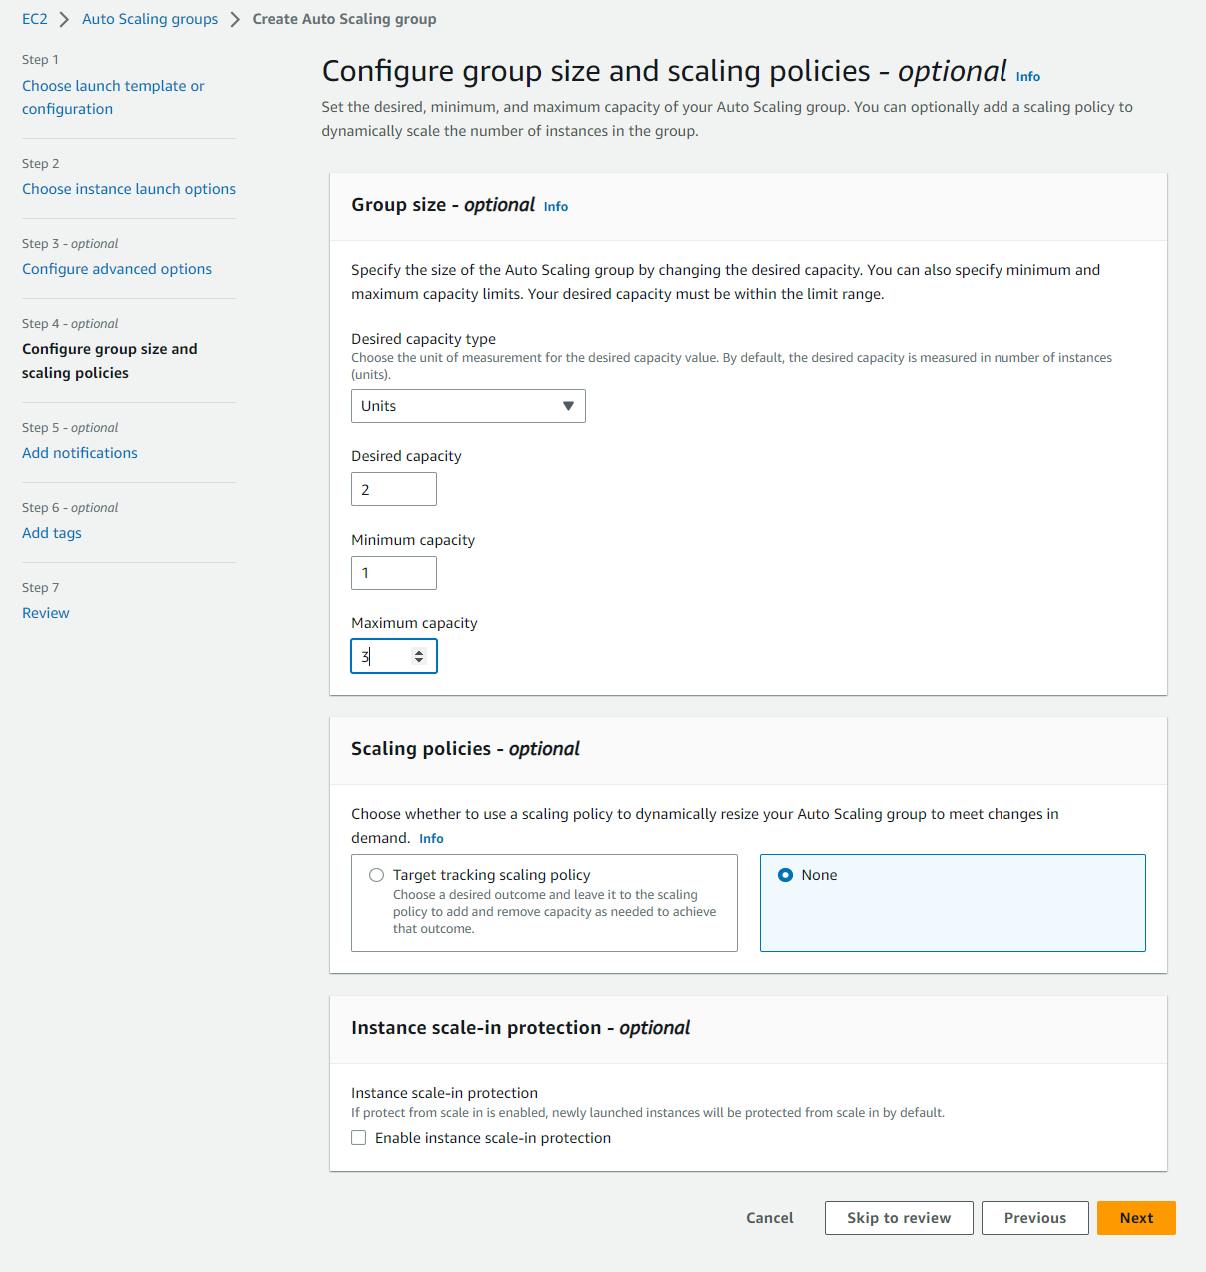
On this page, you can configure your group size and scaling policies. I am going with a desired capacity of 2, a minimum of 1, and a maximum of 5. You can adjust these numbers according to your need. Now, select Next.

The Results
Go to the EC2 Service, You will see that your instance is up and running.
To check if everything is as expected and in place, copy the Public IP of your instance and run it in a new tab inside your browser.
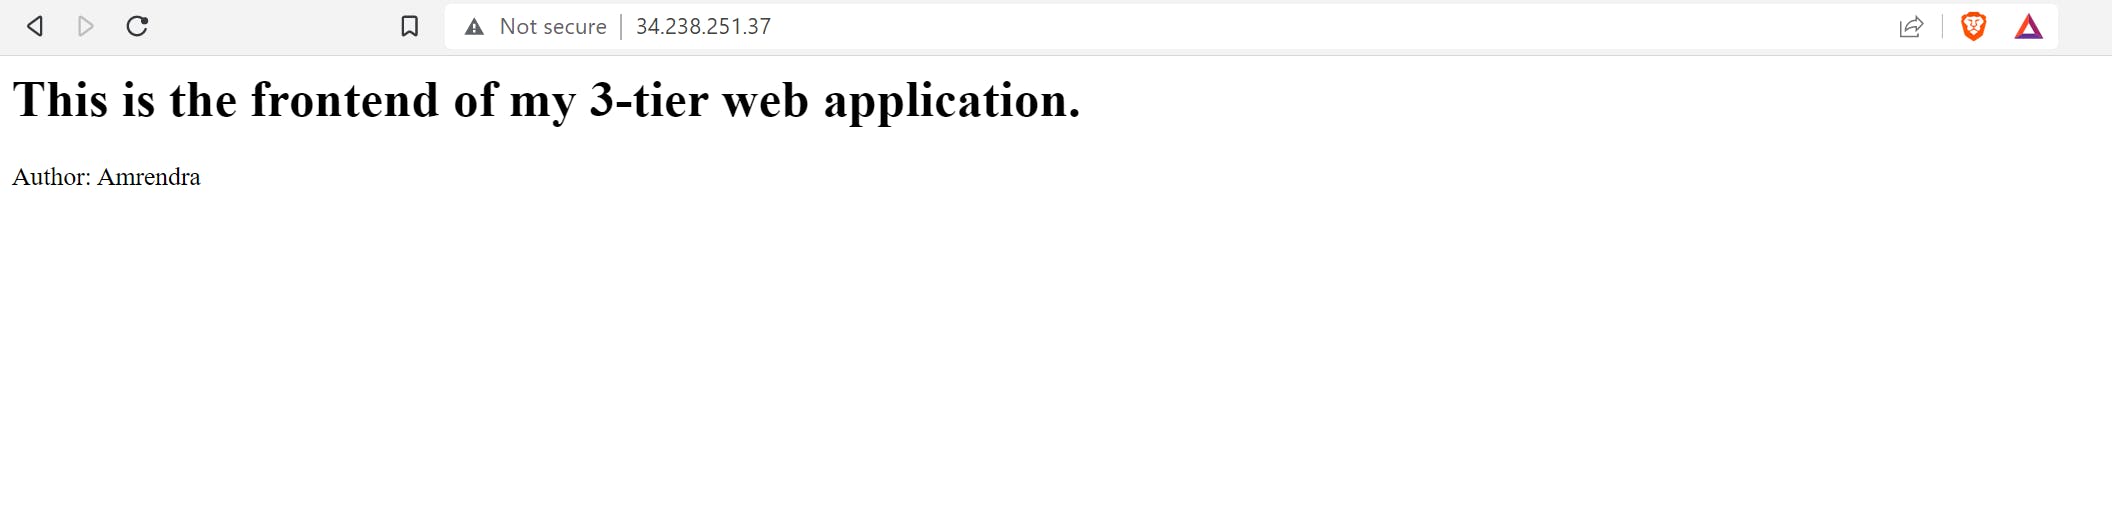
Hurray! We've successfully created a front end for our web application.
Now, Let's create our Application Tier
Create Launch Template
Just like we created the Launch template for our presentation tier, we will follow similar steps to create a launch template for our application tier.


This time I'm adding MYSQL as well to the new security group that I'm creating for my application tier.
Now, Hit Create Launch Template button.
Create Autoscaling Group

Now, Select our VPC and this time select our private subnets.
Make sure you've selected "Internal" under the Load balancer scheme
Our Autoscaling Group is ready.

Let's check our EC2 instance page if the ec2 instances are created for our application tier or not.

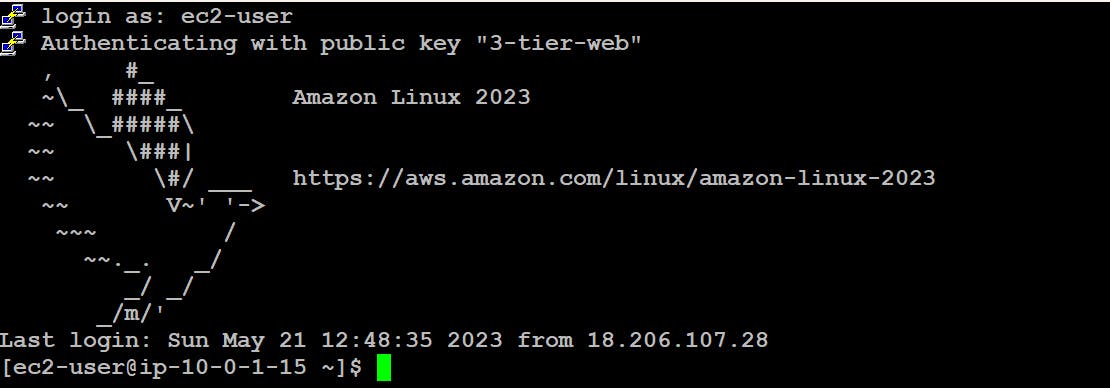
Let's try to reach our Application instance via ssh into our Presentation instance
Connect to the Presentation instance.
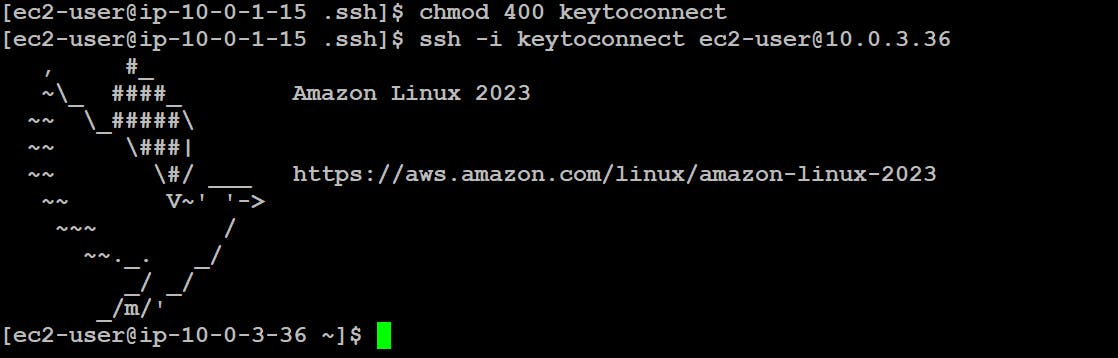
Change the directory to .ssh and Create a file in which we'll copy the private key.vim keytoconnect
Find the related key in your system and open it in Notepad and copy all the data from there and paste it into the file that we just created and save the file.

Now, we can change the file permissions to make it readable only.
And, we can now connect to our application instance by running the following command.
Yay!
We did it.
Now comes the Database Tier
Go to the RDS dashboard, and click on Create Database.
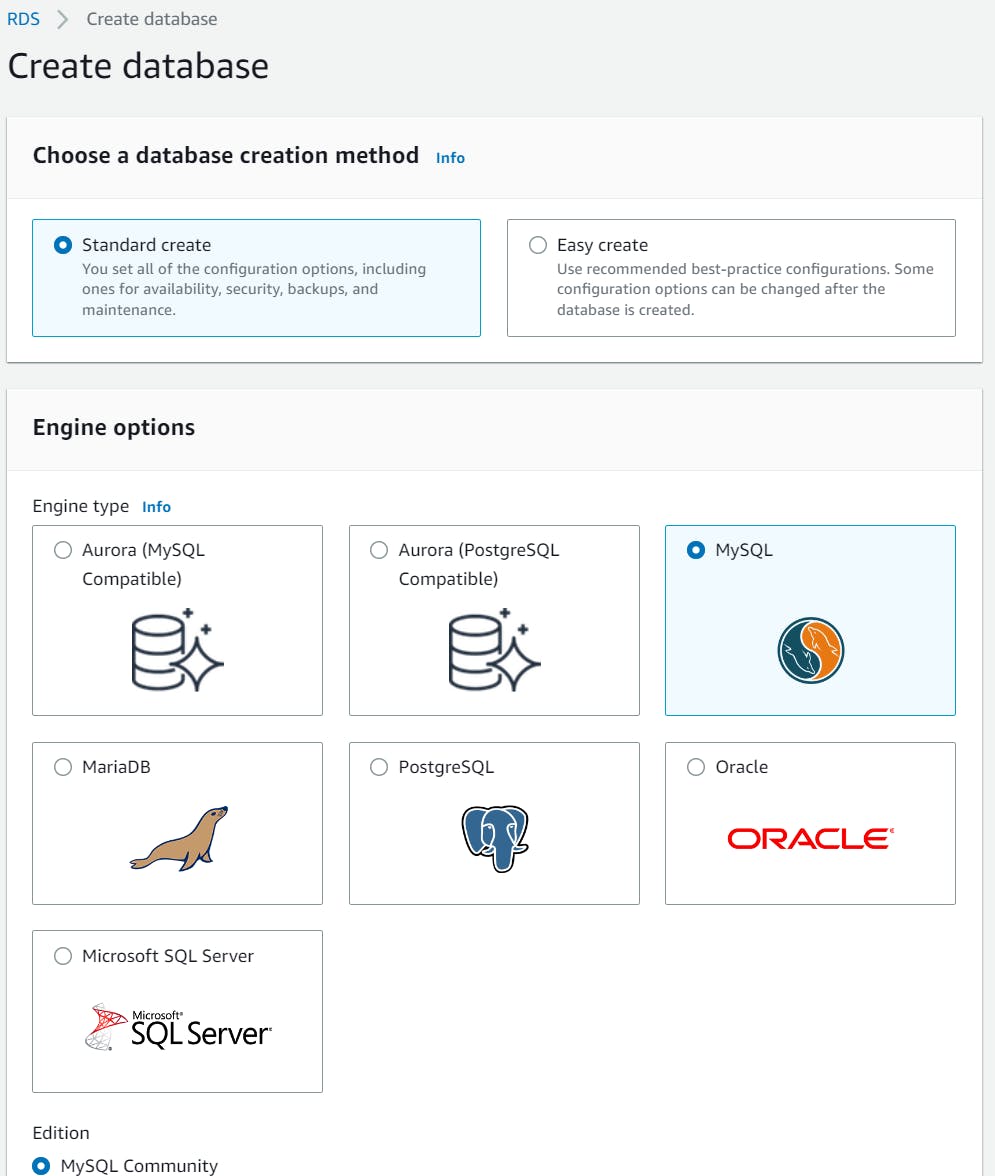
Select the Free tier template.

Choose a name for your database, I'm taking "database3tier". In Credentials Settings type a Login ID for the master user of your DB instance and create a password for the same.


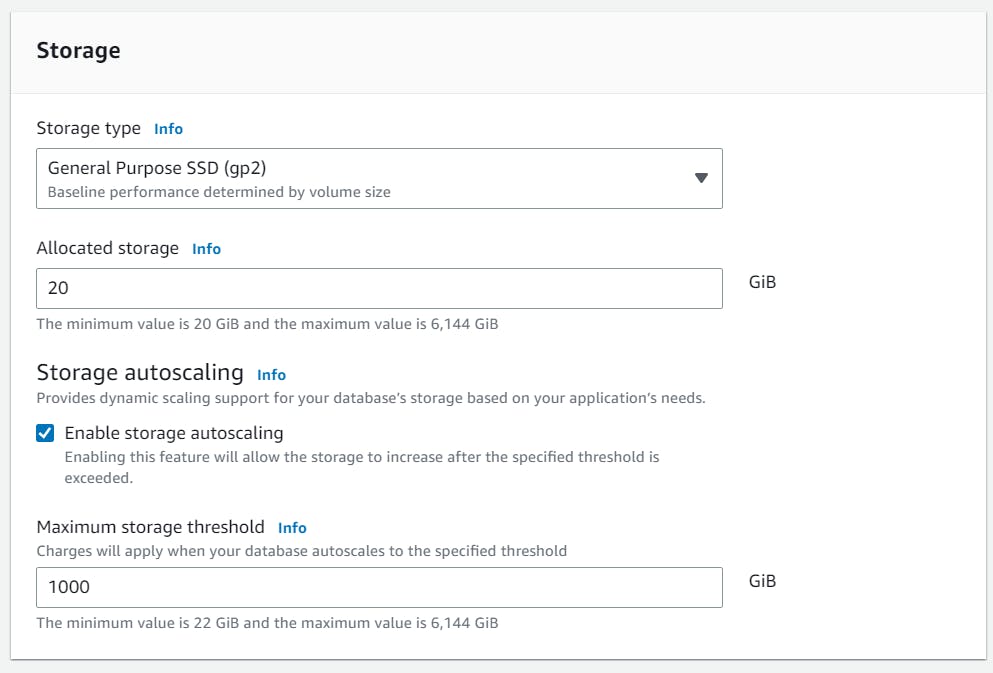
You can keep storage settings as it is
Under Connectivity select your VPC
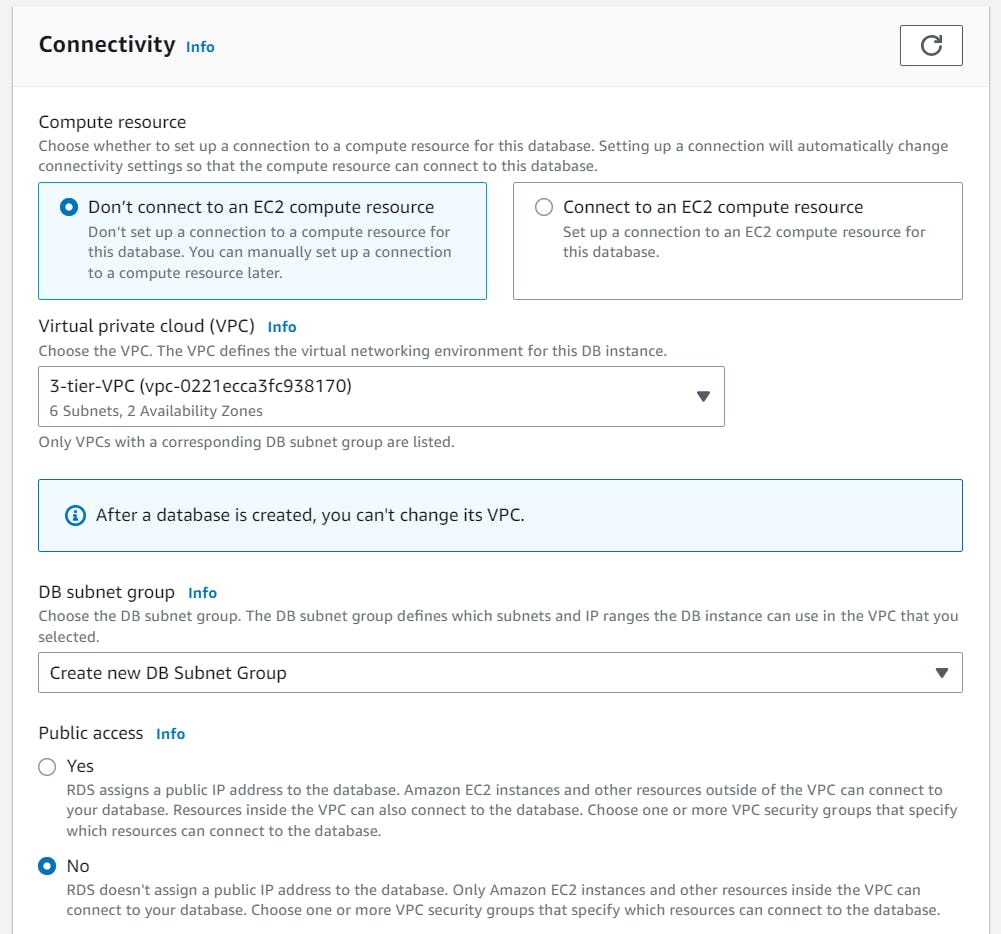
Create a Security Group for our Database.
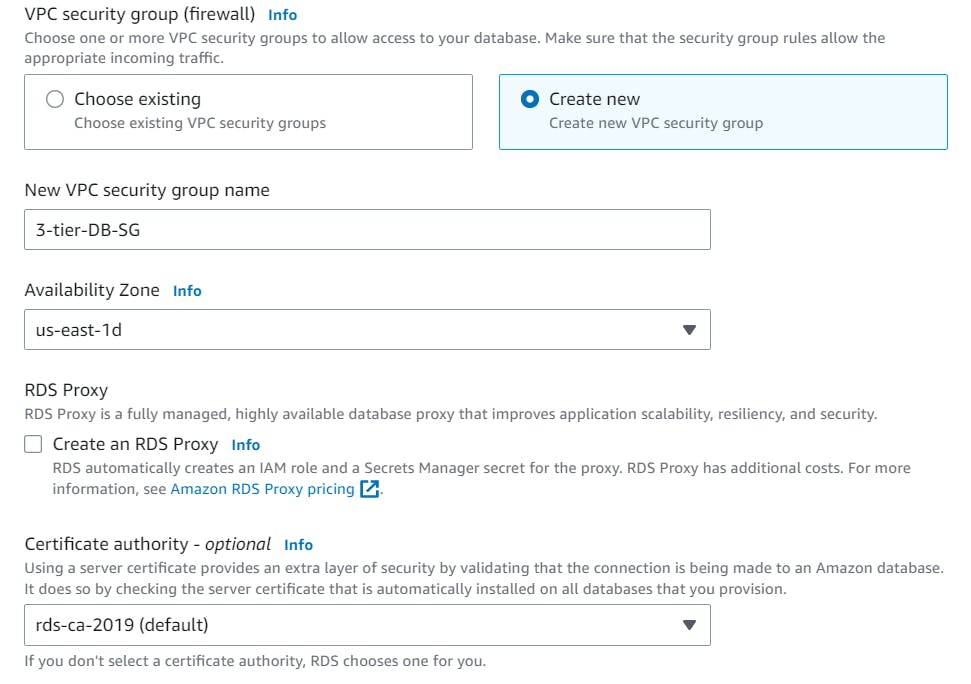
Leave the rest to default and hit Create Database.

Now click on the DB identifier that you created.

Copy the Endpoint and go to your application tier.
Now install MYSQL on the application tier.
sudo yum install mysql -y
Once this is installed you can run another command with the endpoint that we copied
mysql -h database3tier.cwdnlbsm8wgg.us-east-1.rds.amazonaws.com -p 3306 -u admin -p
Or you can run both of the commands together as below.

Yay!
We have successfully accessed the database from the application tier.
All 3 tiers are up and running!
Conclusion
So, Today we learned about the process of creating a 3-Tier Architecture on AWS. Here are the key takeaways:
Understanding the 3-Tier Architecture: We explored the concept of a 3-Tier Architecture, which involves the presentation, application, and database layers.
Presentation Layer: We discussed the importance of load balancers in distributing traffic across multiple instances for high availability and fault tolerance. This layer handles user interactions and serves content to end-users.
Application Layer: We looked at deploying the application layer using EC2 instances. This layer contains the business logic and processes user requests.
Database Layer: We explored the significance of a reliable database service like Amazon RDS for storing and managing data securely.
AWS Services: We emphasized the use of AWS services like VPC, security groups, access controls, and data protection throughout the architecture.
Thank you for Reading!
Happy Learning!