Complete CI/CD Pipeline on Jenkins
Complete CI/CD pipeline with Jenkins Agent performing the jobs by taking it from the Master when a Build is Triggered.


What is a Jenkins Pipeline?
Jenkins Pipeline is a feature of the Jenkins automation server that helps you define and manage the entire process of building, testing, and deploying your software in a structured and automated way. Instead of configuring your pipeline through a user interface, you write a script (called a Jenkinsfile) that describes the steps of your software delivery process.
With Jenkins Pipeline, you can write code to define how your software should be built, tested, and deployed. This code can be version controlled and easily shared among team members. Jenkins Pipeline provides a clear overview of your pipeline's progress and status, making it easier to track and monitor your software delivery.
By using Jenkins Pipeline, you can automate repetitive tasks, ensure consistent and reproducible builds, and streamline your software delivery process. It allows you to integrate with different tools and services, enabling you to perform various tasks such as compiling code, running tests, and deploying applications. Jenkins Pipeline also supports running tasks in parallel, which can speed up the overall pipeline execution.
Terms related to Jenkins Pipeline
Pipeline: A pipeline in Jenkins is a set of steps or actions that automate the process of building, testing, and deploying software. It allows you to define and manage the entire software delivery process in a structured and automated way.
Declarative: Declarative is a simplified and structured approach in Jenkins Pipeline that provides an easier way to define pipelines. It enforces a predefined structure and rules, making pipeline creation and readability easier. It's like following a template for defining your pipeline.
Scripted: Scripted is another syntax option in Jenkins Pipeline that gives you maximum flexibility and control. It allows you to write custom scripts using the Groovy programming language to define your pipeline. It's suitable for more complex scenarios and when you need advanced customization or integration with external tools.
Jenkinsfile: It is a text file written in Groovy syntax that defines the Jenkins pipeline. It contains the entire pipeline configuration and stages.
Stage: A stage represents a distinct phase or step within a pipeline. It defines a specific task or set of tasks that need to be executed.
Step: A step is a single action or command that is executed within a stage. It can include tasks like compiling code, running tests, deploying applications, or sending notifications.
Agent: An agent specifies where the pipeline should be executed. It can be a specific Jenkins node or a container environment, allowing for distributed and parallel execution of stages.
Parallel: The parallel directive in a Jenkins pipeline allows for the concurrent execution of multiple stages or steps. It is useful when tasks can run independently or in parallel.
Post: The post section in Jenkinsfile defines actions or tasks that need to be performed after the stages have been completed. It can include actions like archiving artifacts, sending notifications, or triggering downstream jobs.
Trigger: A trigger determines when the pipeline should be automatically executed. Triggers can be based on events like code commits, scheduled intervals, or manual triggers.
Input: The input step allows for interactive user input during the pipeline execution. It can be used to prompt for approvals or decisions before proceeding to the next stage.
Environment: The environment block allows for the definition of environment variables that can be accessed and used within the pipeline stages and steps.
What are Continuous Delivery (CD) Pipelines?
In a Jenkins pipeline, each job or event needs certain things to happen before it can start. It relies on other jobs or events to finish first. Think of it like a relay race, where each runner needs to pass the baton to the next runner to keep the race going. Similarly, in Jenkins, each job or event is like a runner that needs the previous jobs or events to finish before it can start. This dependency ensures that the pipeline progresses in a coordinated and orderly manner.
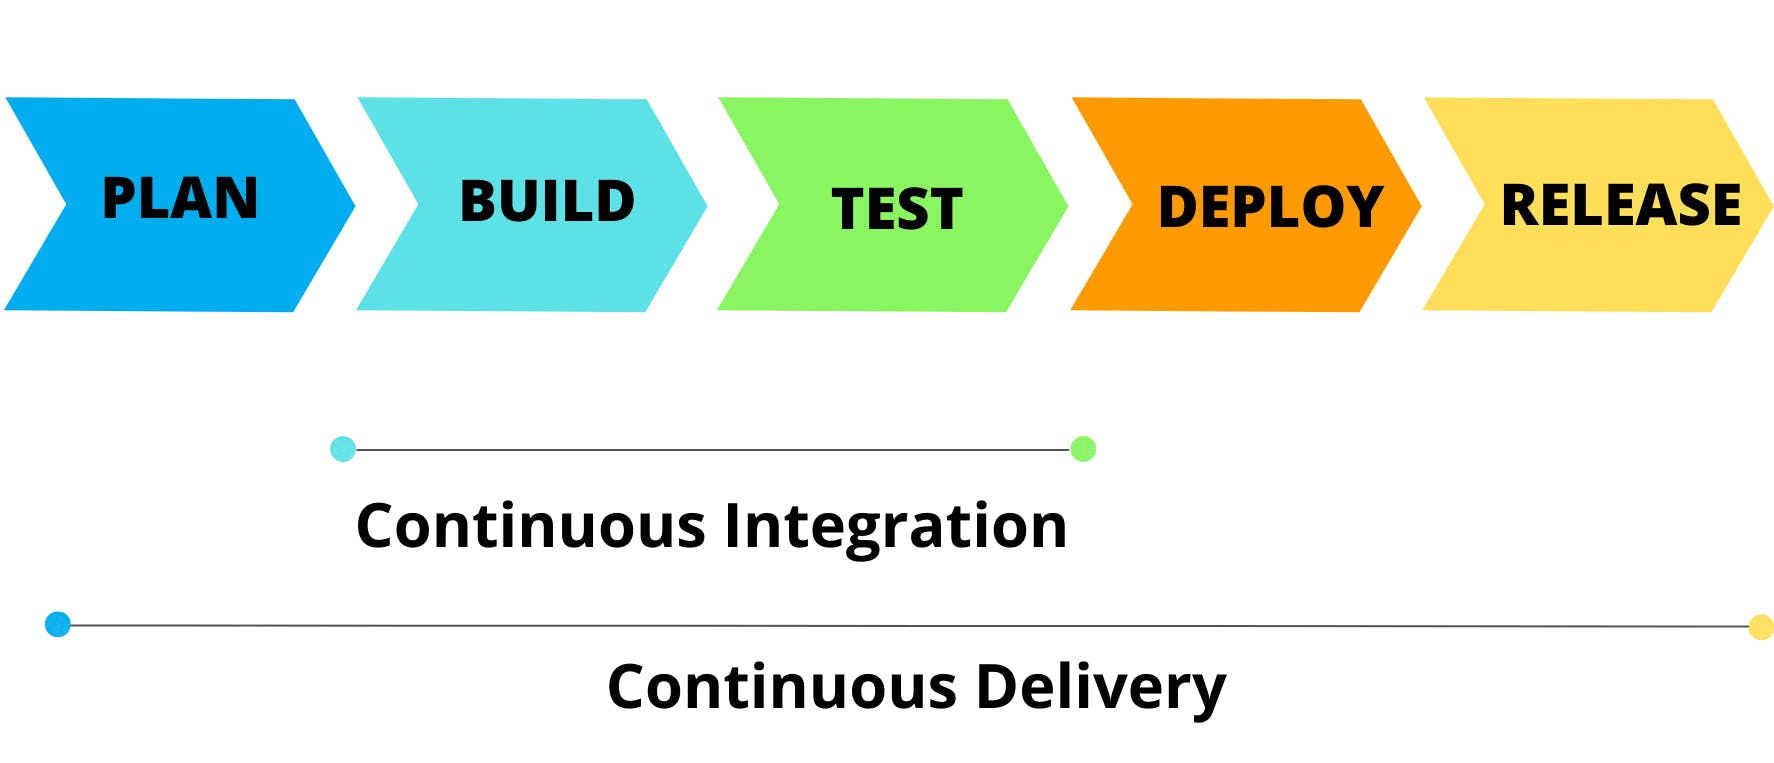
In Jenkins, a continuous delivery pipeline is like a flowchart that represents the journey of your software from development to release. It consists of different stages, such as building, deploying, testing, and releasing. These stages are connected in a specific order to create a pipeline.
Think of it as a conveyor belt where your software changes go through various steps before reaching the final destination. Each step has its own tasks and requirements, and they need to be completed in a specific sequence.
The purpose of the continuous delivery pipeline is to automate and streamline the process of developing and releasing software. It ensures that every change made to the software goes through a series of well-defined and tested steps. This helps maintain the quality and reliability of the software and allows for faster and more efficient releases.
What is a JenkinsFile?
A Jenkinsfile is a text file written in Groovy that defines the entire CI/CD pipeline as code in Jenkins. It allows for version-controlled and standardized automation of the build, test, and deployment stages. The Jenkinsfile is stored in the source code repository and provides visibility, collaboration, and reproducibility for the software delivery process.
Why you should use a Pipeline?
The benefits of using a Jenkins pipeline:
Code-based Implementation: Jenkins pipeline allows you to define your automation process as code, enabling multiple users to collaborate and make changes to the pipeline. This provides flexibility and ensures that the pipeline is easily version-controlled.
Robustness: Jenkins pipelines are designed to be resilient. In the event of an unexpected server restart, the pipeline will automatically resume from where it left off, ensuring that no progress is lost.
User Interaction: With Jenkins pipeline, you can introduce user interactions within the automation process. This means you can pause the pipeline and wait for user input before resuming execution. It allows for manual intervention or decision-making when necessary.
Scalability: Jenkins pipelines are suitable for handling large and complex projects. You can run multiple jobs within a pipeline, and even incorporate loops and iterations to accommodate different scenarios and requirements.
Jenkins Master
Jenkins Master is the central controller and server in Jenkins that manages the entire Jenkins environment. It coordinates build jobs, provides a web interface for configuration and monitoring, supports plugin management, and distributes workloads to Jenkins Agents for parallel execution. It is responsible for the overall management and control of the Jenkins system.
Jenkins Agent
A Jenkins Agent, also known as a Jenkins Slave, is a worker node that performs build tasks under the control of the Jenkins Master. It enables distributed build execution and allows jobs to be executed on multiple machines in parallel, increasing scalability and efficiency.
In other words, an agent refers to a machine or container that connects to a Jenkins master and performs the actual execution of build steps in a job. When configuring a Jenkins job, you need to assign it to a specific agent. Each agent is identified by a unique label.
When a Jenkins job is triggered, the execution takes place on the agent node that is designated in the job configuration. The agent handles the workload while the master serves as the control node and hosts the Jenkins user interface.
As your team and project requirements grow, a single Jenkins installation may become insufficient. To scale up, Jenkins provides a "master to agent connection" approach. This allows you to distribute the workload by connecting multiple agents to the Jenkins master. The master handles the UI and coordination, while the agents execute the build jobs concurrently. This distributed setup enhances scalability and enables efficient job execution in larger environments.
Setting up Agent
Let's set up an Agent which will take the jobs from our Master and perform the task.
Step 1: Go to your Jenkins Dashboard and click on "Set up an agent"

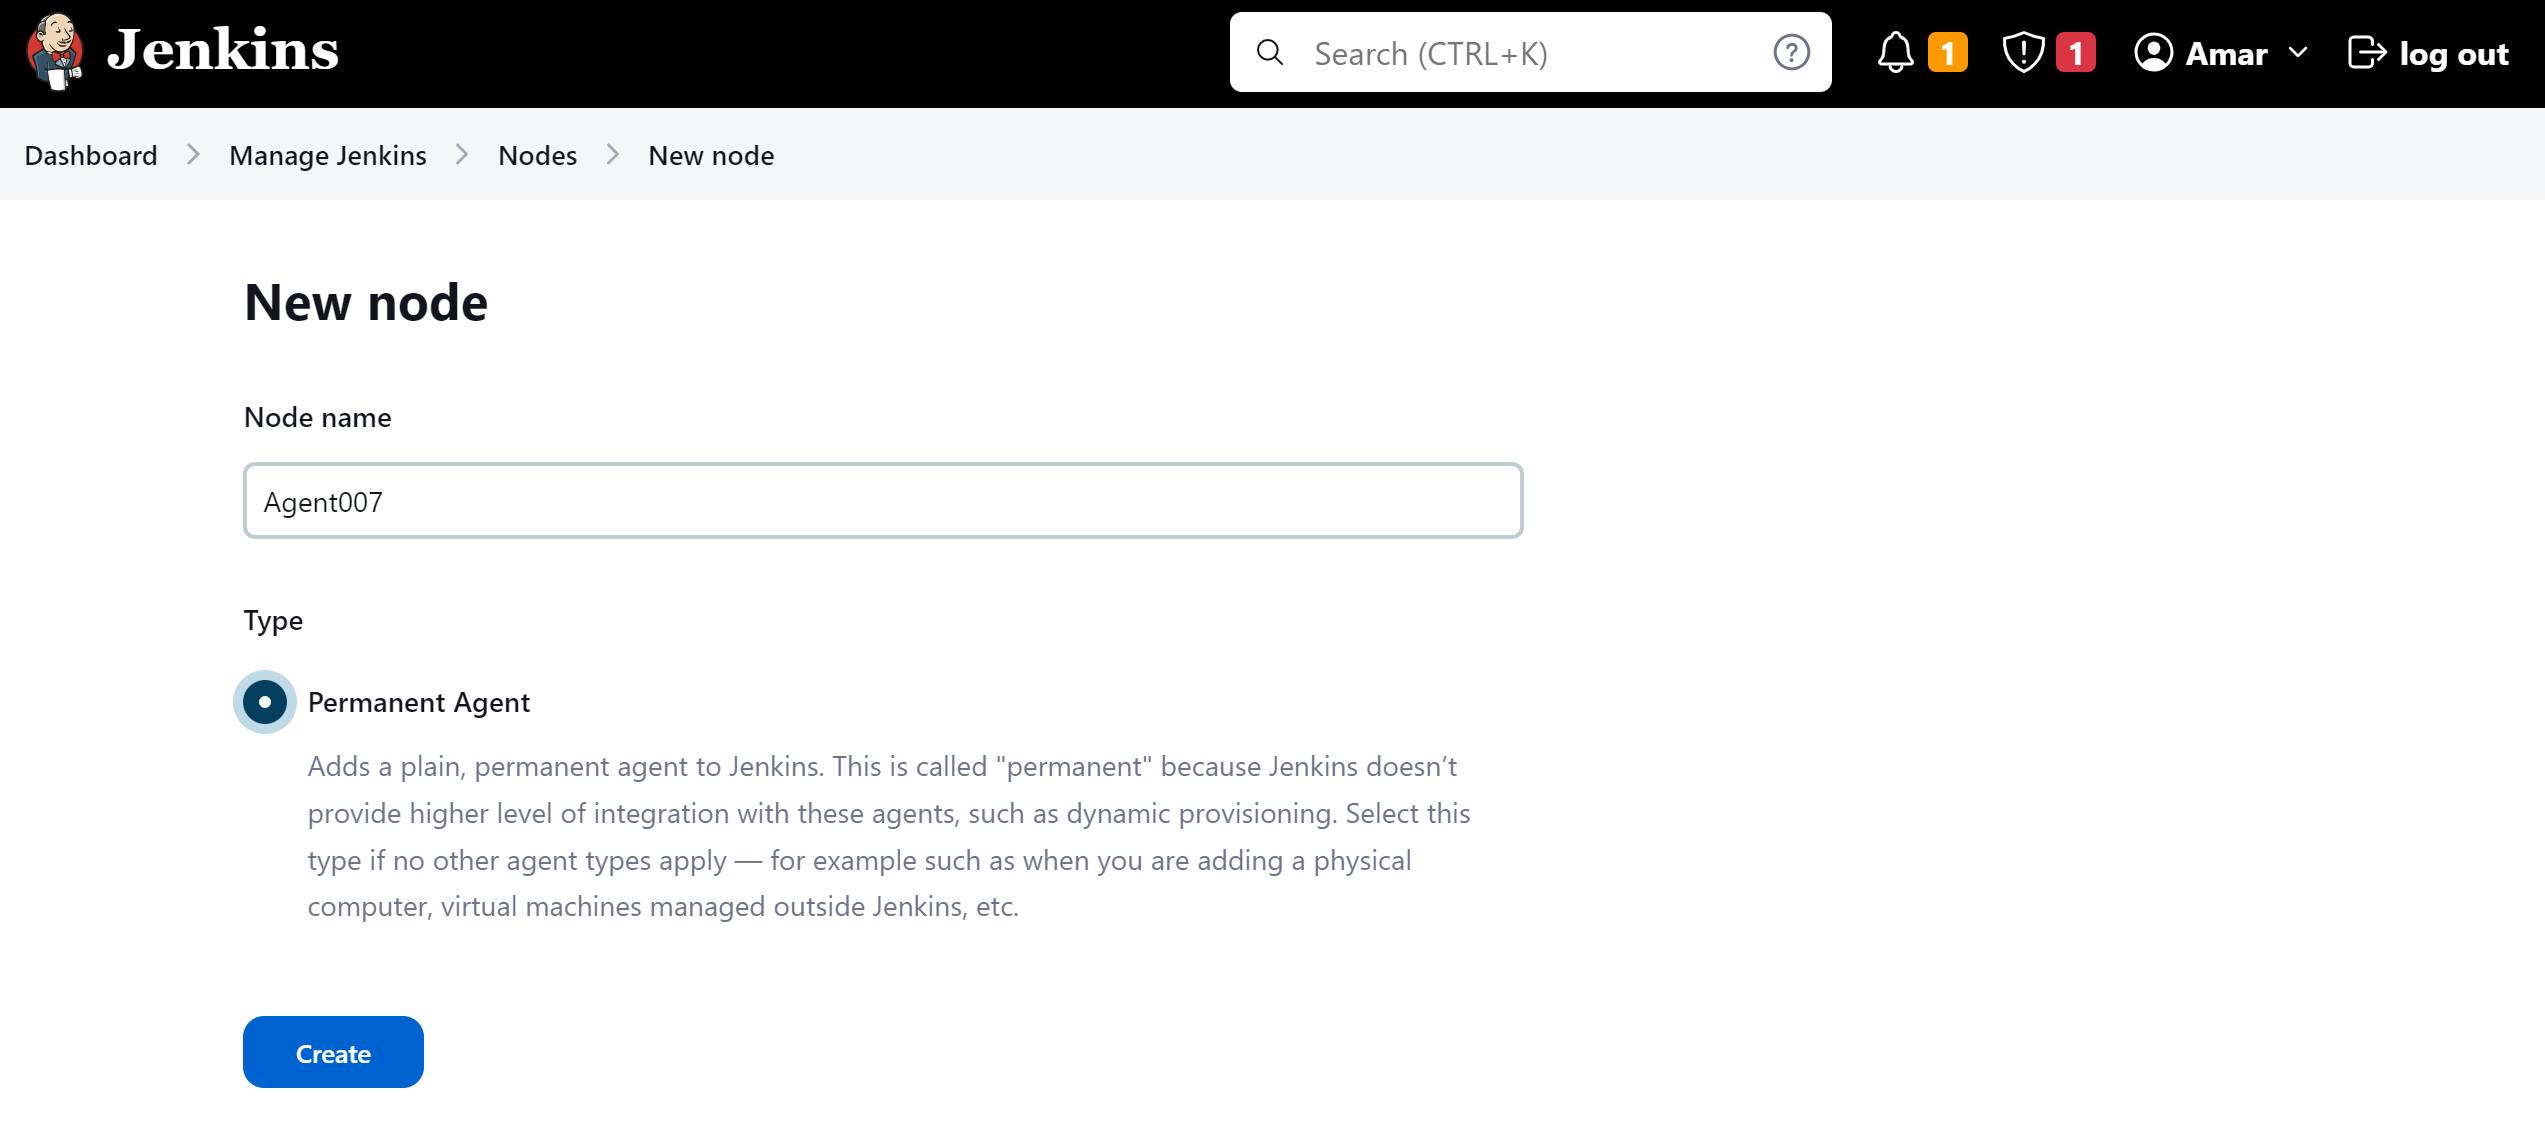
Step 2: Click on "+ New Node"

Step 3: Name your Agent and Create
Step 4: Write a description about your Agent, Write a path where you want to save the jobs, Label your Agent, and select usage as "Only build jobs with label expression matching this node".

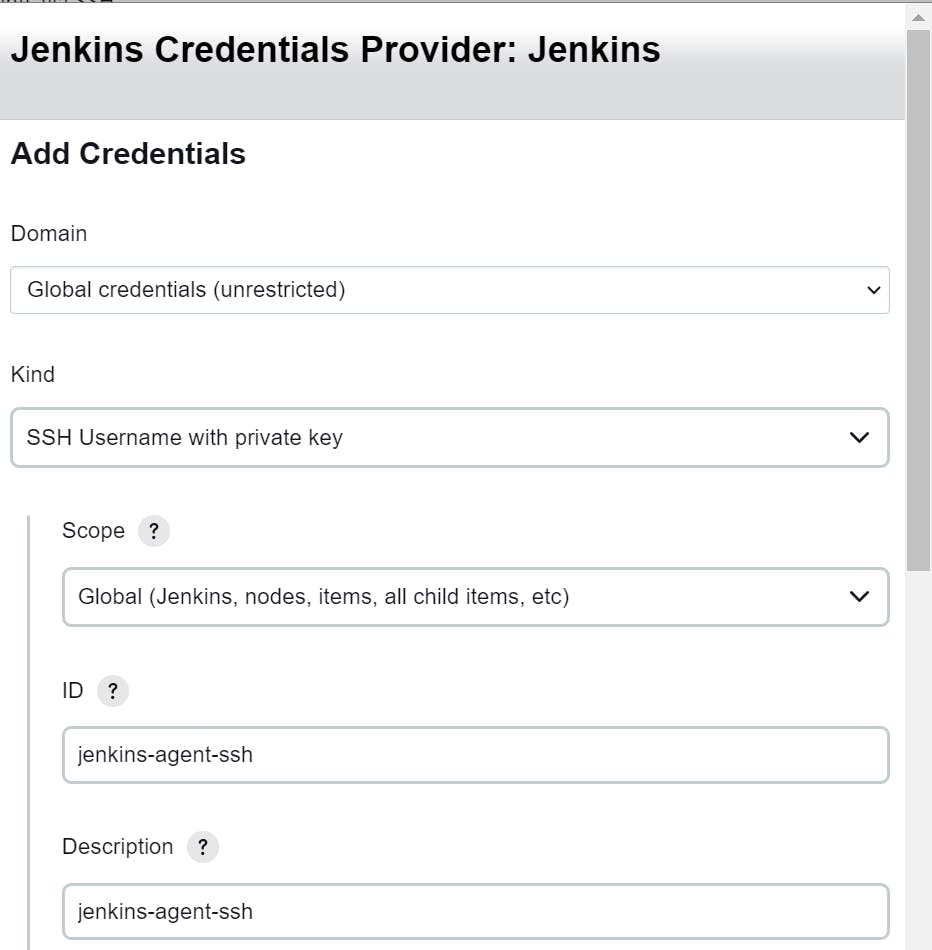
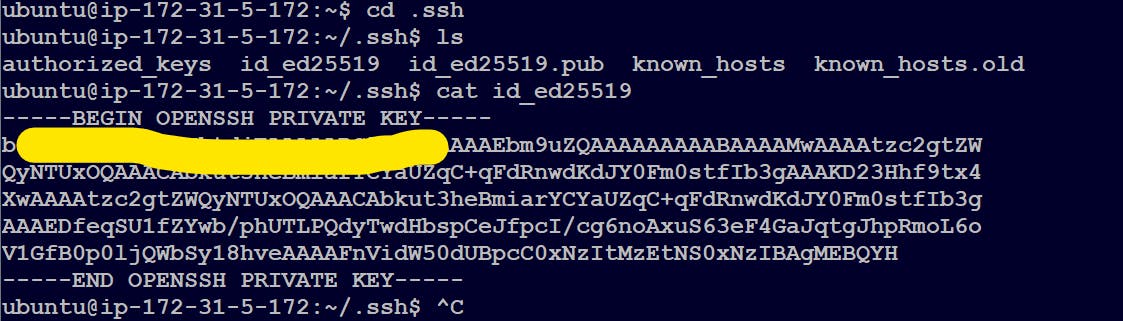
Step 5: Select the Launch method as "Launch agents via SSH", provide the Host with your Agent Public ID, Then Add a Jenkins Credential for SSH.

Fill in a few details as below and provide your master private Key and click Add.

Step 6: You can select Host Key Verification Strategy as "Non verifying Verification Strategy" and click Save.
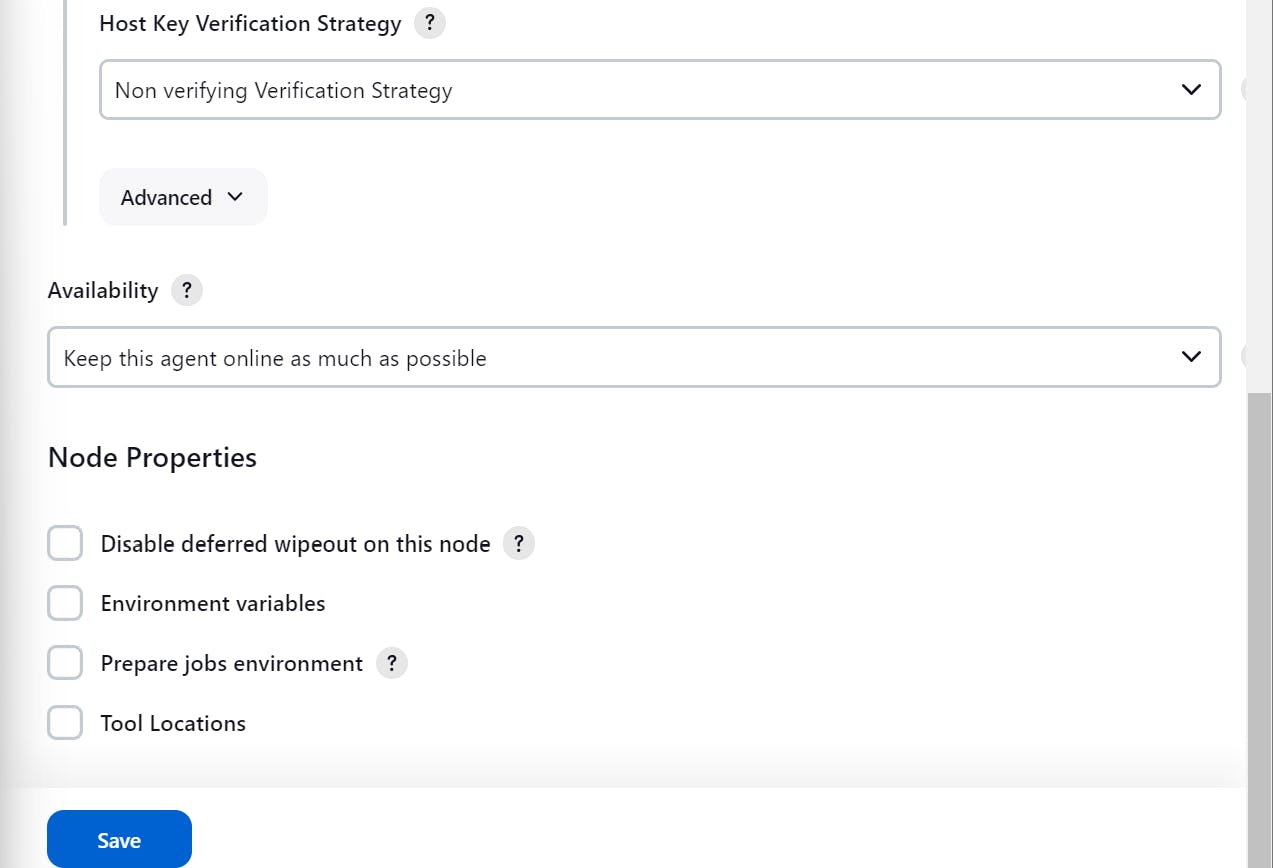
Make sure Java is installed in your Agent instance if not then please install.
Now you can check if your Agent is connected successfully and Online or not.

Creating a Pipeline
Step 1: Click on New Item in your Dashboard.

Step 2: Name your Pipeline, Select Pipeline from the list and click OK

Step 3: Write a description, select the GitHub project and provide the web link of your project on GitHub.

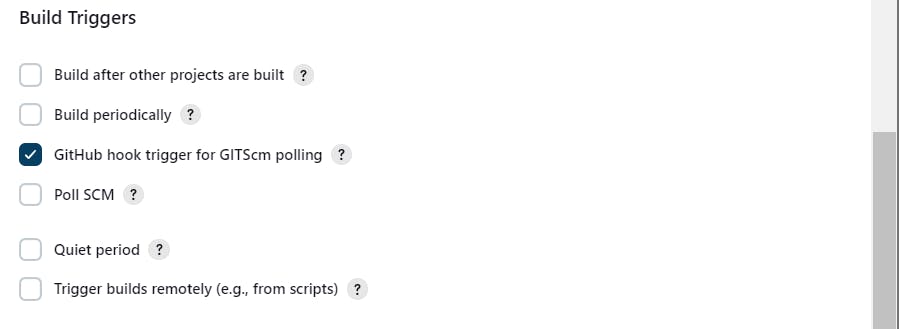
Step 4: Select "GitHub hook trigger for GITScm polling"
Step 5: Select Definition as Pipeline Script and you can start writing your script in Groovy Syntax.
Write the stages of your pipeline

Now, you can fill "steps" in your stages.

Let's see here if our pipeline is working with the above pipeline code.
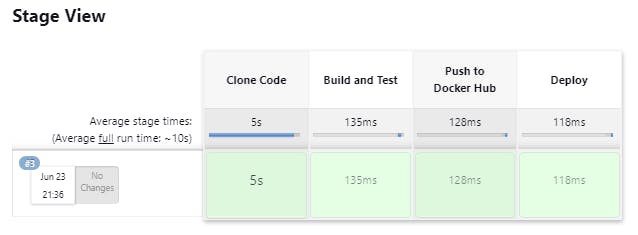
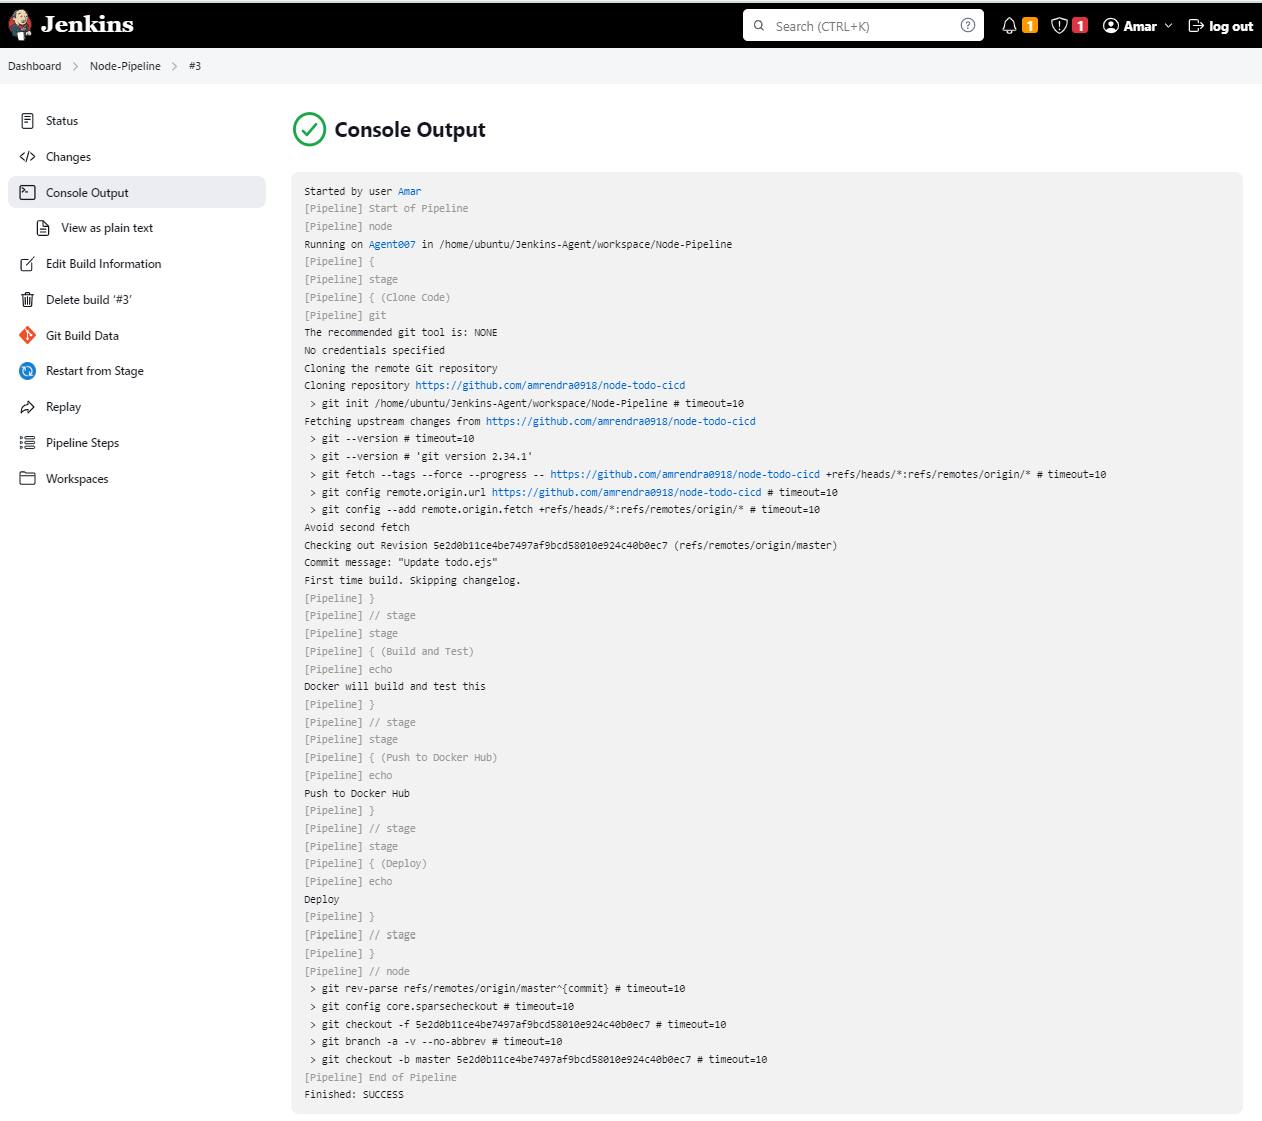
Great! Our Pipeline is working.
We can check the jobs running on our Agent.

Let's fill in the steps of the next stage which is the Build stage. For that, we'll need to install docker and docker-compose on our Agent.
sudo apt-get install docker.io docker-composesudo usermod -aG docker $USERsudo reboot
Let's see here if our pipeline is still working with the above pipeline code.

Yay! It's still working.
Let's go ahead with the next stage "Push to Docker Hub". For this step, we'll need to write sh commands to log in to our Docker Hub and then our Pipeline can Push the image to Docker Hub.
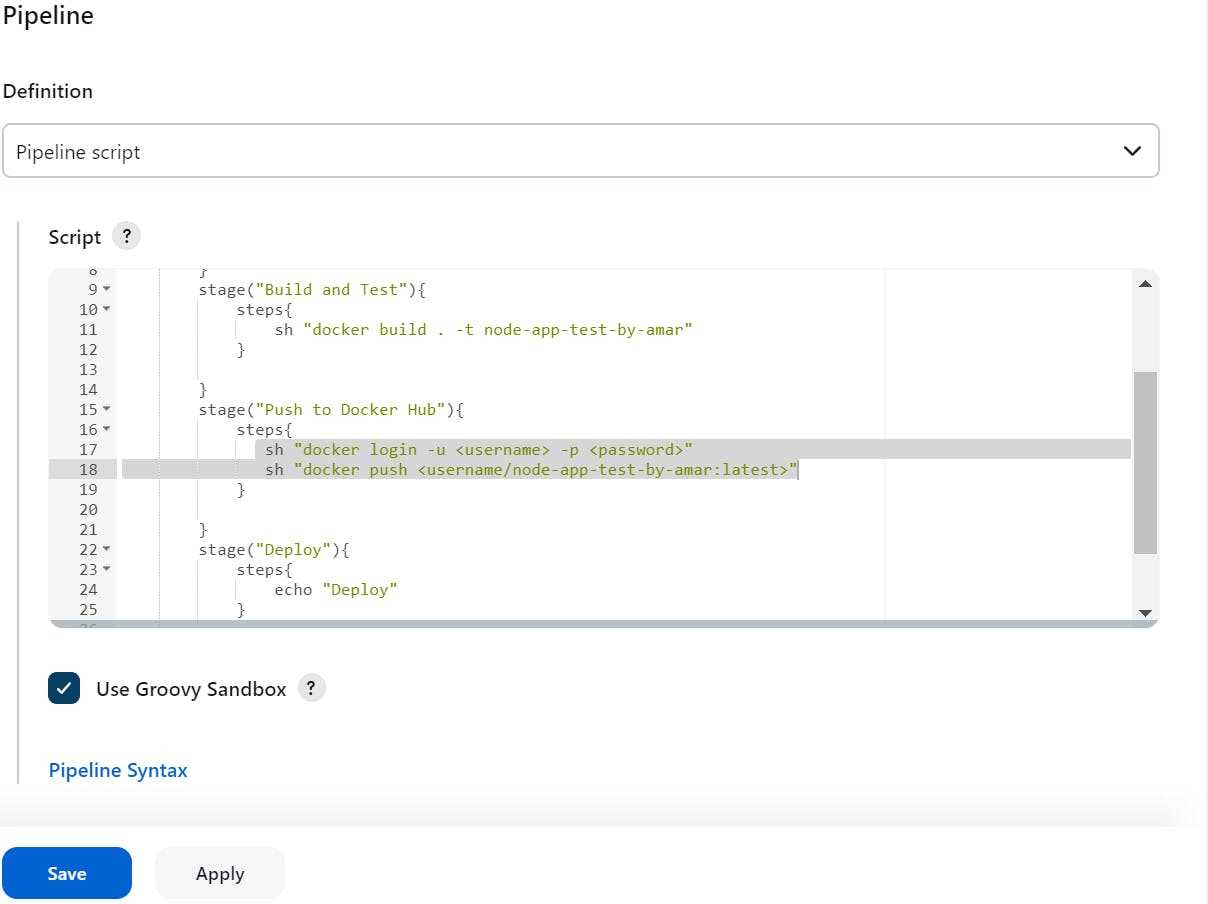
But we can't provide our Docker Hub credentials in our pipeline code as it will be visible to whoever has access to the pipeline code, So we'll use environment variables.
To create environment variables:
Go to Manage Jenkins.
Go to Manage Plugins, Click on Available Plugins and search for a plugin which allows you to set an environment for the builds and click on "Download now and install after restart".
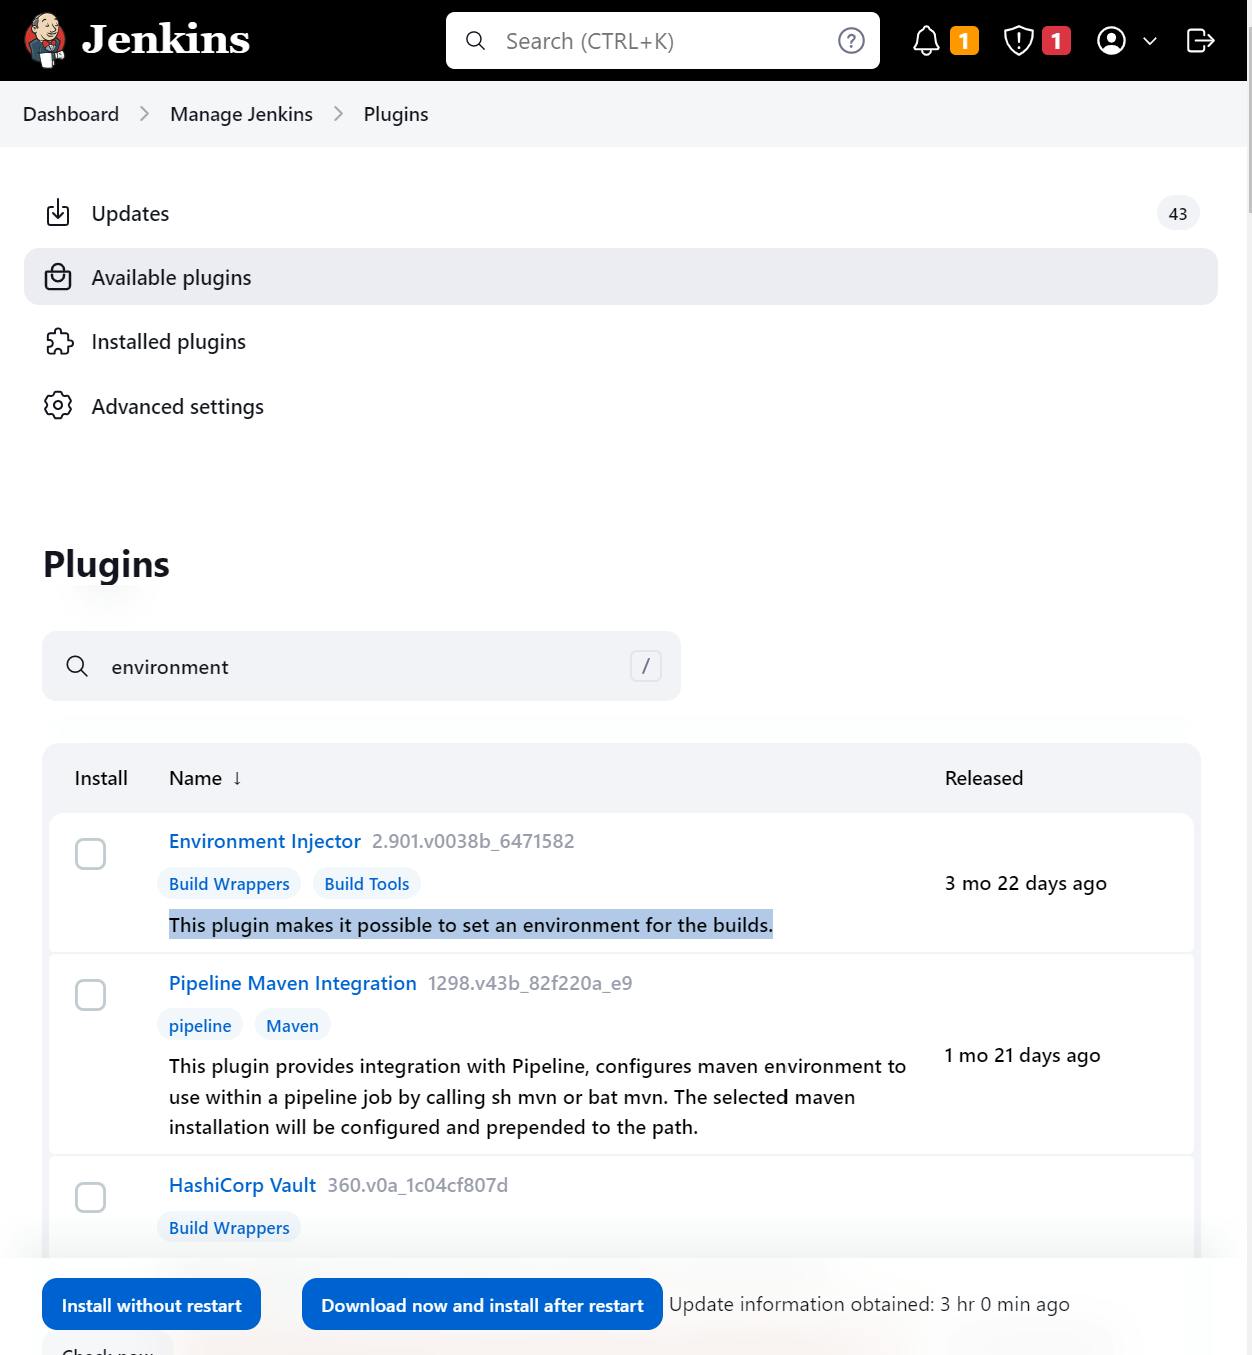
Restart your Jenkins.
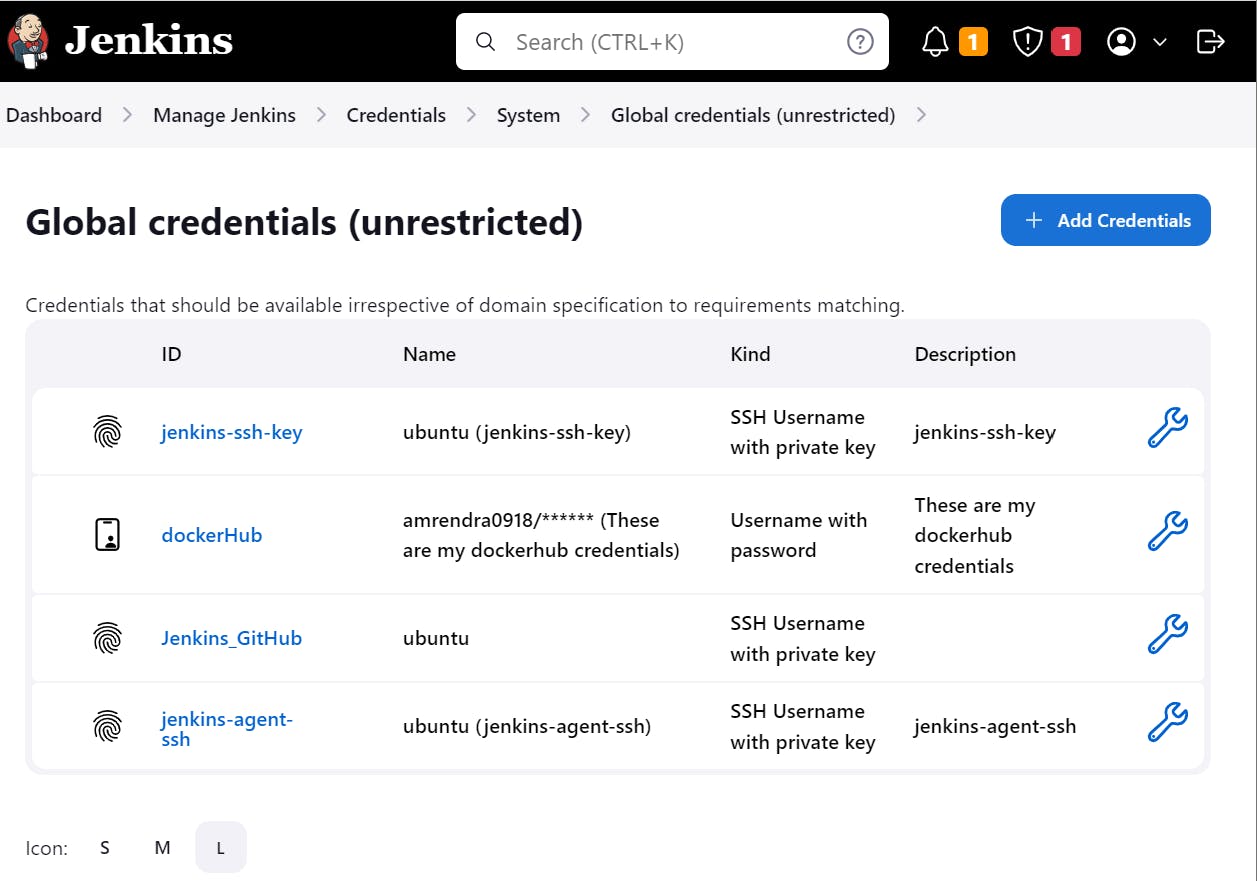
Go to Manage Jenkins and open the Credentials, and click on (global) under Stores scoped to Jenkins.

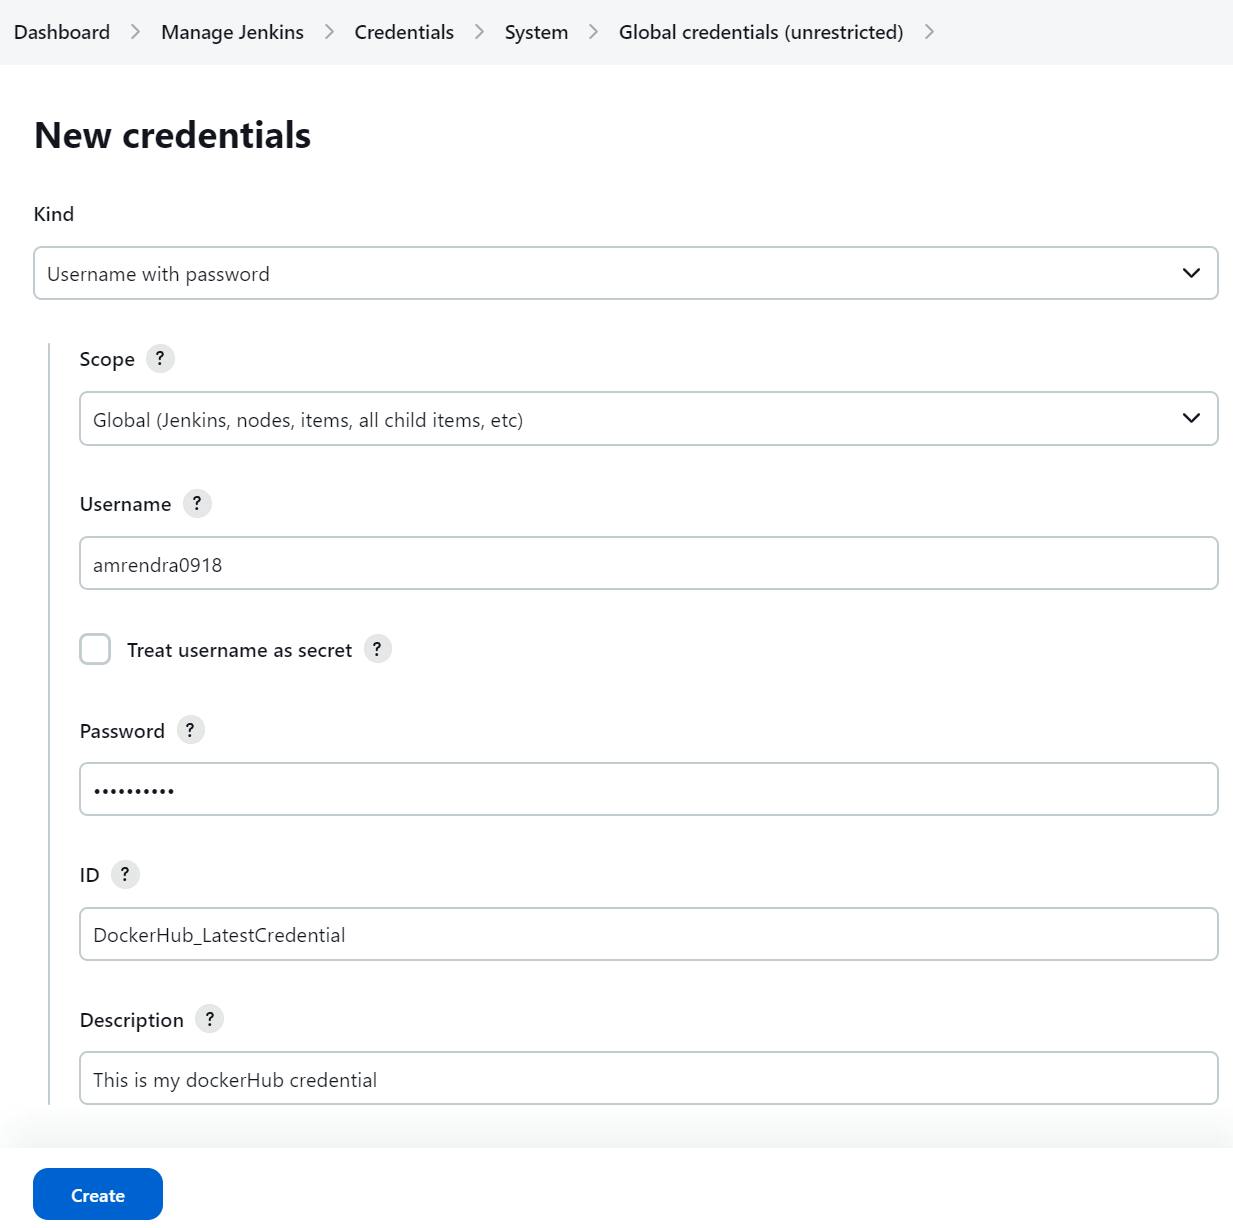
Click on Add Credentials
Provide your docker hub Credentials and click on Create.
Now, let's write the steps.
withCredentials([usernamePassword(credentialsId:"DockerHub_LatestCredential",passwordVariable:"dockerHubPass",usernameVariable:"dockerHubUser")]){sh "docker tag node-app-test-by-amar ${env.dockerHubUser}/node-app-test-by-amar:latest"sh "docker login -u ${env.dockerHubUser} -p ${env.dockerHubPass}"sh "docker push ${env.dockerHubUser}/node-app-test-by-amar:latest"}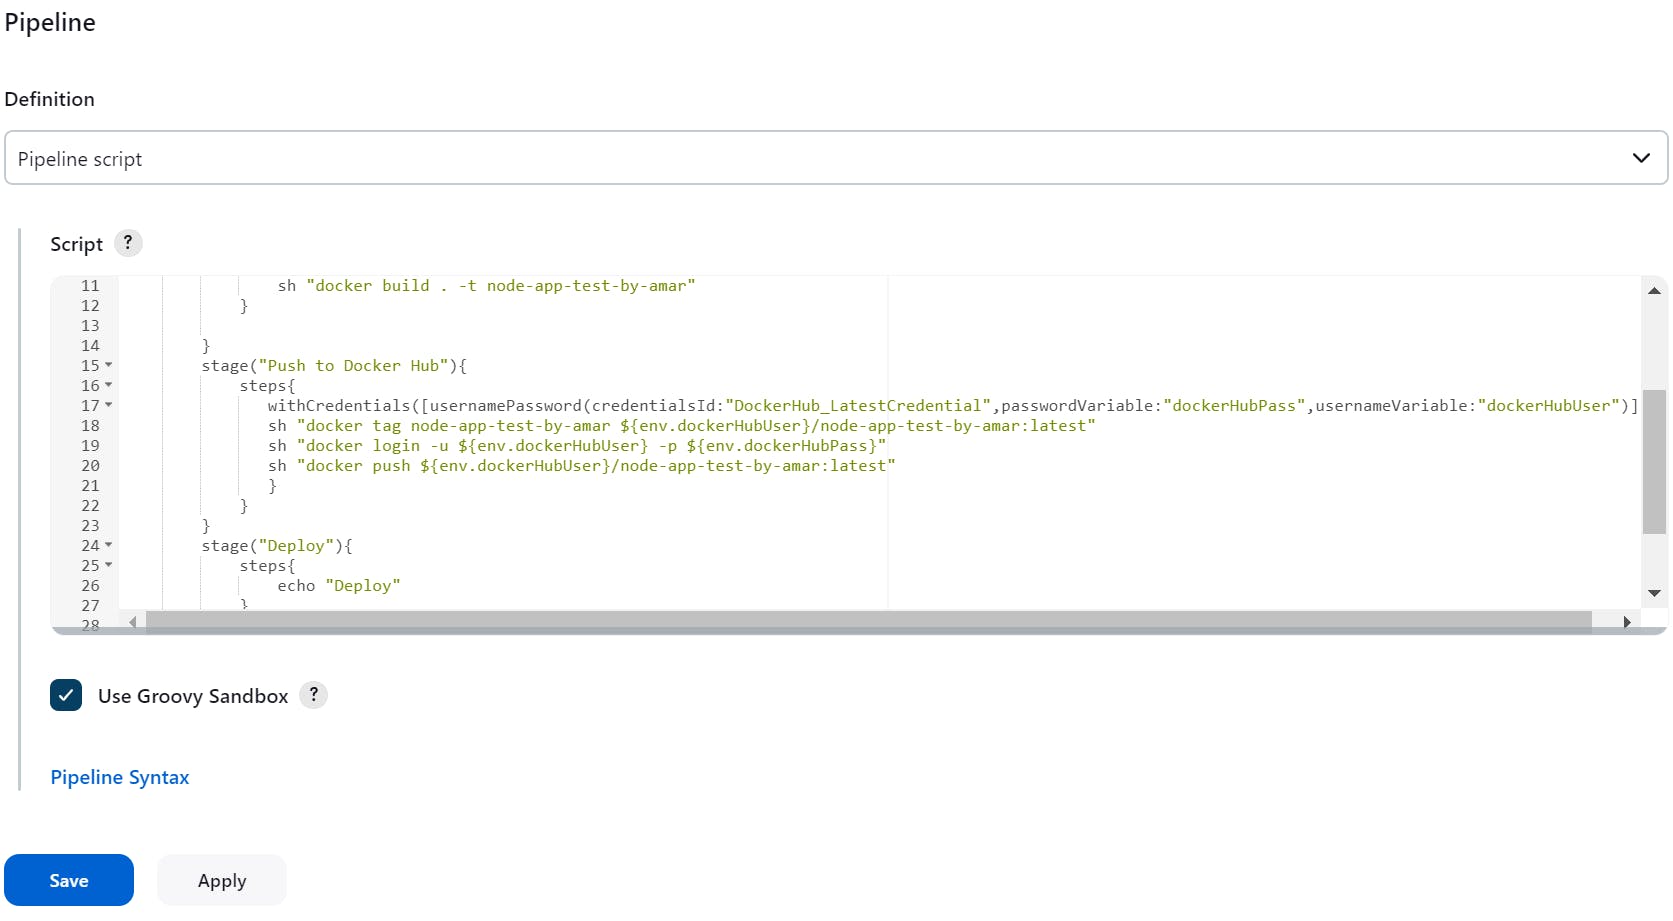
And, try to run the pipeline if it's working.

Great Job! Our pipeline is working on this step as well.
Let's complete the steps of our last stage "Deploy"
sh "docker-compose down && docker-compose up -d"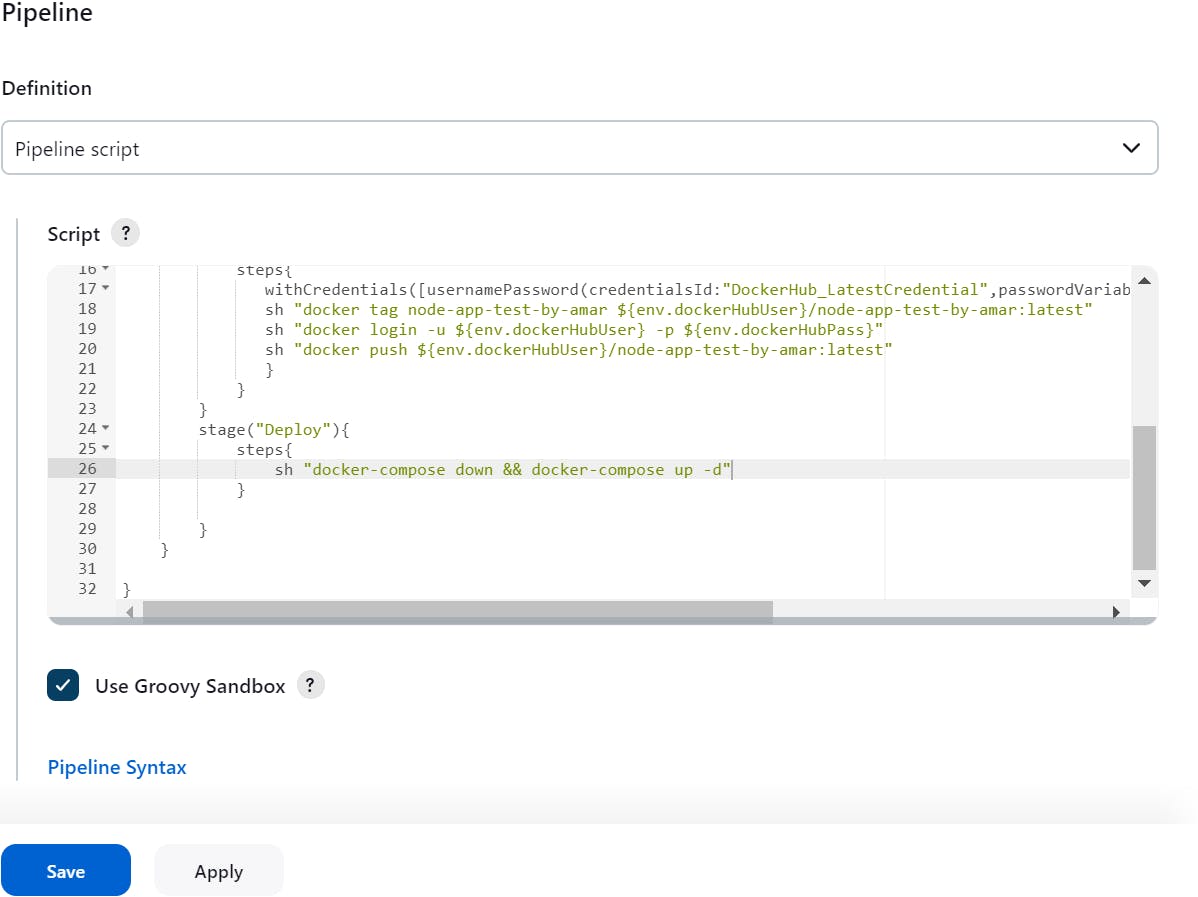
Check if the pipeline is working or not, click on build now.
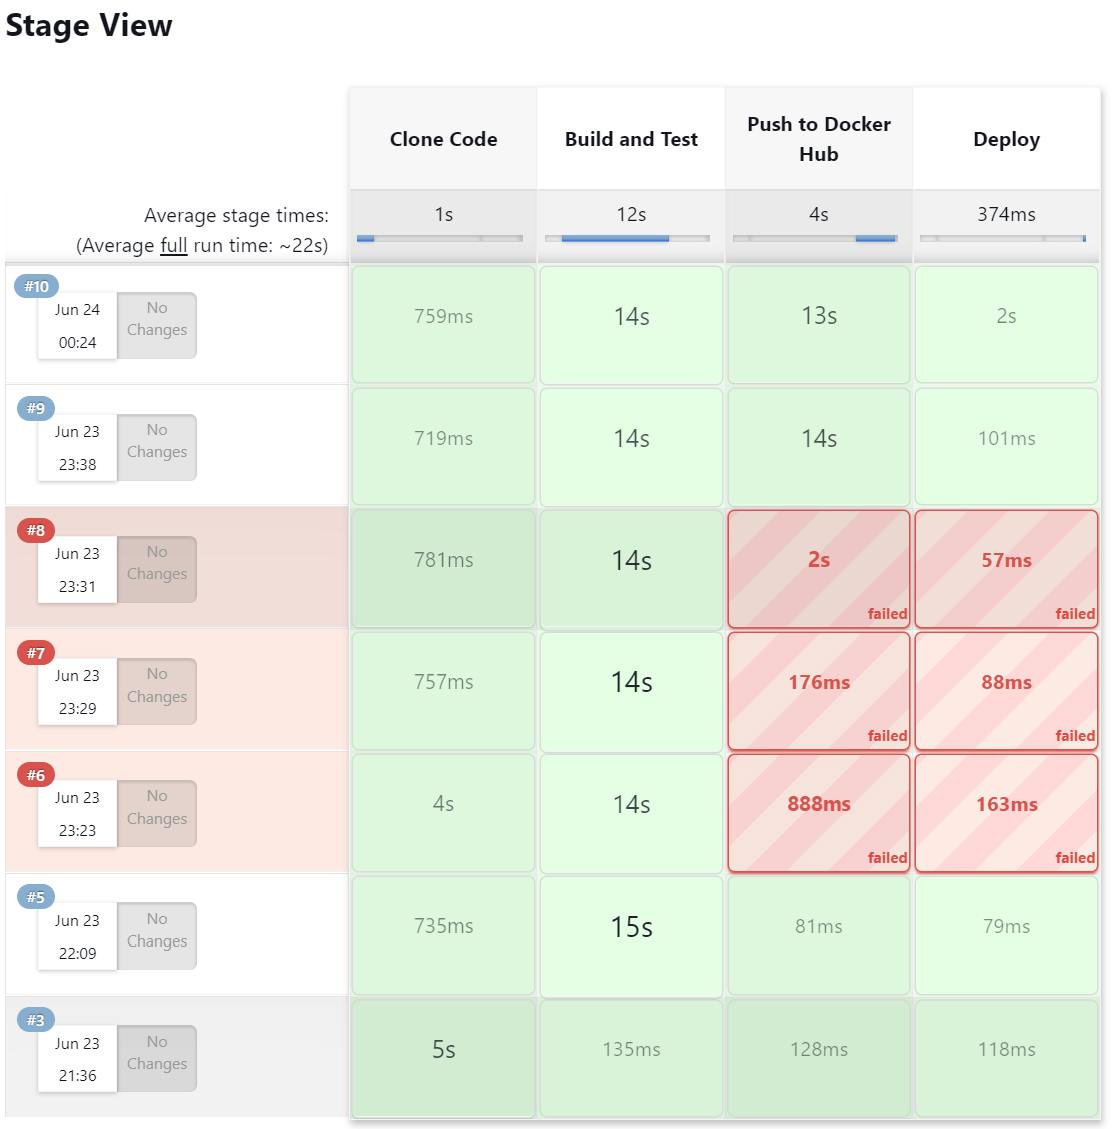
Yay! It's working.
We can do this, one more way, i.e. writing a Jenkinsfile and saving it on GitHub.


Now, In Definition under Pipeline we can select "Pipeline script from SCM"

Let's try this, Click on Build Now.

Success!
Thank you for reading my blog on the complete CI/CD pipeline. Your support means a lot to me, and I appreciate your time and engagement. If you have any further questions or need more information, feel free to reach out. I look forward to sharing more valuable content with you in the future.
Happy Learning!