


What is Dockerfile?
A Dockerfile is a text file that contains instructions for building a Docker image. Docker images are a key component of the Docker platform and are used to create and run containers. A Dockerfile provides a simple and standardized way to automate the process of building Docker images, ensuring that each image is built consistently and reproducibly.
A Dockerfile consists of a series of instructions, each of which specifies a different step in the process of building an image. Some of the most common Dockerfile instructions include:
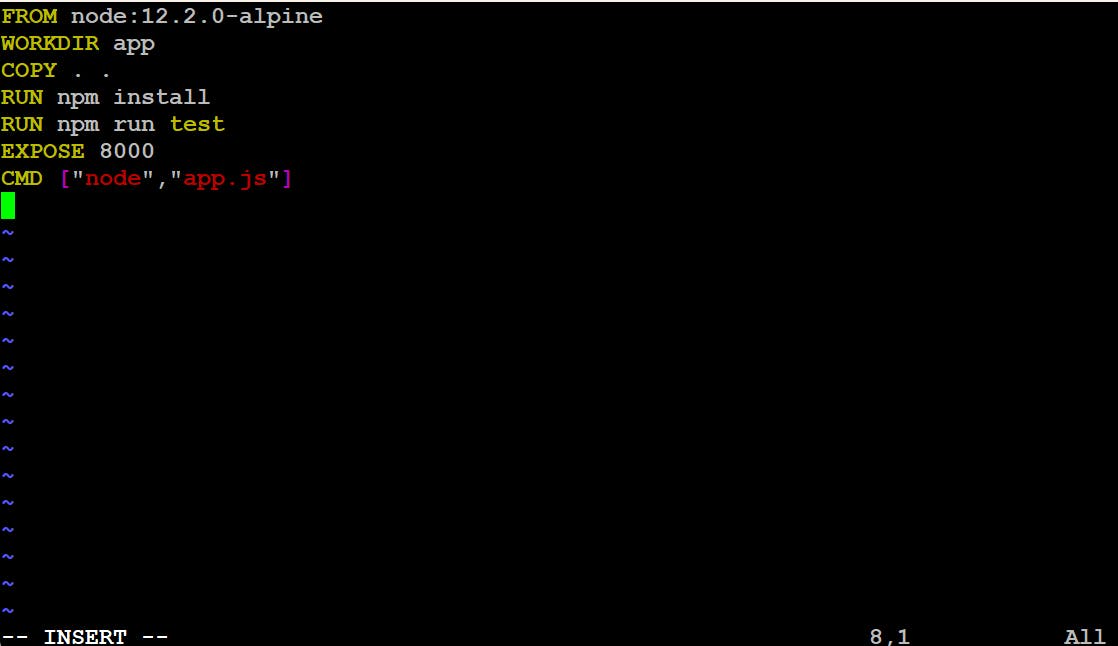
FROM: Specifies the base image that the new image should be built on top of.RUN: Executes a command inside the container, typically used to install software packages or configure the environment.COPYorADD: Copies files or directories from the host machine into the image.CMDorENTRYPOINT: Specifies the default command that should be executed when a container is run from the image.
Using a Dockerfile to build images has several benefits, including:
Reproducibility: Since Dockerfiles specify the exact steps needed to build an image, they can be used to reproduce the same image on different machines or environments.
Versioning: Dockerfiles can be version-controlled using Git or other tools, allowing developers to track changes and collaborate on image development.
Scalability: Dockerfiles can be used to create lightweight and efficient images, making it easier to scale applications across multiple containers or hosts.
Tasks:
- Create a Dockerfile for a simple web application

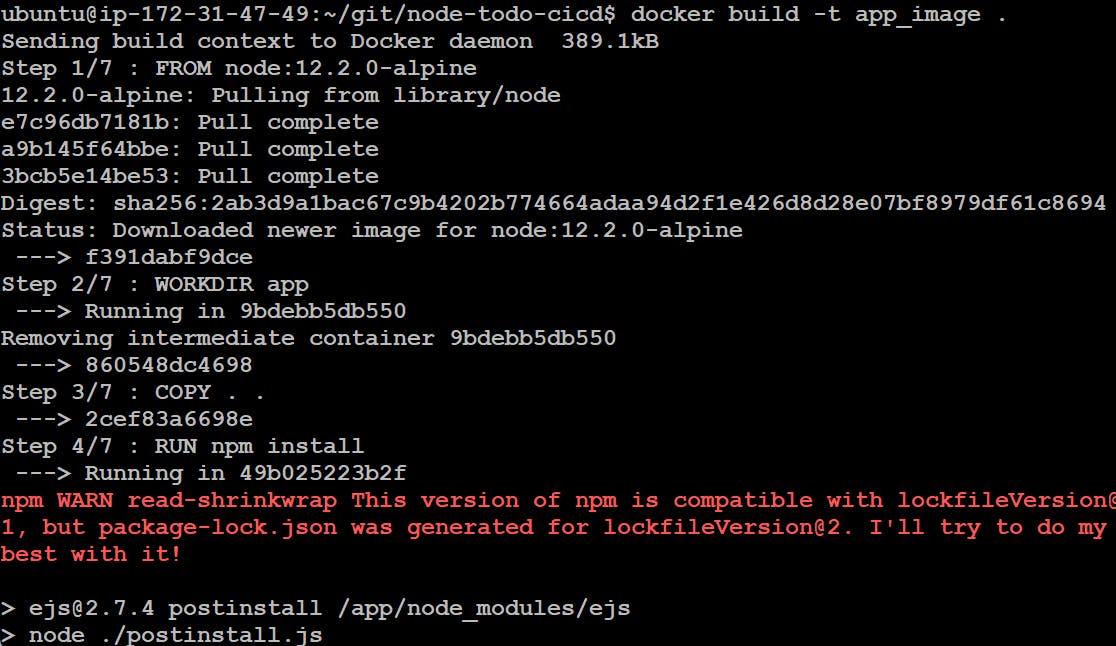
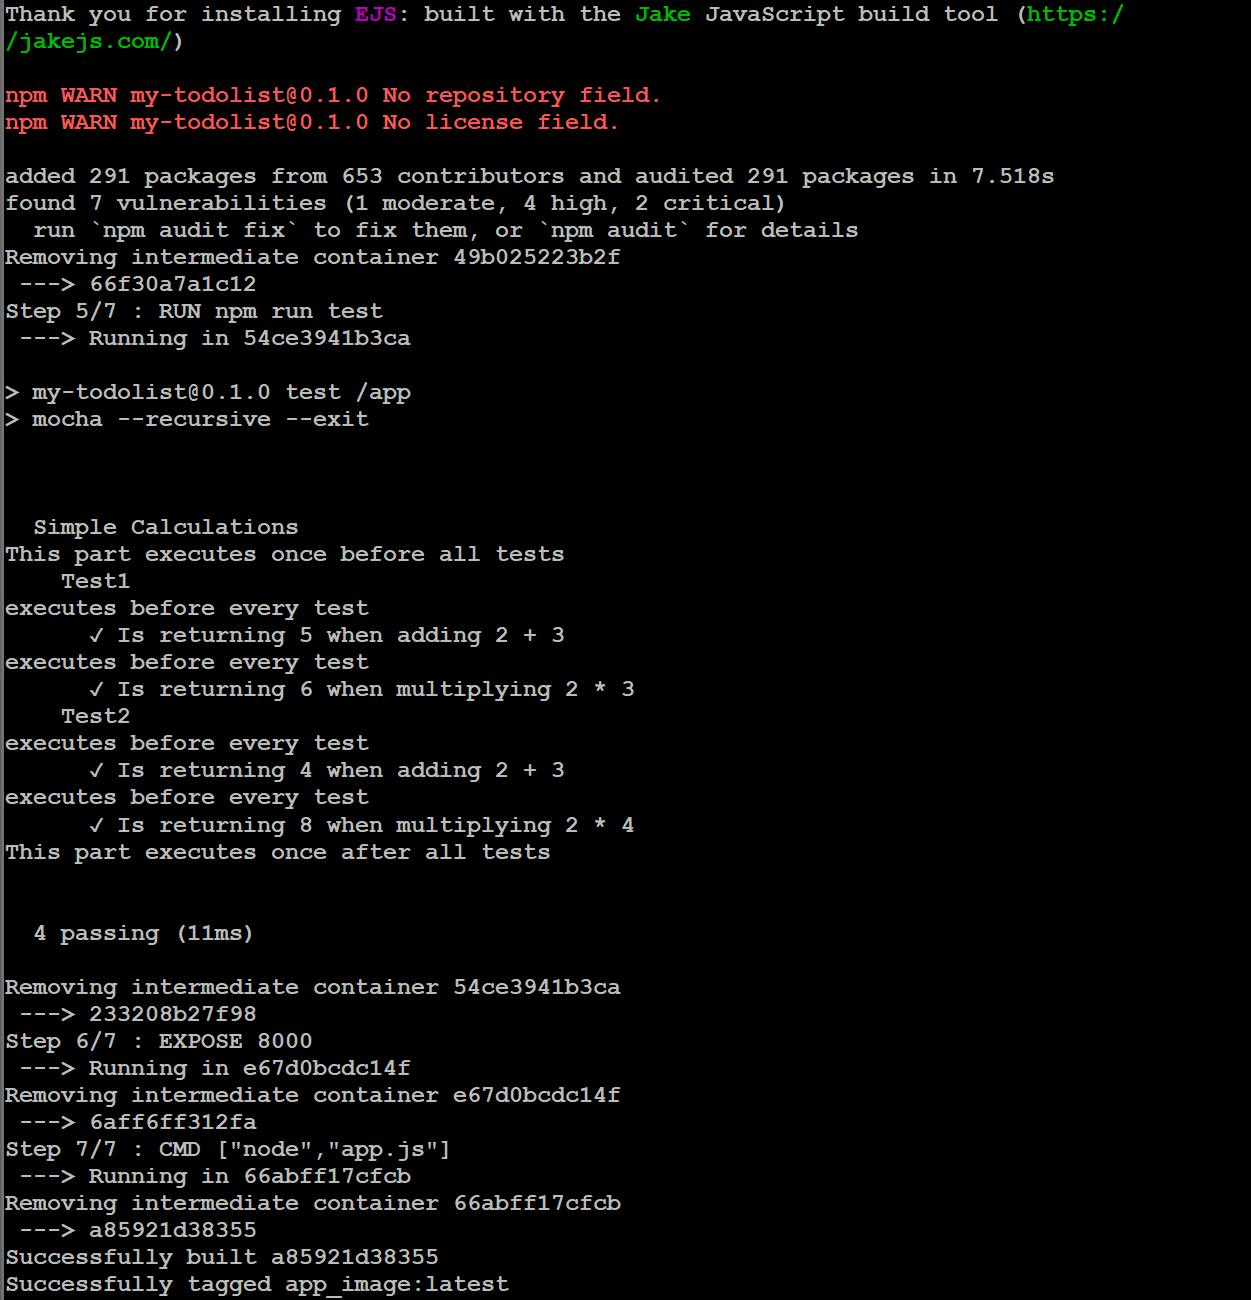
- Build the image using the Dockerfile and run the container
- Check if the image is created

- Create a container using the image you created

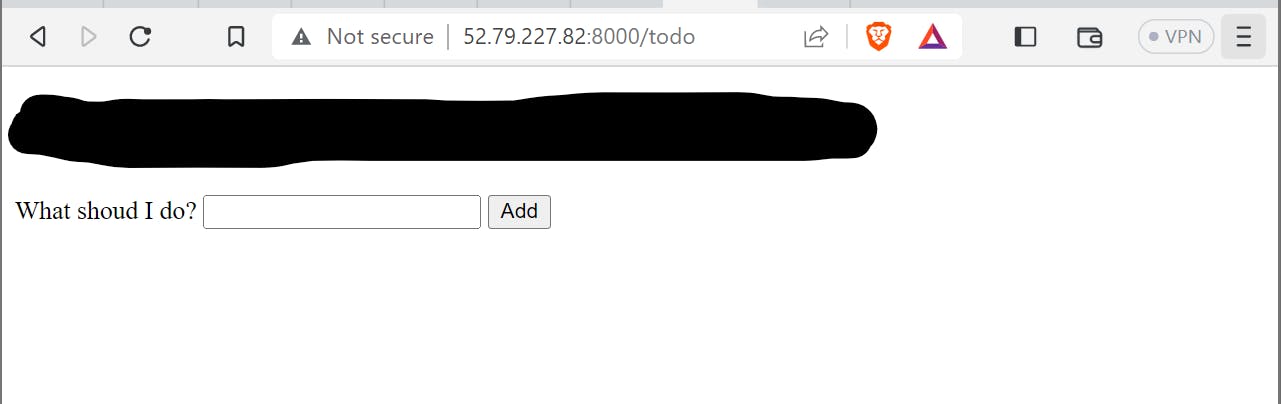
Verify that the application is working as expected by accessing it in a web browser. For that, you need to copy your Public IP of the ec2 instance and paste it into a browser with the port you exposed.
e.g. <publicIP>:8000

Now, if the webpage shows a page like this, it means we are missing out on something.
To fix that, let's go to our EC2 instance on our AWS account.

- Go to Security

- Click on Security Group
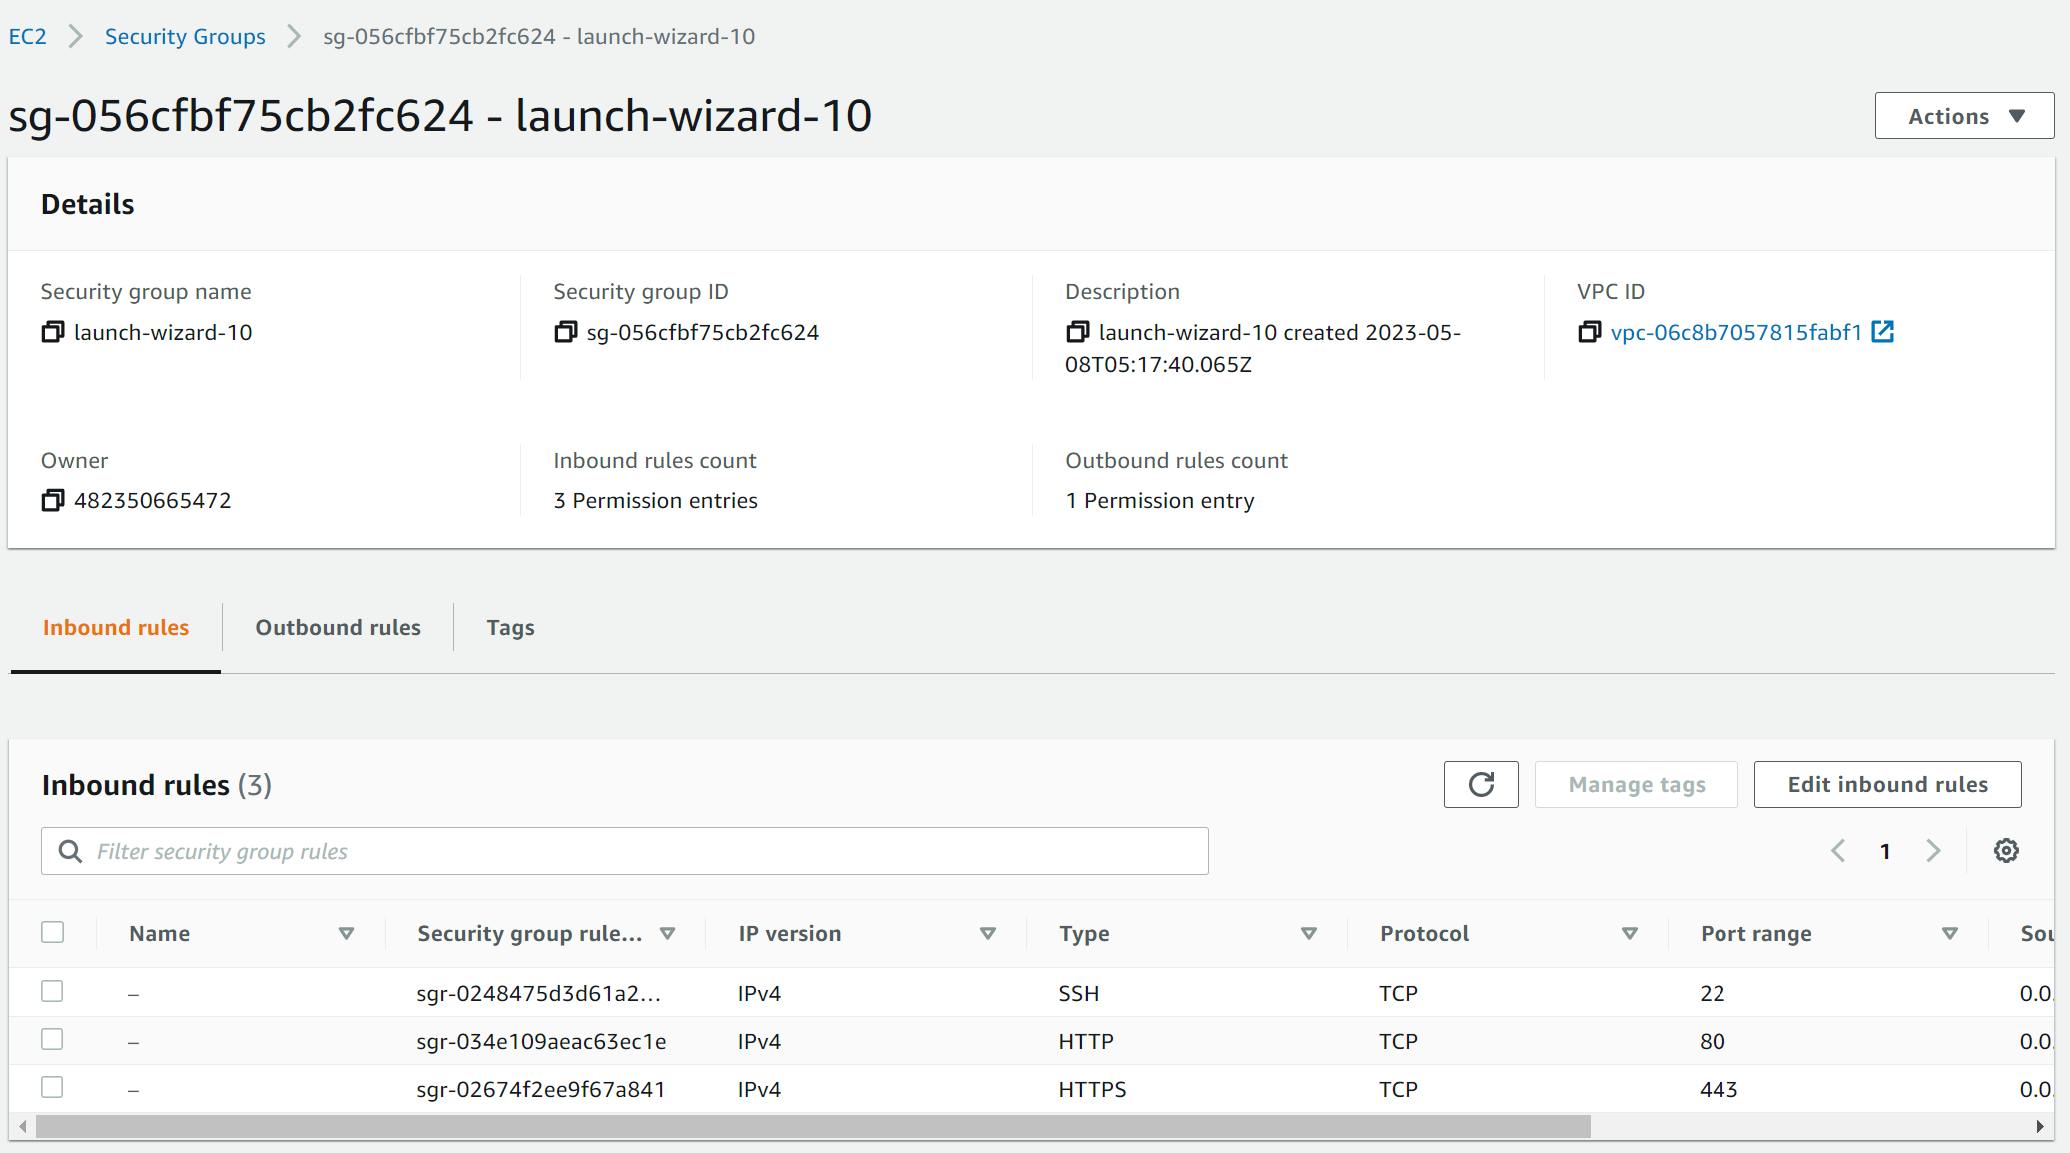
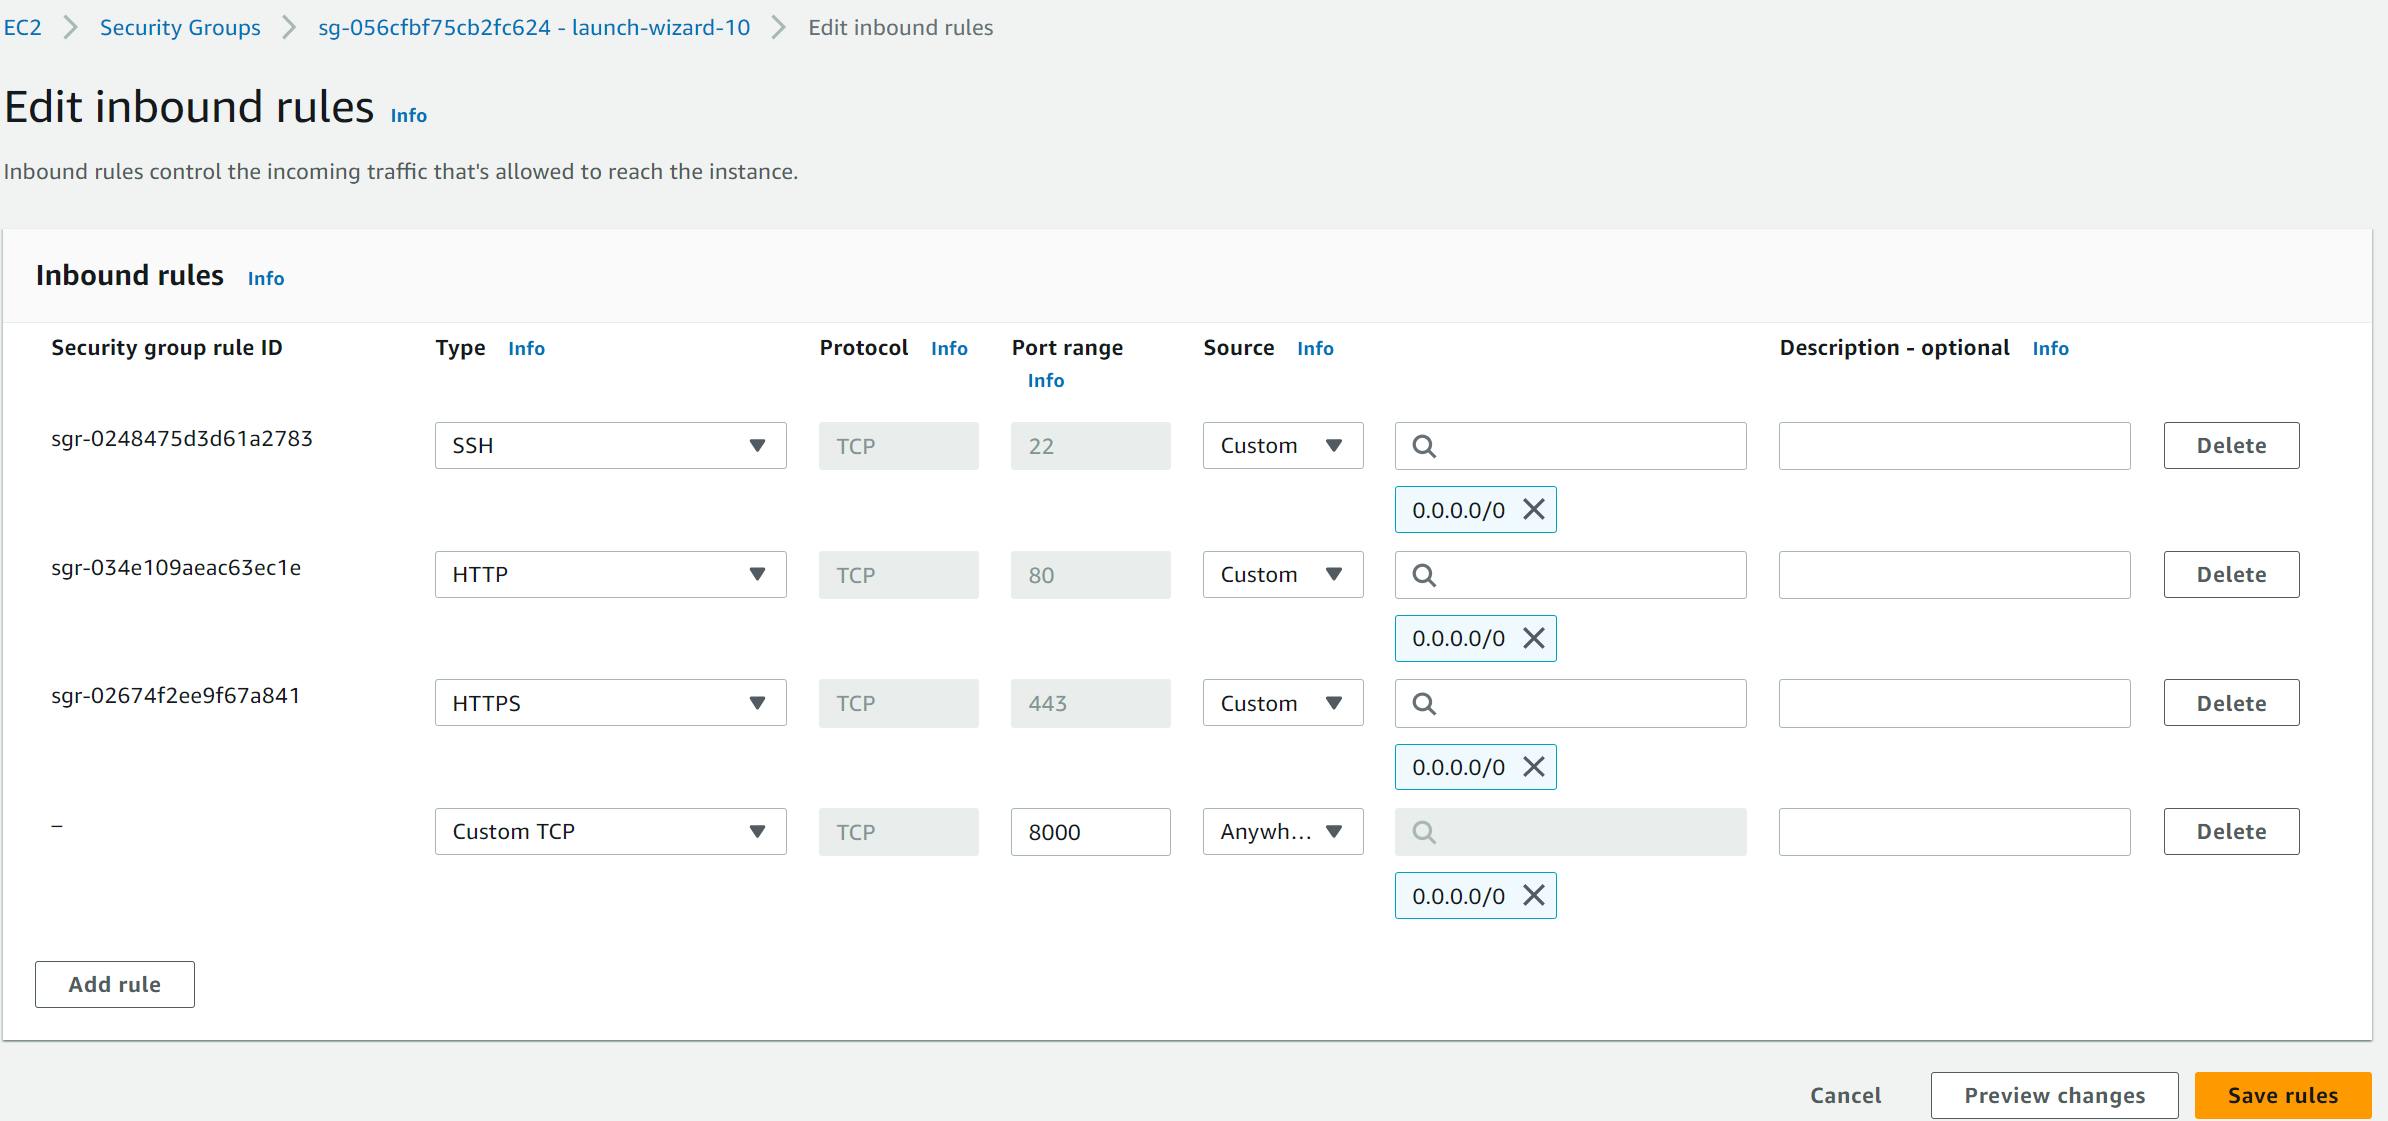
- Click on Edit inbound rules, add a Custom TCP rule and set the source to Anywhere, then click on Save rules.
- Now try refreshing the browser tab where you were trying to open the application.
Create an image of the running container
docker commit <container_name> <new_name_with_dockerhub_repository>

- Try to push it to DockerHub.
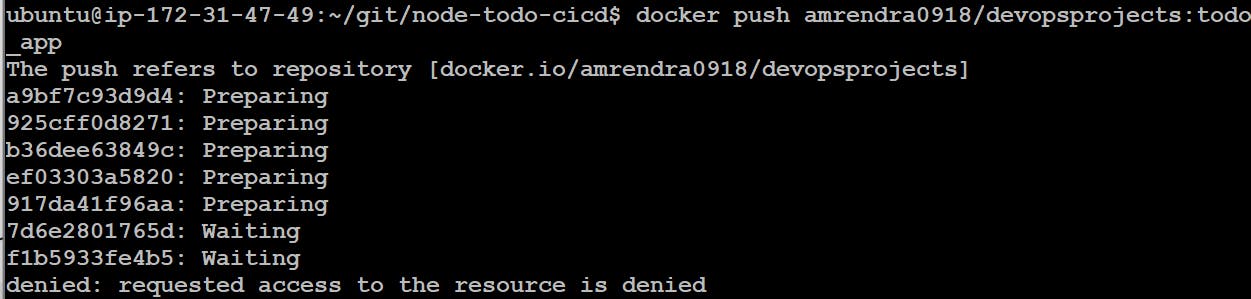
Denied as we were not logged in
run
docker loginand login to your DockerHub profileTry to push your image again to DockerHub
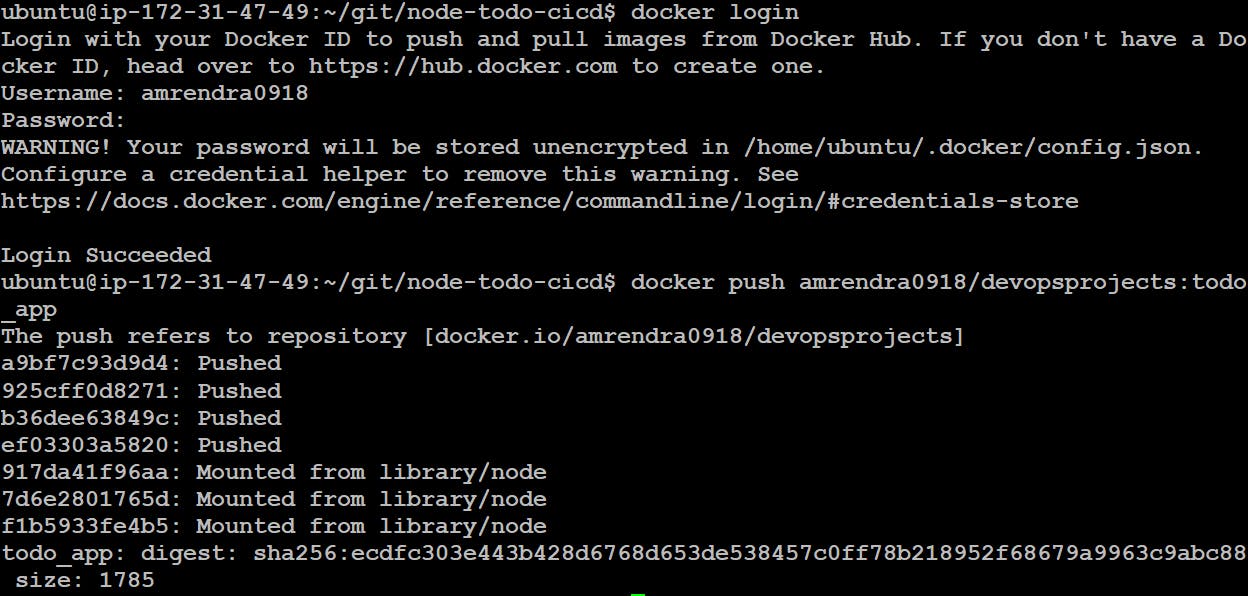
Done!
- Let's check our remote repository
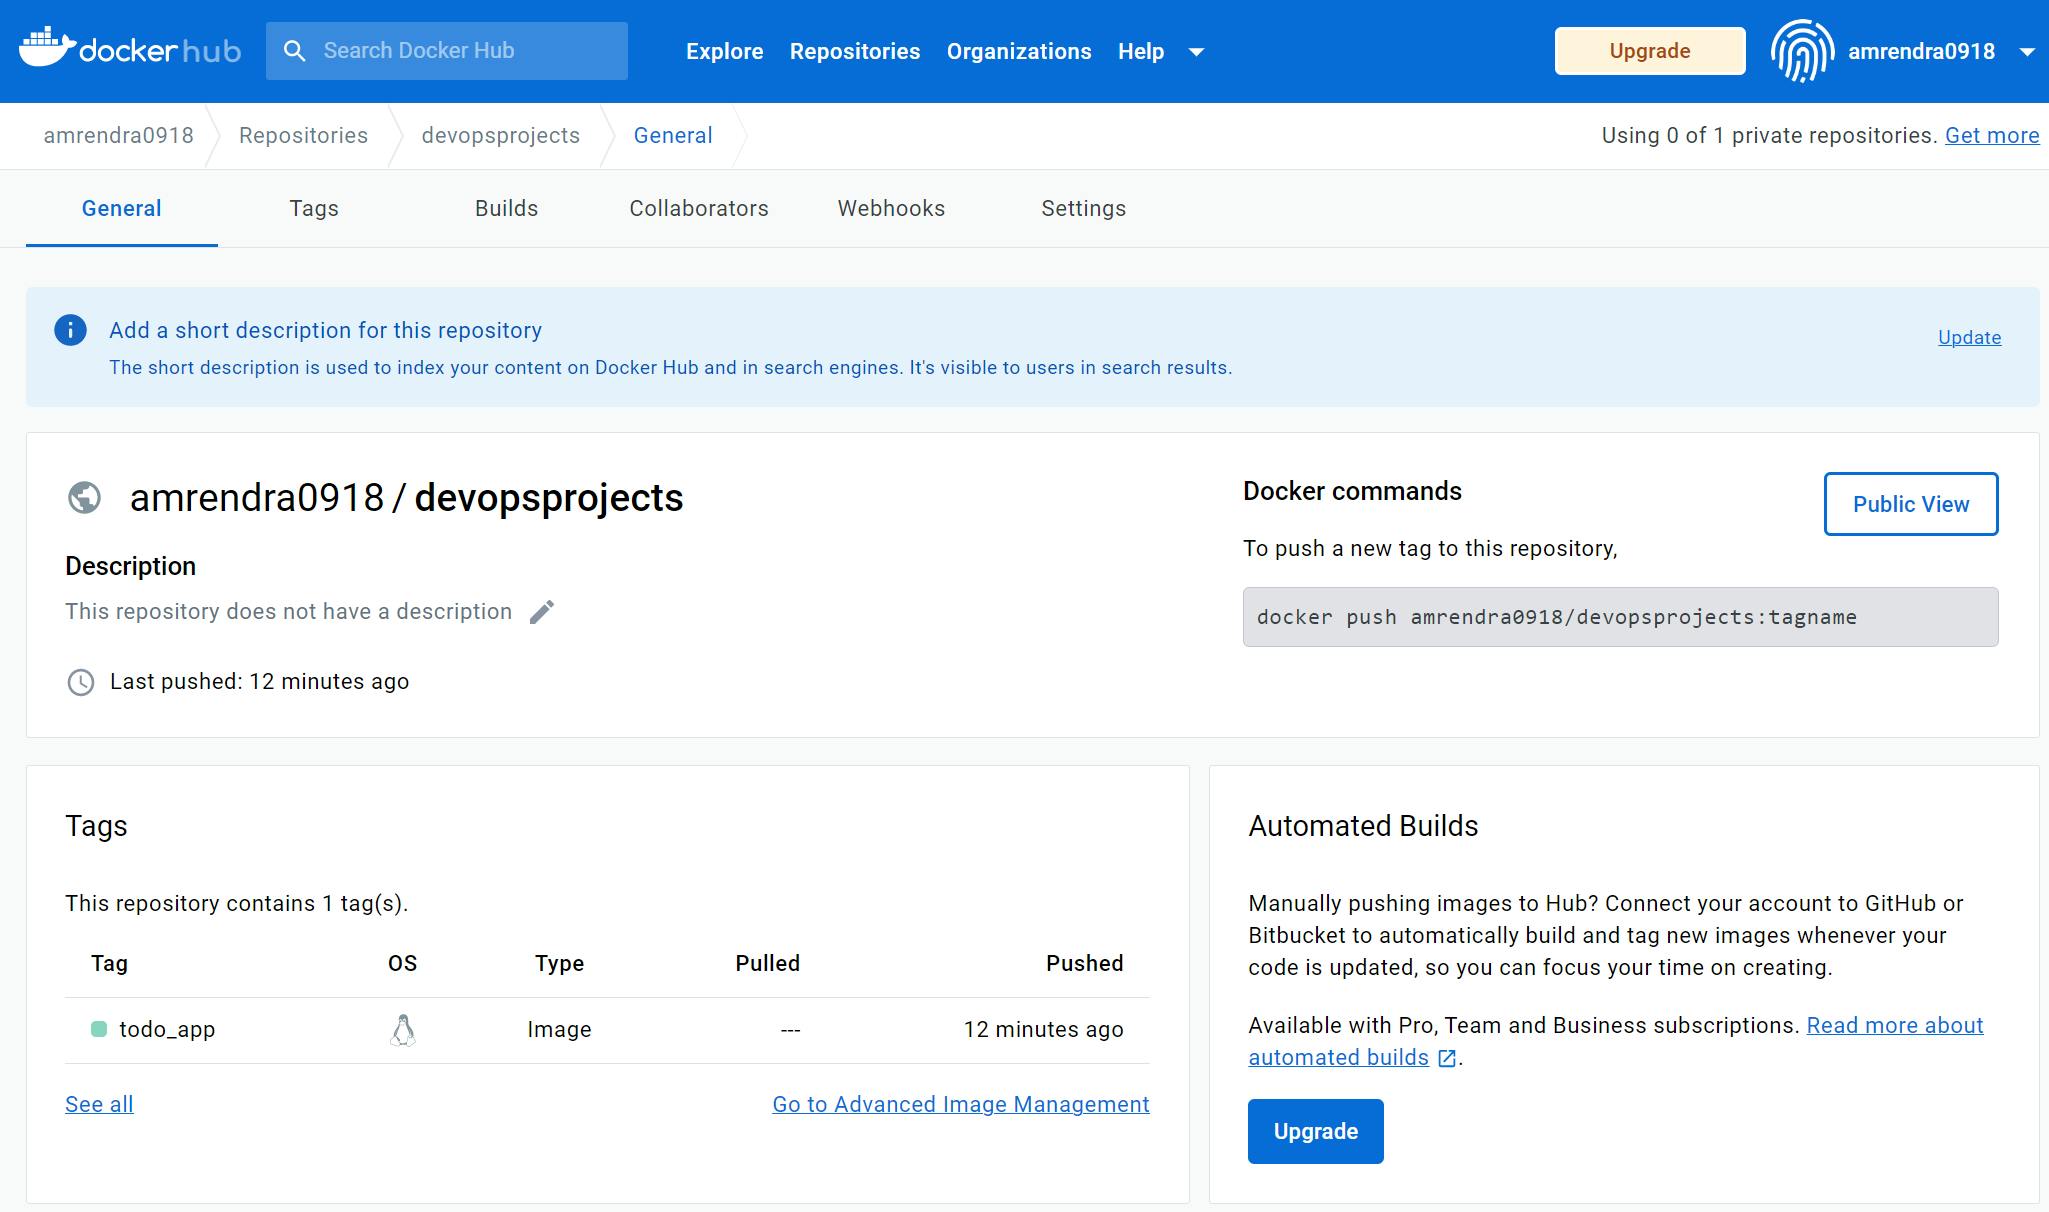
Successful!
Conclusion: In this blog post, we explored the process of building a Docker image from a Dockerfile, creating a container from the image, and then creating a new image from the container with any changes made during the container's runtime. We then pushed the final image to Docker Hub, a public registry where developers can share and store Docker images.
Thank you for taking the time to read this blog post! I hope that this tutorial has been helpful for you in understanding the basics of building Docker images, creating containers, and pushing images to Docker Hub. If you have any questions or feedback, please feel free to leave a comment below. Your support and engagement mean a lot to me and I look forward to sharing more Docker-related content with you in the future. Thanks again for reading!