Complete Jenkins CI/CD Project
In this blog we'll make a CI/CD Project for our Node JS Application using GitHub Webhooks.
GitHub Webhooks
GitHub webhooks are notifications or messages that GitHub sends to another service or application whenever something happens in a GitHub repository, such as code being pushed, issues being created, or releases being published. These notifications allow the receiving service or application to take automated actions based on the events happening in the repository.
Think of it as a way for GitHub to say, "Hey, something just happened in your repository! Let me tell you about it." These notifications are sent in real-time, which means they are immediate and happen as soon as the event occurs.
To receive these notifications, you need to set up a webhook. A webhook is like a messenger that waits for GitHub's notifications and delivers them to a specific place or URL (endpoint) that you choose. This URL belongs to the service or application you want to integrate with GitHub.
For example, let's say you have Jenkins, You can set up a webhook in your GitHub repository and provide Jenkins with the webhook's URL. Whenever an event occurs in your repository, like someone pushing code, GitHub will send a message (payload) to the webhook URL you specified.
Jenkins, being connected to the webhook, will receive this message and can take action based on the event. For instance, Jenkins can automatically start a build process, run tests on the new code, or deploy the updated application.
Uses
GitHub webhooks have various uses and can be employed in several scenarios. Here are some common uses of GitHub webhooks:
Continuous Integration and Deployment (CI/CD): Webhooks can trigger automated build, test, and deployment processes in CI/CD pipelines. Whenever code is pushed to a repository, a webhook can notify a CI/CD tool like Jenkins, Travis CI, or CircleCI to start the automated pipeline and perform necessary tasks.
Automated Testing: Webhooks can be utilized to trigger automated tests whenever a new code is pushed or a pull request is opened. This ensures that code changes are thoroughly tested before being merged into the main branch.
Issue and Pull Request Management: Webhooks can integrate with issue tracking systems like JIRA to create or update issues automatically when new issues or pull requests are opened or closed in GitHub. This streamlines the process of managing and tracking tasks across different platforms.
Deployment and Release Automation: Webhooks can initiate deployment processes to different environments or notify deployment tools like Ansible, Kubernetes, or AWS Lambda to deploy the latest changes to production or staging environments.
Notifications and Alerting: Webhooks can send notifications to external services like Slack, Microsoft Teams, or email, informing team members about important events such as new code commits, pull request reviews, or failed builds. This keeps the team informed in real time about the repository activities.
Automated Documentation Generation: Webhooks can trigger documentation generation tools like Swagger or Sphinx to automatically update API documentation or project documentation whenever code changes occur.
Integration with External Services: Webhooks enable integration with a wide range of external services and applications. For example, they can connect with chatbots, analytics tools, monitoring systems, or custom internal services, allowing for customized workflows and automation tailored to specific needs.
Now, Let's Create a connection between our Jenkins and GitHub Repository via GitHub Integration:
Setting up a connection between GitHub and Jenkins
To create a connection between the Jenkins job and GitHub repository using GitHub integration, we'll need to follow these steps:
Step 1: Install the GitHub Integration Plugin in Jenkins
Open your Jenkins web interface.
Go to "Manage Jenkins" > "Manage Plugins."
Select the "Available" tab.
Search for "GitHub Integration" in the filter box.
Check the box next to "GitHub Integration Plugin."
Click on the "Install without restart" button to install the plugin.

Step 2: Create SSH key for authentication on GitHub
Connect to your Jenkins master and copy the public key
cd .sshcat id_#####.pub
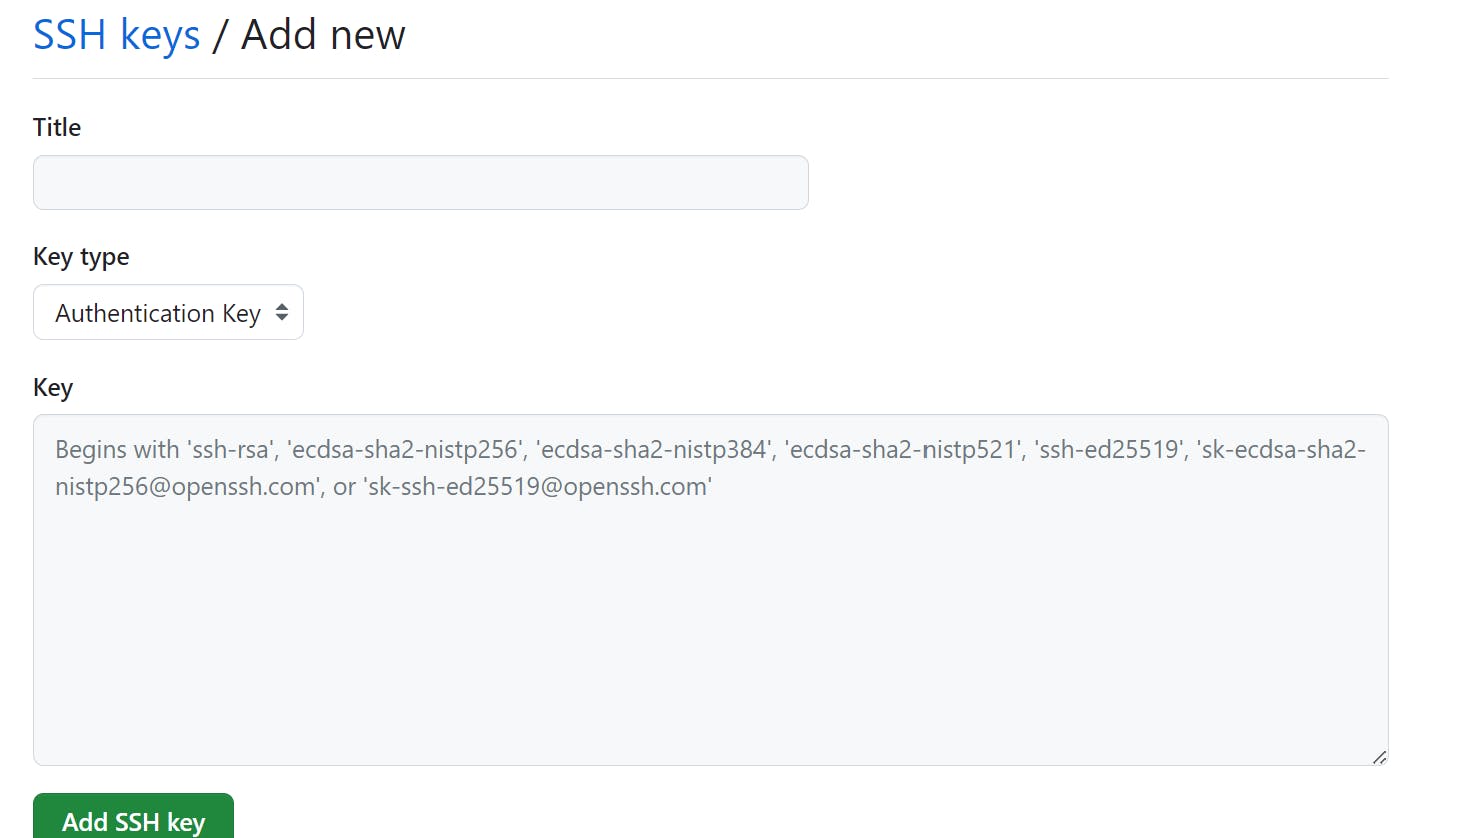
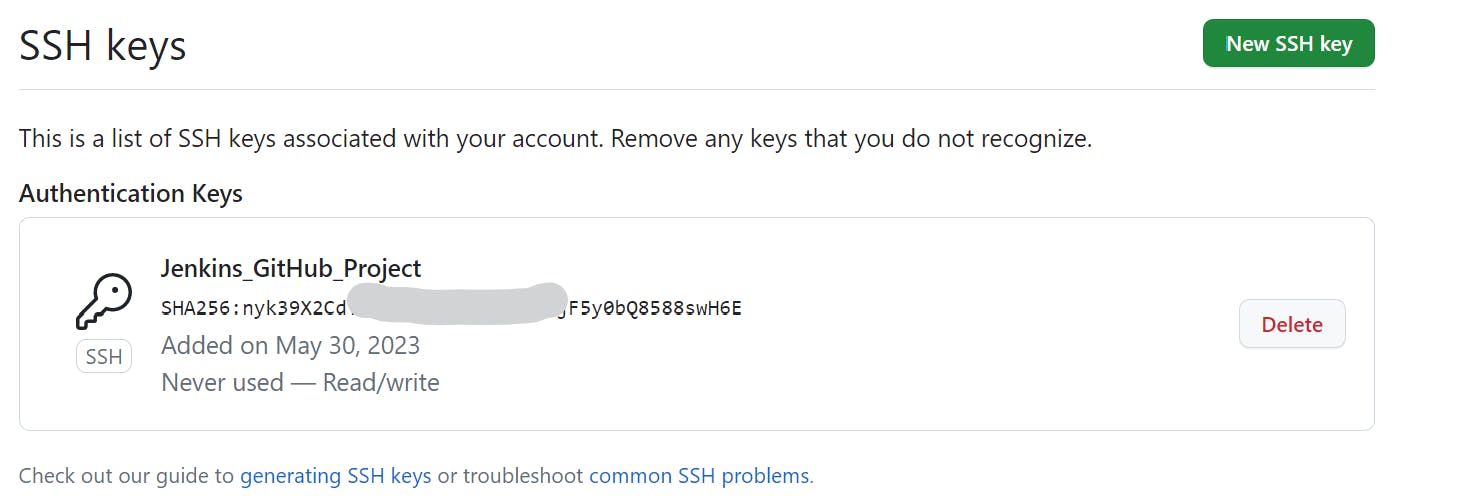
Open the GitHub setting page and go to SSH & GPG keys, Enter a title and paste the Key which you copied and press "Add SSH key"
Creating a project on Jenkins
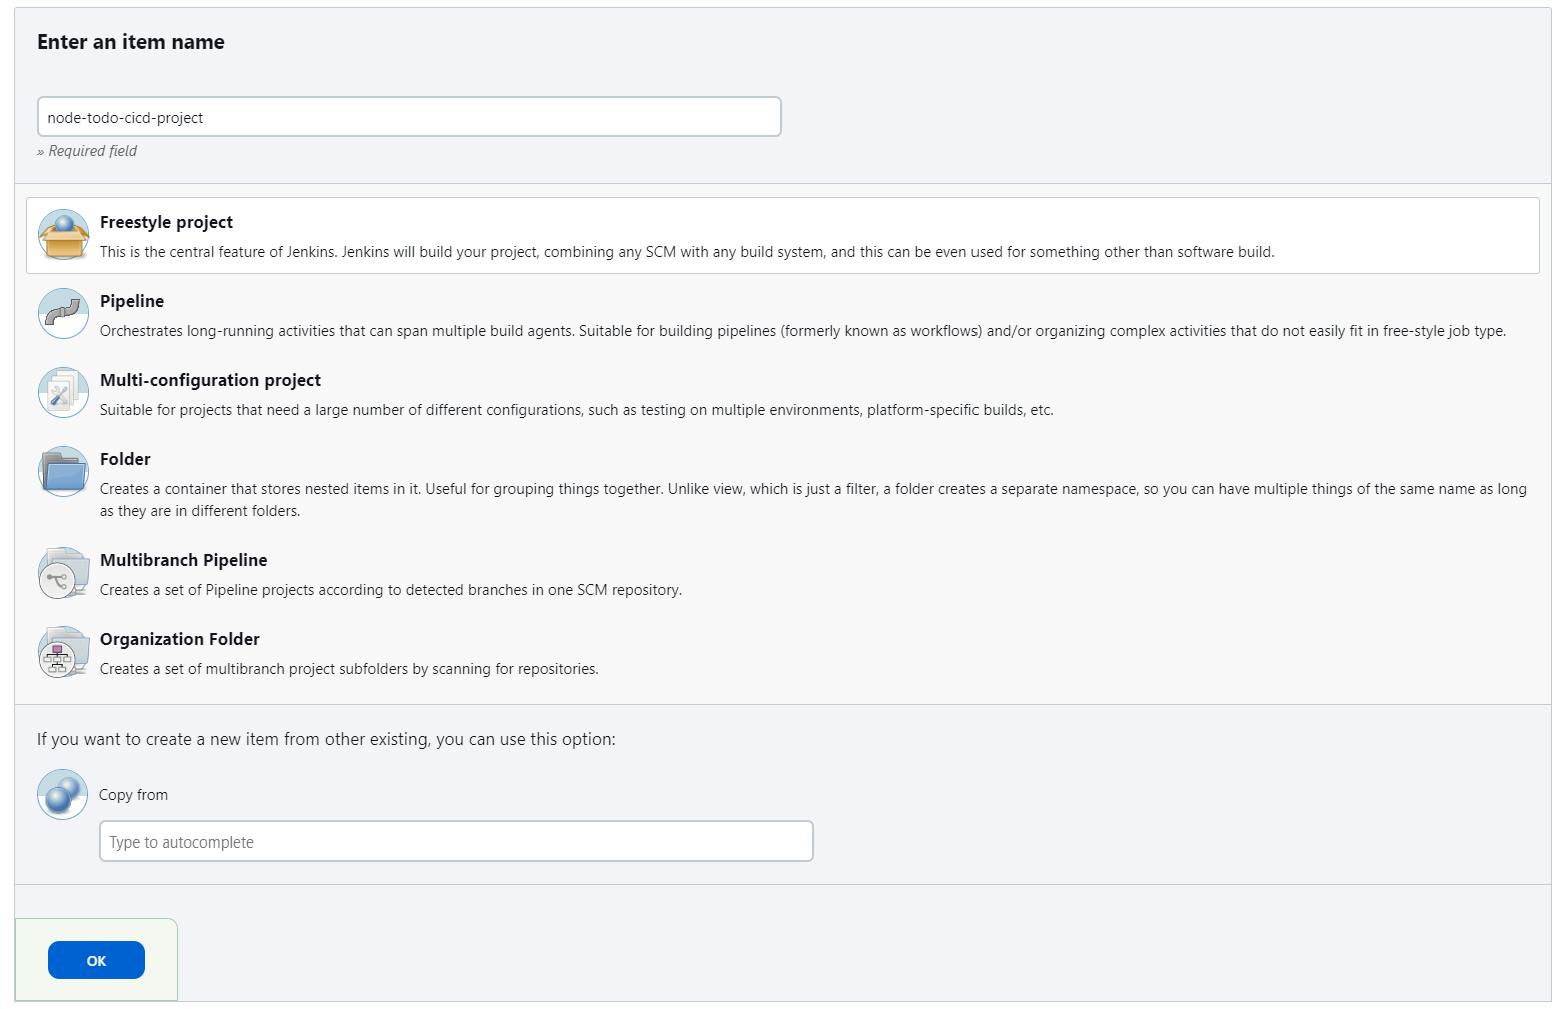
Create a new item, choose a free-style project and name it as per your choice
Write a description, Go to source code management, and paste the GitHub URL for the relative repository. Now click on Add under Credential

And enter into it by clicking on "Jenkins"
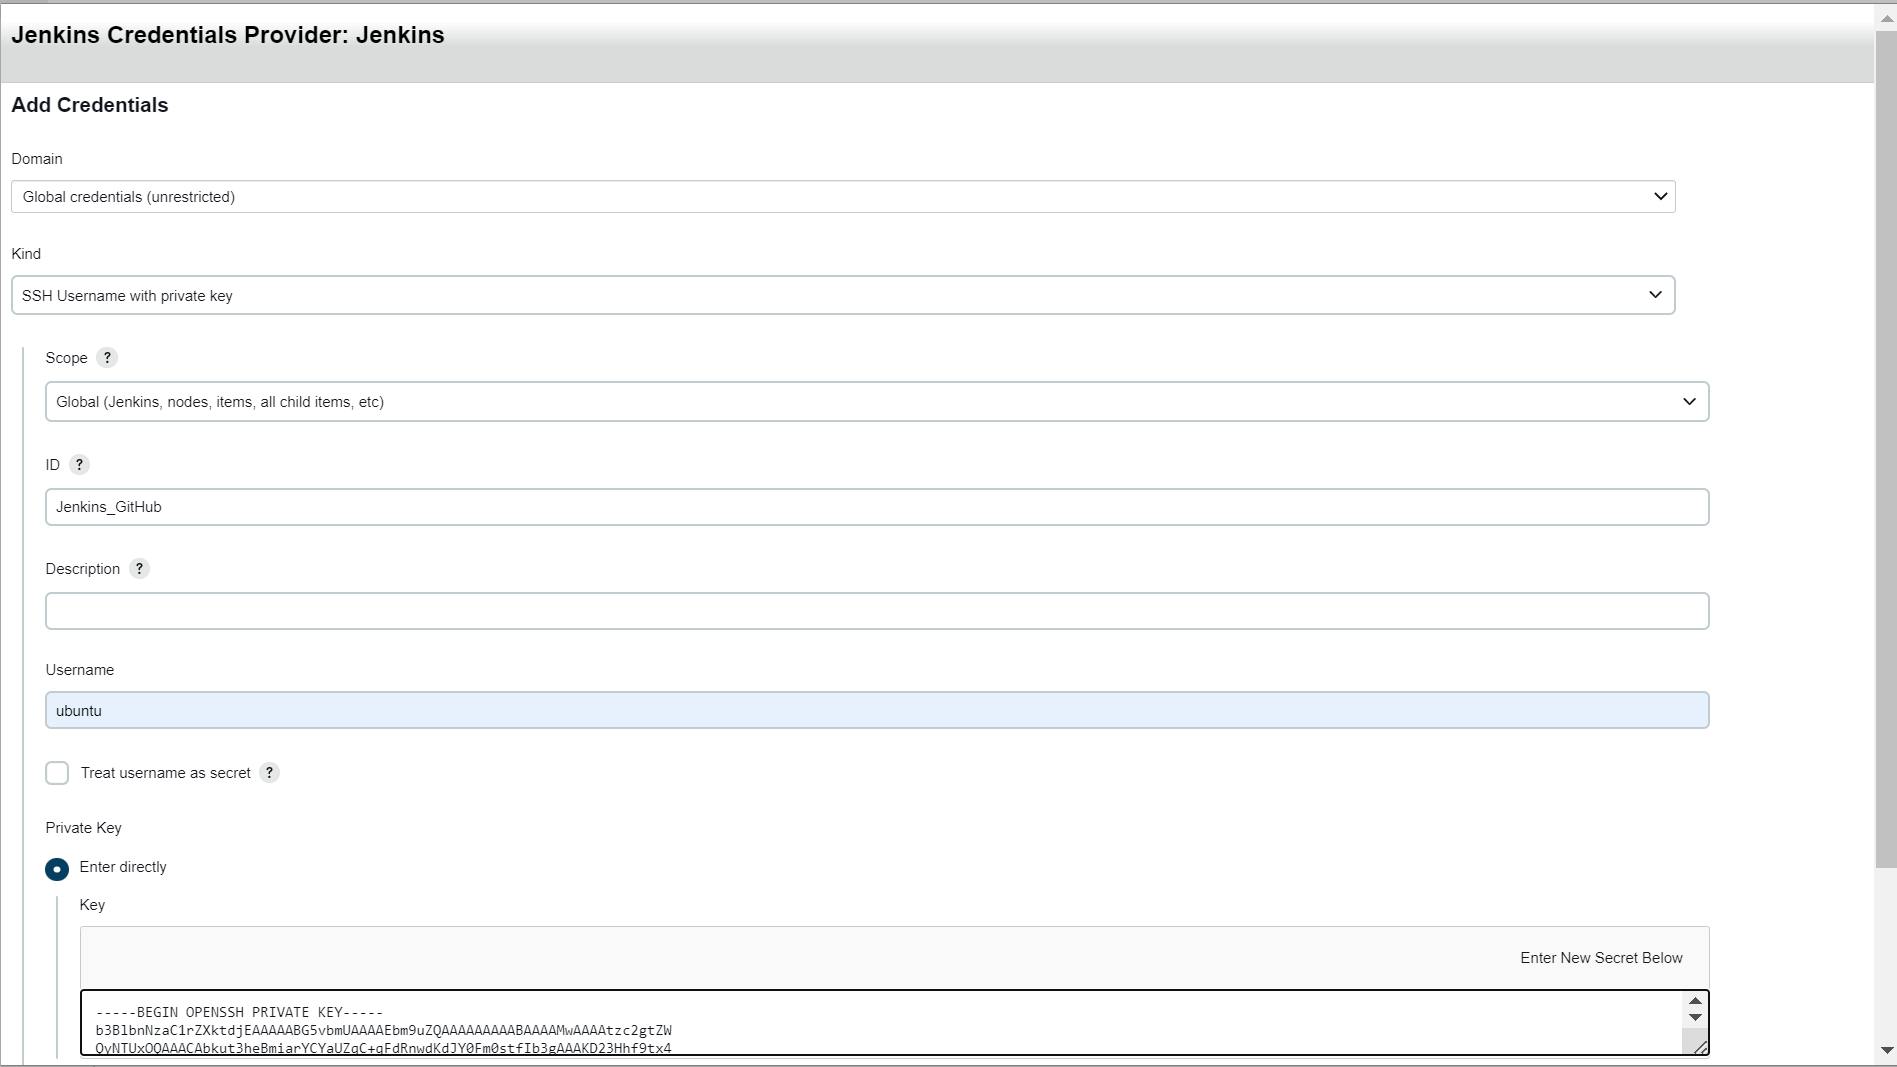
Make sure it shows the relevant GitHub branch.

Go to Build Steps, and write the steps to build and deploy the application.
echo "I will build the code using docker"docker build . -t node_todo_app:latest
echo "I will deploy the code"docker run -p 8000:8000 -d node_todo_app:latest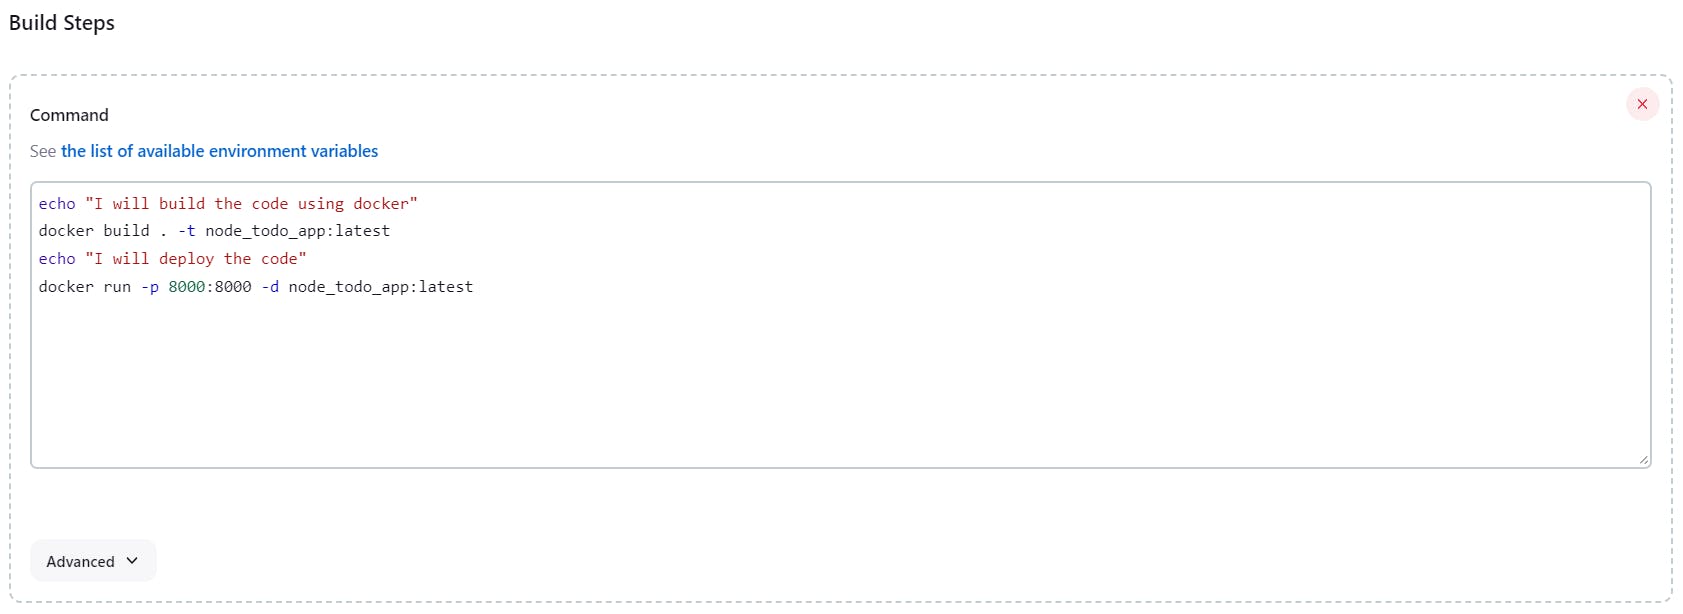
Press Save!
Click on Build Now to check the project is working.
Setting up GitHub-Webhook
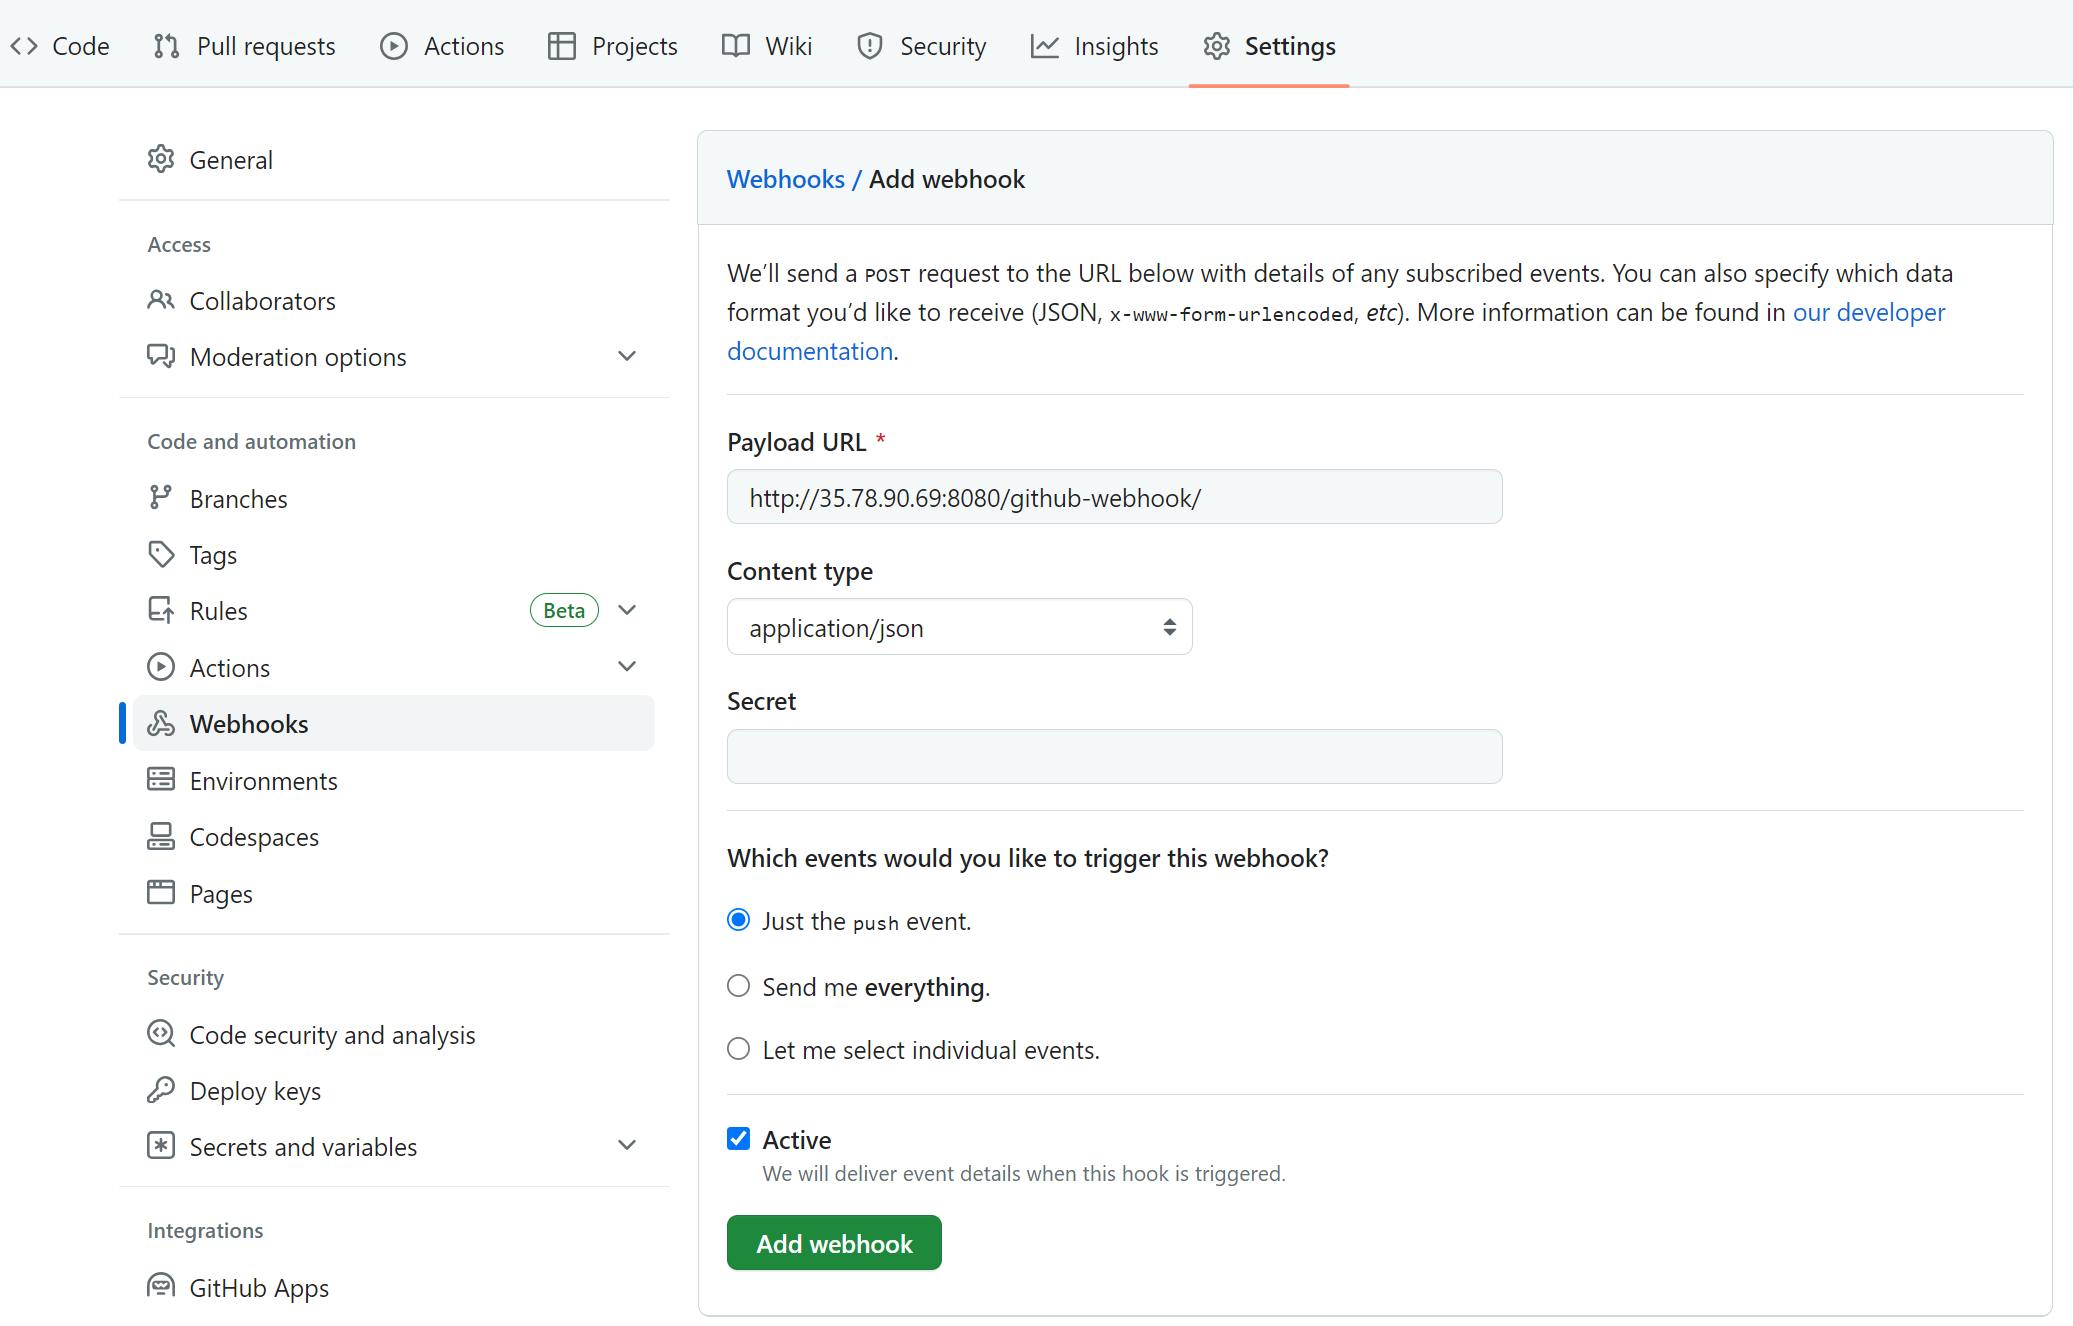
Go to your GitHub repository and click on Settings.
Click on Webhooks
In "Payload URL" enter the Jenkins URL:
https://master_ip:8080/github-webhookIn the Content type select the application/json.
Click on Add webhook.

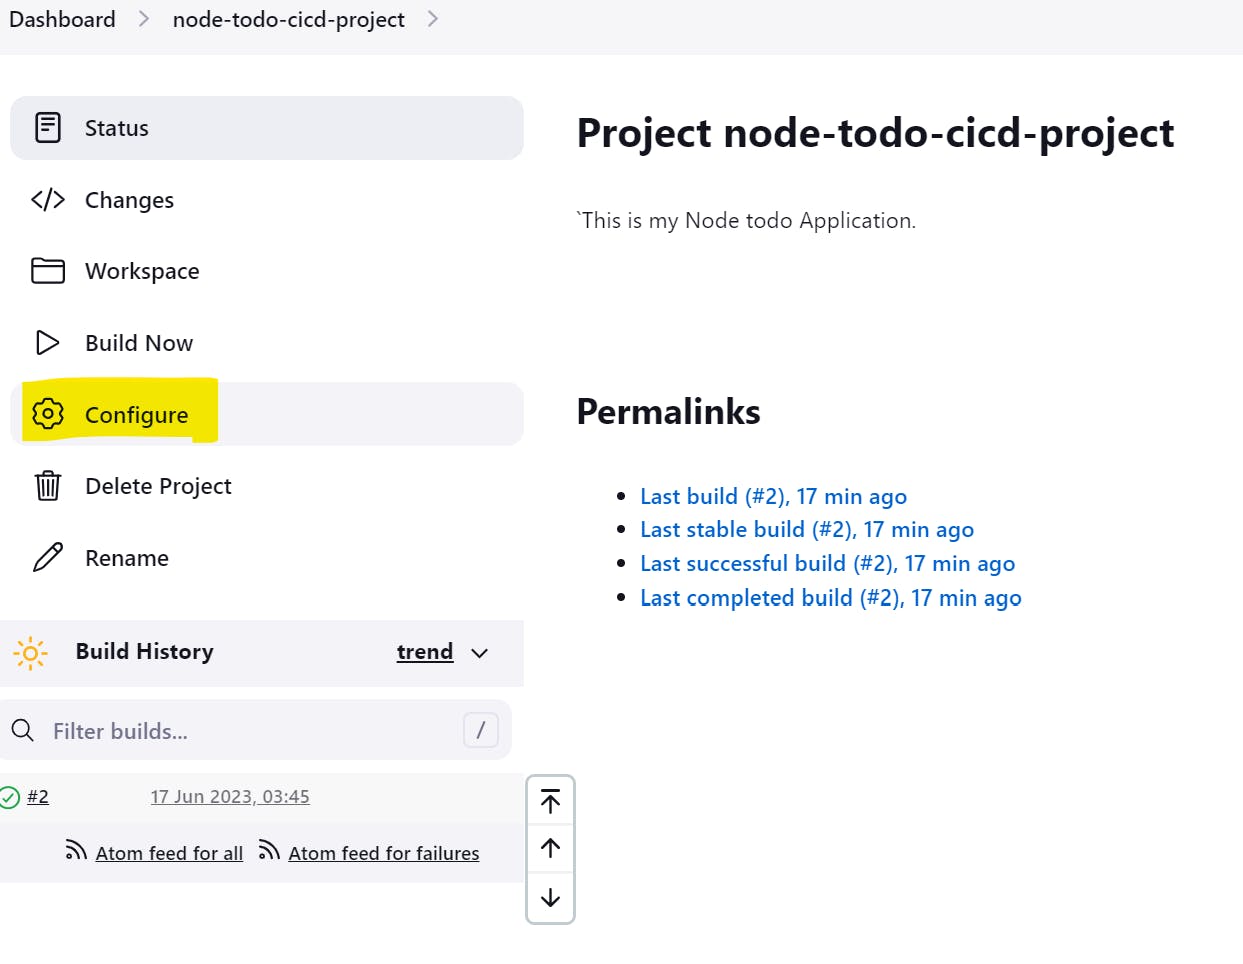
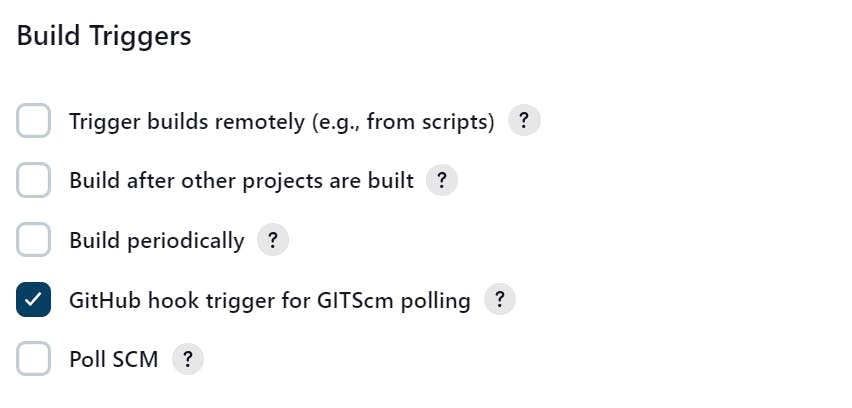
Now go to your Jenkins, open the project you were working on and select "configure" then select Build Triggers for GitHub Hook trigger for GITScm polling and click Save.
- Make Changes to the code in GitHub.
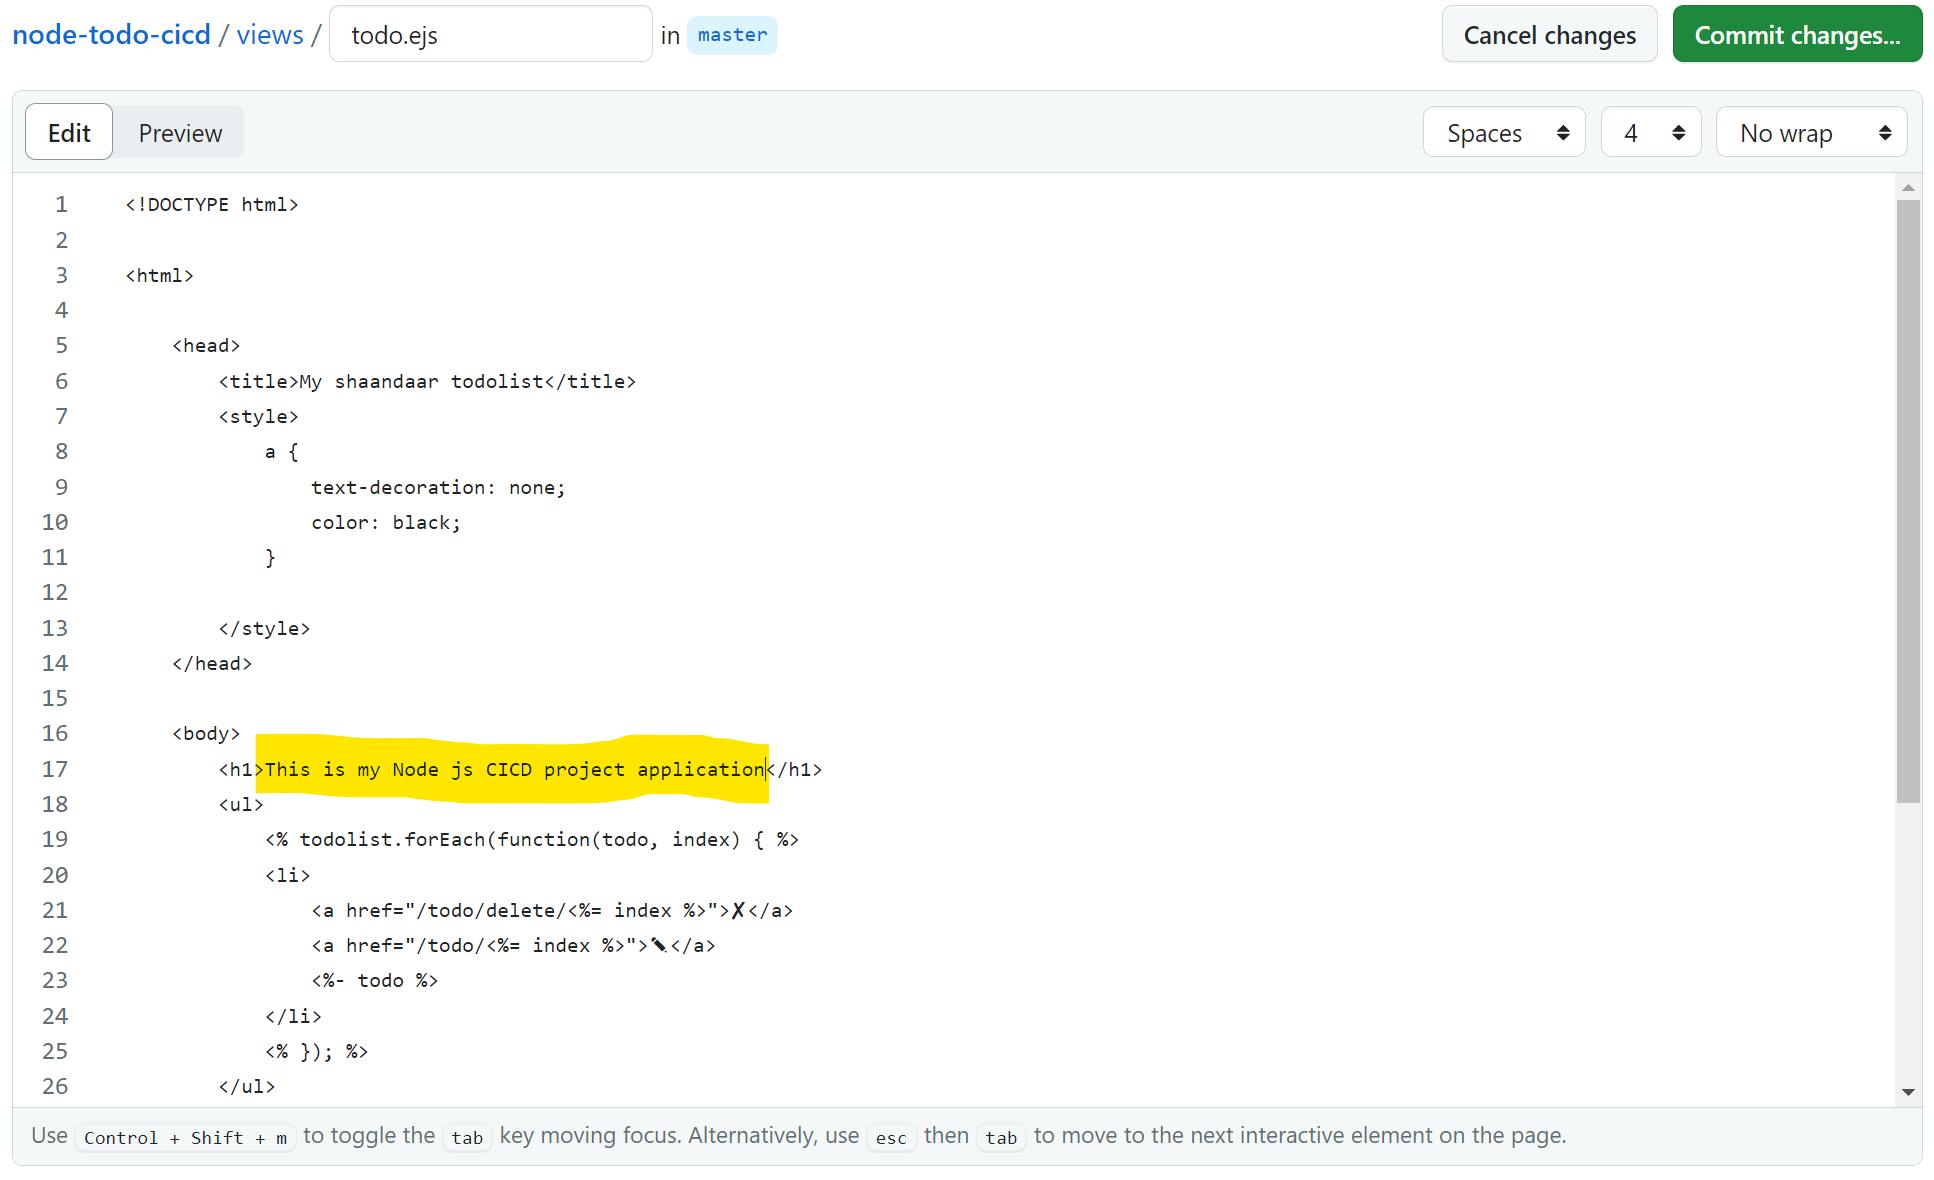
See if it started building the code which is triggered by GitHub as we made some changes to the code.
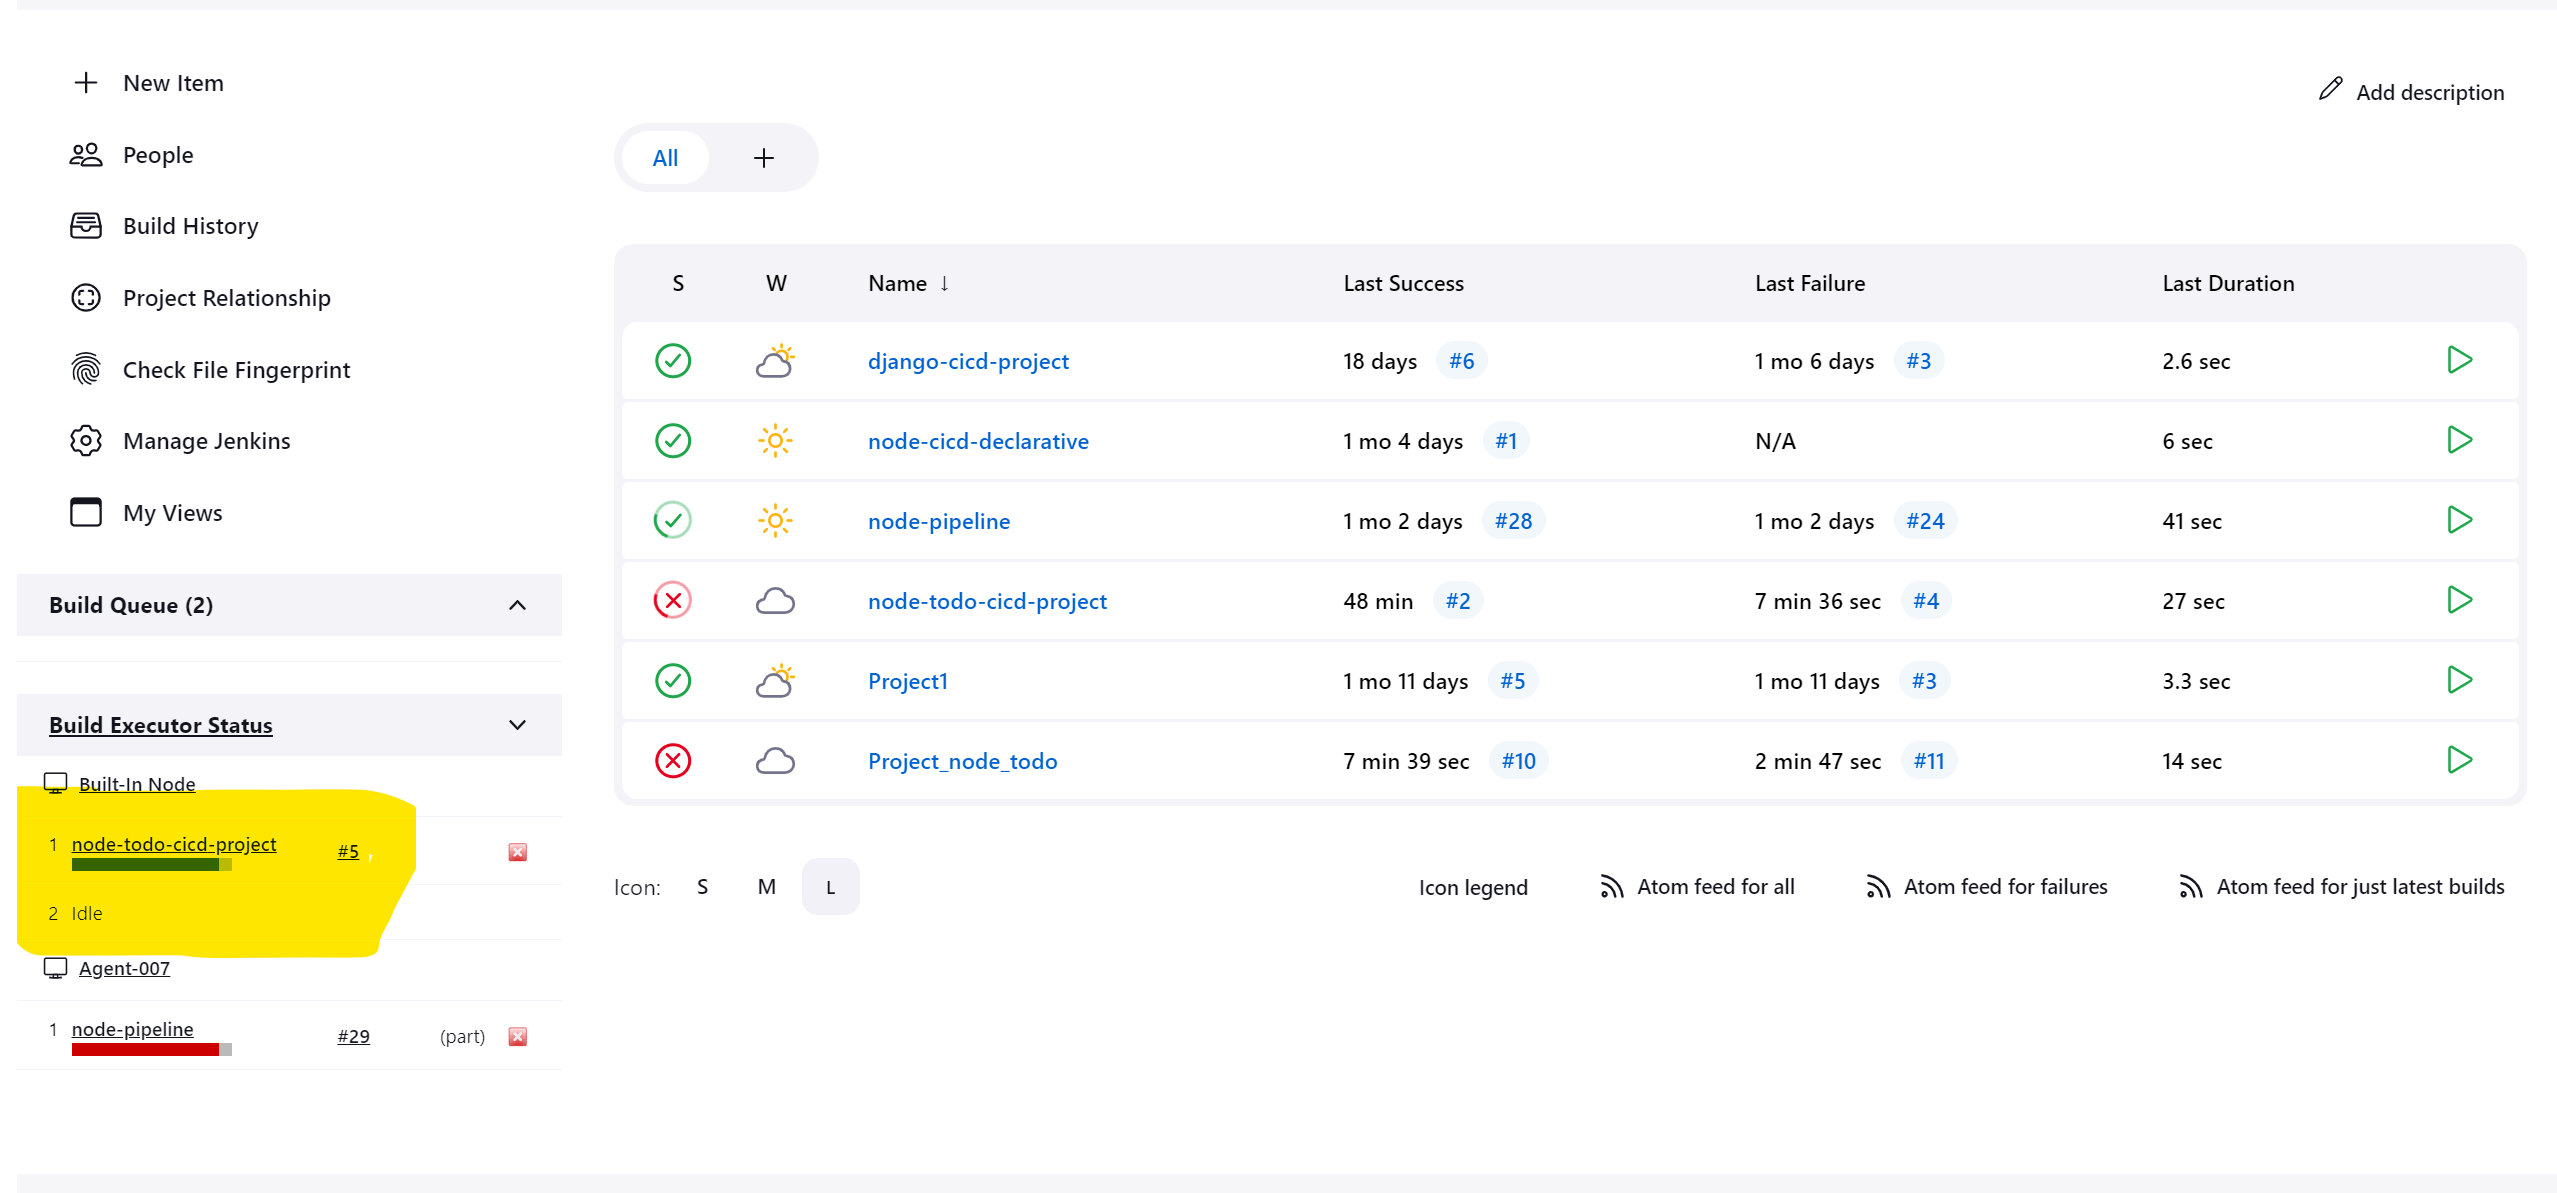
We can see that the build is triggered as soon as we change the code on GitHub
Thank you for reading about my CICD project. Your support means a lot to me. I appreciate your time and interest in my work.